TL;DR:
- Neglected plumbing systems can fail unexpectedly, leading to costly repairs and water waste. Regular maintenance tasks like leak detection, faucet cleaning, sediment flushing, and pipe inspection help prevent emergencies and extend system lifespan. Enlisting professional help for complex issues ensures your home’s plumbing remains reliable and efficient year-round.
A neglected plumbing system doesn’t warn you before it fails. One corroded pipe or ignored drip can turn into a repair bill that wipes out months of savings. A solid plumbing maintenance checklist gives you the structure to catch small problems before they become expensive ones. Annual plumbing maintenance costs between $200 and $600, but emergency repairs for something like a burst pipe can exceed $15,000. The math is straightforward. This guide walks you through every task that matters, organized so you can move through your home with confidence and a clear purpose.
Table of Contents
- Key takeaways
- 1. Your plumbing maintenance checklist starts with knowing your system
- 2. Check every faucet for drips and replace washers proactively
- 3. Clean faucet aerators and showerheads
- 4. Inspect visible pipes for corrosion and damage
- 5. Test your water pressure
- 6. Clear drain traps and prevent clogs
- 7. Water heater maintenance: sediment flushing
- 8. Inspect and replace the anode rod
- 9. Test the temperature and pressure relief valve
- 10. Seasonal and preventative maintenance tasks
- 11. Maintenance task comparison at a glance
- What I’ve learned from years of plumbing inspections
- How Mdtechservices can help protect your home’s plumbing
- FAQ
Key takeaways
| Point | Details |
|---|---|
| Leaks waste thousands of gallons | A single dripping faucet wastes over 3,000 gallons per year, making leak detection a top priority. |
| Proactive maintenance saves real money | Routine inspections cost a fraction of what emergency repairs demand, protecting your budget long-term. |
| Water heater care extends its life | Flushing sediment and inspecting the anode rod annually prevents premature tank failure. |
| Seasonal timing prevents emergencies | Organizing your maintenance tasks by season keeps your plumbing system reliable year-round. |
| Know when to call a professional | Some tasks, like T&P valve testing and pipe rerouting, are safer with licensed technician support. |
1. Your plumbing maintenance checklist starts with knowing your system
Before you inspect a single fixture, you need to know what you are working with. Walk your home and locate the main water shut-off valve. This is almost always near the water meter, in a utility room, or along the foundation wall. Knowing exactly where it is can save your home from flooding when something goes wrong fast.
Next, trace your visible supply and drain lines. Note where pipes run behind walls, under sinks, and along the basement ceiling. This mental map helps you identify which fixtures share lines and where a problem in one area might signal a broader issue.
Gather these tools before you start any plumbing system inspection:
- Adjustable wrench and slip-joint pliers
- Pipe thread tape
- Flashlight for dark crawl spaces and cabinet interiors
- Bucket and towels for controlled water release
- Pressure gauge (attaches to an outdoor hose bib)
- Replacement washers and O-rings in common sizes
Pro Tip: Label your shut-off valves with small tags showing which fixture or zone each one controls. This takes ten minutes once and saves real time during any future repair or inspection.
2. Check every faucet for drips and replace washers proactively
A dripping faucet is easy to dismiss as minor. It is not. A single faucet dripping one drip per second wastes over 3,000 gallons of water per year. Multiply that by a few fixtures and you are looking at a significant water bill and unnecessary strain on your system.
For compression faucets, the washer is almost always the culprit. Replacing faucet washers every three to five years proactively prevents most drips before they start. The job costs about $10 in parts and takes roughly 30 minutes. That is a fraction of what a plumber charges for an emergency call.
Also check for drips at the base of faucet handles, which often signal worn O-rings. These are just as easy to replace and just as important to catch early on this checklist for plumbing upkeep.
Pro Tip: Turn off all water fixtures in the house, then watch your water meter for two hours. If the meter moves, you have a hidden leak somewhere in the system.
3. Clean faucet aerators and showerheads
Aerators are the small mesh screens screwed onto the end of your faucets. Mineral deposits and debris collect in them over time, reducing water flow and putting unnecessary pressure on your plumbing. Unscrewing the aerator, soaking it in white vinegar for 30 minutes, and rinsing it clean is one of the fastest wins on this entire plumbing maintenance guide.
Do the same for showerheads. Fill a plastic bag with white vinegar, secure it over the showerhead with a rubber band, and let it soak overnight. You will notice the difference in flow immediately. This is one of those essential plumbing tasks that costs nothing and takes almost no time.
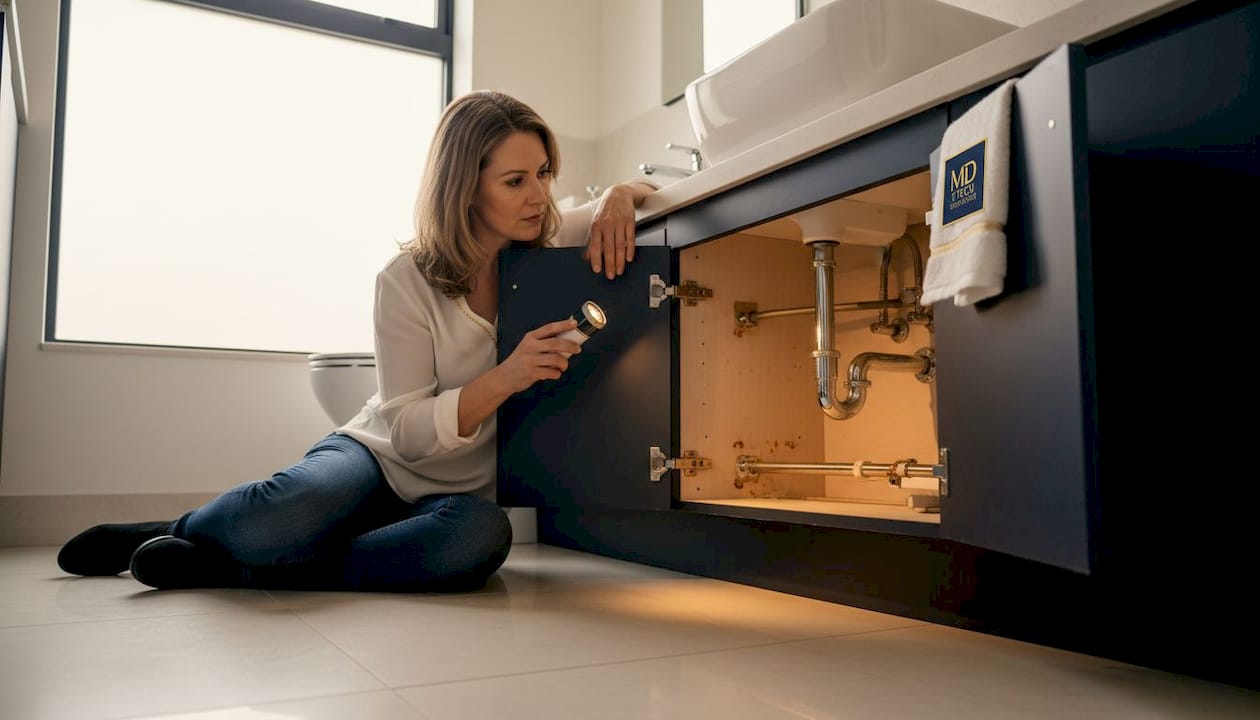
4. Inspect visible pipes for corrosion and damage
Open the cabinets under every sink in your home. Look at the supply lines and drain pipes. You are checking for discoloration, rust, white mineral buildup, wet spots, or any soft areas in the pipe walls. Green staining on copper pipes means oxidation is active. That is not always an emergency, but it does mean the pipe is degrading and worth monitoring closely.
Check flexible supply lines connecting toilets and faucets to the wall. These braided stainless lines have a finite lifespan, typically seven to ten years. If yours are approaching that age or show any signs of bulging, replace them now. A failed supply line can dump gallons of water into your cabinet in minutes.
5. Test your water pressure
Water pressure is one of the most overlooked items on a homeowner’s checklist for plumbing upkeep. Home water pressure should stay between 40 and 80 PSI. Pressure above 80 PSI accelerates wear on washers, O-rings, and appliance connections throughout your entire home.
Testing is simple. Attach a pressure gauge to an outdoor hose bib, turn the water on fully, and read the dial. If your reading is above 80 PSI, a pressure-reducing valve brings it back into a safe range. Installing one costs between $150 and $300 and protects every fixture and appliance connected to your water supply.
6. Clear drain traps and prevent clogs
Slow drains are a warning, not just an inconvenience. Hair, soap scum, and grease build up in drain traps over time and eventually cause complete blockages. As part of your periodic plumbing inspections, pull out and clean the stoppers in bathroom sinks and tubs every few months. A bent wire or a simple drain tool removes the debris quickly.
For kitchen drains, avoid pouring grease down the drain entirely. Run hot water for 30 seconds after washing dishes to push soap and light residue through the trap. Use a mesh drain cover to catch food particles. These habits cost nothing and prevent the majority of kitchen drain calls that plumbers receive.
7. Water heater maintenance: sediment flushing
Sediment is the quiet enemy of your water heater. Minerals in your water supply settle at the bottom of the tank over time, forming a layer that insulates the water from the heating element. Your heater works harder, energy bills rise, and the tank wears out faster than it should.
Flushing sediment annually is the standard recommendation for homes with water hardness below 120 mg/L. If you are in a very hard water area, flush every three to six months. Here is how to do a basic partial flush:
- Turn the water heater to its lowest setting and let it cool for at least two hours.
- Connect a garden hose to the drain valve at the base of the tank.
- Run the hose to a floor drain or outside, then open the valve and let two to three gallons drain out.
- Close the valve, disconnect the hose, and restore the heater to its normal temperature setting.
Note: After any plumbing work that requires draining the system, run a full flush cycle to clear debris that could clog fixtures or valves downstream.
8. Inspect and replace the anode rod
The anode rod is a metal rod inside your water heater tank that corrodes deliberately so your tank does not have to. When the rod is fully depleted, the tank itself begins to corrode from the inside. Replace the anode rod when it has degraded below half an inch in diameter to avoid permanent tank damage.
Inspect it every two to three years under normal conditions. If your home uses a water softener, inspect it annually. Water softeners accelerate anode rod depletion significantly, so the standard inspection interval does not apply. A new anode rod costs $20 to $50 and can add years to your water heater’s life. It is the single highest-leverage maintenance task for your water heater.
9. Test the temperature and pressure relief valve
The T&P valve is a safety device on your water heater that releases pressure if it builds beyond a safe level. If it fails and pressure continues to build, the result can be catastrophic. Testing it once a year is a non-negotiable part of any plumbing maintenance guide.
To test it, place a bucket under the discharge pipe, then lift the lever briefly and release it. You should hear a rush of water or steam and then a clean shut. If nothing comes out, or if the valve drips continuously after testing, it needs to be replaced. This is one task where calling a licensed technician is the right call if you are unsure.
10. Seasonal and preventative maintenance tasks
A calendar-based approach to plumbing maintenance is the most reliable way to prevent failures year-round. Here is a framework you can follow:
- Spring: Test your sump pump by pouring a bucket of water into the pit. Inspect exterior hose bibs for freeze damage from winter. Check washing machine hoses for cracks.
- Summer: Inspect irrigation connections and outdoor spigots. Monitor water bills for unusual increases that could indicate a hidden leak.
- Fall: Disconnect and drain garden hoses. Insulate exposed pipes in unheated areas before temperatures drop. Schedule your annual professional plumbing inspection before the cold season.
- Winter: Know where your main shut-off is and keep it accessible. Check under sinks on exterior walls for cold air infiltration near pipes.
Pro Tip: The EPA’s WaterSense program recommends flow monitoring devices to detect hidden leaks that a visual inspection cannot catch. Smart water monitors attach to your main line and alert you instantly when flow patterns suggest a leak.
11. Maintenance task comparison at a glance
Use this table to prioritize your time and budget across the most common plumbing maintenance tasks.
| Task | Frequency | DIY Difficulty | Key Benefit | When to Call a Pro |
|---|---|---|---|---|
| Check faucets for drips | Monthly | Easy | Prevents water waste and high bills | If the valve seat is damaged |
| Clean aerators and showerheads | Every 3-6 months | Easy | Restores full water flow | Rarely needed |
| Inspect visible pipes | Every 6 months | Easy | Catches corrosion early | If corrosion is advanced |
| Test water pressure | Annually | Easy | Protects fixtures and appliances | If PRV installation is needed |
| Flush water heater sediment | Annually (or more) | Moderate | Extends heater life and efficiency | If tank shows rust or leaks |
| Inspect anode rod | Every 2-3 years | Moderate | Prevents tank corrosion | If access is limited |
| Test T&P valve | Annually | Moderate | Safety critical | If valve fails to shut cleanly |
| Seasonal pipe winterization | Every fall | Easy | Prevents freeze damage | If pipes are in inaccessible areas |
What I’ve learned from years of plumbing inspections
I’ve walked through hundreds of homes for inspections and repairs, and the pattern is always the same. The homeowners who have never had a major plumbing emergency are the ones who do small things consistently. They clean their aerators. They know where their shut-off is. They flush their water heater once a year. Nothing dramatic.
The homeowners who face the biggest bills are almost always dealing with something that was visible months earlier but got ignored. A slow drain that finally blocked completely. A supply line that felt slightly soft to the touch. A water heater making rumbling sounds from sediment buildup that no one addressed.
Annual plumbing inspections reduce repair costs by around 30%, and that number lines up with what I see in practice. Catching one issue early easily pays for a full year of maintenance. The mindset shift that matters most is treating your plumbing like a car. You would not skip oil changes and hope nothing breaks. Your home’s plumbing deserves the same approach.
— MDTECH
How Mdtechservices can help protect your home’s plumbing
When your maintenance checklist reveals something beyond a DIY fix, having a reliable local team matters. Mdtechservices serves homeowners across Orange County and Los Angeles County with licensed technicians who specialize in residential plumbing inspections, water heater service, and appliance repair.

Whether you need a full plumbing system inspection or help diagnosing a specific issue, our team is responsive, experienced, and focused on getting your home’s systems working reliably again. We also provide expert guidance on appliance repair services for water-connected appliances that overlap with your plumbing. Call Mdtechservices today to schedule your inspection and get ahead of costly repairs before they happen.
FAQ
How often should you do a plumbing maintenance check?
Most essential plumbing tasks should be checked every six months, with a full plumbing system inspection done annually. Seasonal checks, like winterizing pipes and testing your sump pump, should be done each fall and spring.
What does a basic plumbing maintenance checklist include?
A basic checklist covers leak detection, faucet and aerator cleaning, pipe inspection, water pressure testing, drain maintenance, and annual water heater service including sediment flushing and anode rod inspection.
Can I do my own plumbing maintenance, or do I need a professional?
Most routine tasks on a checklist for plumbing upkeep are DIY-friendly with basic tools. Tasks like T&P valve replacement, pressure-reducing valve installation, and advanced leak detection are safer with a licensed plumber.
How much can regular plumbing maintenance save me?
Periodic plumbing inspections reduce repair costs by roughly 30%, and routine maintenance prevents emergency expenses that can exceed $15,000 for major failures like burst pipes.
How do I detect a hidden water leak at home?
Turn off all fixtures and appliances that use water, then check your water meter. If the dial continues to move over a two-hour period, you have a leak. The EPA also recommends flow monitoring devices for ongoing hidden leak detection.