TL;DR:
- Installing an AC system in Orange and Los Angeles requires permits, code compliance, and safety precautions.
- Proper preparation includes obtaining permits, assembling tools, and following professional installation steps.
- Regular maintenance and inspections ensure system efficiency and help avoid costly mistakes.
Summer heat in Orange and Los Angeles County is no joke. Temperatures regularly climb past 90°F, and many homeowners want reliable cooling without waiting weeks for a contractor appointment. But installing an air conditioning system involves more than mounting a unit and plugging it in. There are permits, local code requirements, refrigerant regulations, and real safety risks that can turn a weekend project into a costly problem. This guide walks you through every stage of AC installation, from gathering permits to ongoing maintenance, so you can make informed decisions and stay safe throughout the process.
Table of Contents
- What you need before starting AC installation
- Step-by-step instructions for installing your AC
- Common mistakes and troubleshooting tips
- Verifying your AC installation and ongoing maintenance
- Why careful planning beats rushed DIY installs
- Expert help for your next installation
- Frequently asked questions
Key Takeaways
| Point | Details |
|---|---|
| Permit is essential | Every AC installation in Los Angeles and Orange County requires a permit and inspection for legal compliance. |
| DIY scope is limited | Homeowners can tackle simple mechanical steps but must use professionals for electrical and refrigerant tasks. |
| Common errors hurt efficiency | Mistakes like duct leaks or improper sizing can reduce your AC system’s performance by 25% or more. |
| Routine maintenance extends life | Changing filters monthly and calling for annual tune-ups prevent breakdowns and keep your AC running efficiently. |
| Planning and pro help save money | Careful preparation, permits, and professional guidance protect your investment and prevent costly issues. |
What you need before starting AC installation
Once you’ve set your expectations, here’s what you must assemble and prepare before installation can begin.
Permits and legal requirements
Before you touch a single wire or mount bracket, you need to understand the permit requirements in your area. HVAC permits are required in both Los Angeles and Orange County for all AC installations and replacements, including like-for-like swaps. This means even if you’re replacing an old unit with an identical model, you still need a mechanical permit and, in most cases, an electrical permit as well.
California also requires Title 24 compliance, which is the state’s building energy efficiency standard. For many installations, you’ll also need a HERS (Home Energy Rating System) test performed by a certified rater after the work is complete. HERS testing verifies that your duct system is sealed properly and that the system is charged correctly. Permit fees in Los Angeles County typically range from $200 to $600 depending on the scope of work, and inspection scheduling can add days or weeks to your timeline.
Pro Tip: Submit your permit application as early as possible. In busy seasons, permit offices in LA and Orange County can take two to three weeks to process applications. Starting paperwork early keeps your project on schedule.
Legal compliance is not just a formality. It protects your warranty, ensures your homeowner’s insurance remains valid, and keeps your family safe from electrical and refrigerant hazards.
Proper vent installation and duct installation info are also part of the compliance picture, so review those requirements before you finalize your plan. For a broader overview of what’s involved, the AC installation basics page is a solid starting point.
Tools and materials checklist
The tools and materials you need depend heavily on whether you’re installing a ductless mini-split or a central AC system. Here’s a comparison to help you plan:
| Item | Central AC | Mini-Split |
|---|---|---|
| Refrigerant line set | Required | Required (often pre-charged) |
| Duct materials | Required | Not needed |
| Vacuum pump | Required | Required |
| Manifold gauge set | Required | Required |
| Electrical disconnect box | Required | Required |
| Mounting brackets | Varies | Required |
| Nitrogen tank (for brazing) | Required | Recommended |
| Torque wrench | Required | Required |
| Drill and hole saw | Required | Required |
| Pipe insulation | Required | Required |
Beyond tools, you’ll need the following safety gear before starting any work:
- Insulated electrical gloves rated for at least 1000 volts
- Safety glasses or goggles
- Respirator mask for working in dusty attics or crawl spaces
- Non-contact voltage tester to confirm power is off
- Sturdy work boots with non-slip soles
Skipping safety gear is one of the most common mistakes homeowners make. Even when the breaker is off, capacitors inside AC units can hold a dangerous charge. Always treat electrical components with caution.
Step-by-step instructions for installing your AC
With permits secured and all prep materials ready, here’s how to approach AC installation one step at a time.
Mini-split installation steps
Partial DIY installation is possible for ductless mini-splits, especially when using pre-charged line sets, but electrical connections and refrigerant handling still require a licensed professional. Here’s how the process typically flows:
- Choose your location. Mount the indoor air handler on an interior wall with enough clearance above and below. Avoid placing it near heat sources or in direct sunlight.
- Drill the wall penetration. Use a hole saw to create a 2.5 to 3-inch opening through the wall for the line set and wiring. Angle the hole slightly downward toward the outside to allow condensate drainage.
- Mount the wall bracket. Use a level to confirm the bracket is perfectly horizontal before securing it with lag bolts into wall studs.
- Run the line set and wiring. Feed the refrigerant lines, communication wires, and drain line through the wall opening. Keep bends gentle to avoid kinking the copper tubing.
- Mount the outdoor unit. Place the condenser on a level concrete pad or wall bracket. Confirm it is level in all directions.
- Connect the line set. Flare or braze the refrigerant line connections according to the manufacturer’s specs. This step requires a licensed technician if your system is not pre-charged.
- Vacuum the system. Use a vacuum pump to pull the system down to 500 microns or lower before releasing refrigerant. This removes moisture and air from the lines.
- Electrical connection. A licensed electrician must wire the disconnect box, connect the unit to the breaker panel, and verify all connections meet local code.
- Test the system. Power on the unit and verify cooling, heating (if applicable), drainage, and remote operation.
Central AC installation steps
Central AC installation is significantly more involved and carries greater risk. Here’s a simplified overview:
- Install the air handler or furnace in the designated indoor location.
- Connect supply and return duct runs to the air handler.
- Set the outdoor condenser on a level pad.
- Run refrigerant line sets between indoor and outdoor units.
- Braze all refrigerant connections using nitrogen purge to prevent contamination.
- Pull vacuum to 500 microns or lower.
- Have a licensed technician charge the system with refrigerant.
- Complete all electrical wiring with a licensed electrician.
- Schedule your permit inspection and HERS test.
| Step | DIY possible? | Requires a pro? |
|---|---|---|
| Mounting indoor unit | Yes | No |
| Drilling wall penetrations | Yes | No |
| Running line sets | Partial | For brazing |
| Electrical wiring | No | Yes |
| Refrigerant charging | No | Yes |
| Vacuum and leak test | Partial | Recommended |
| Permit inspection | No | Yes |
Statistic callout: Leaky ducts lose 20 to 30% of conditioned air before it reaches living spaces, making proper duct sealing one of the highest-impact steps in any central AC installation.
Pro Tip: For electrical work, refrigerant handling, and duct sealing, always bring in local HVAC technicians. The cost of professional help for these specific steps is far less than the cost of fixing a failed inspection or a refrigerant leak.
Common mistakes and troubleshooting tips
Even the best-planned installation can go astray. Here are key mistakes and how to catch them quickly.
The most common installation errors
Homeowners who take on AC installation without enough preparation tend to make the same set of mistakes. Knowing what they are helps you avoid them:
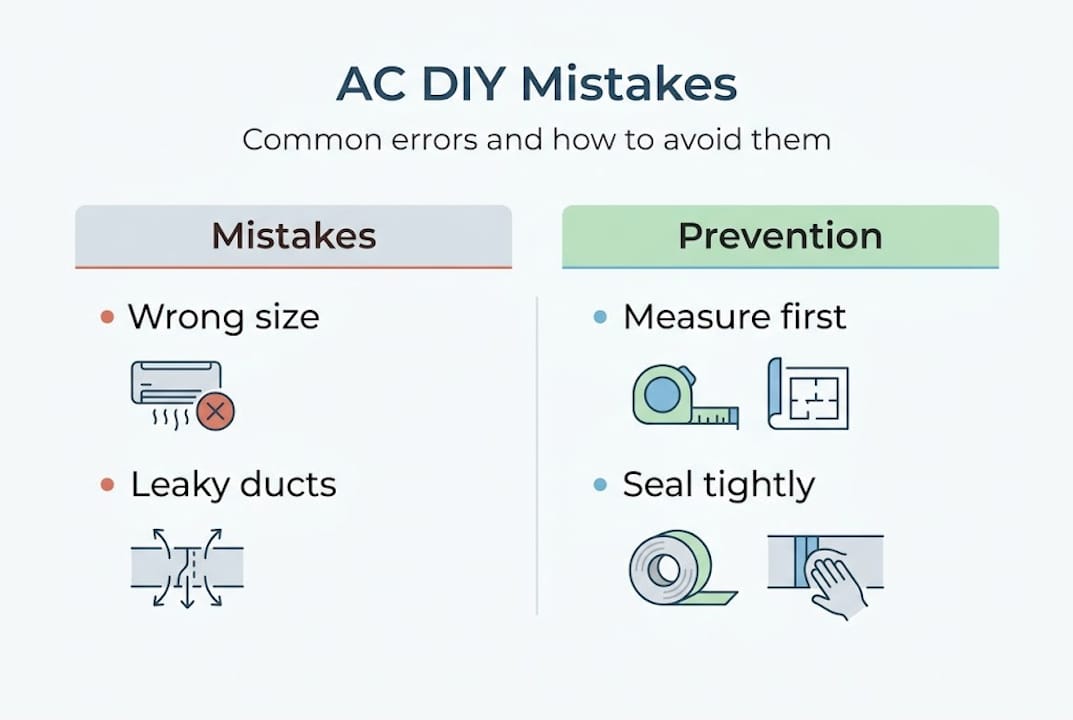
- Improper unit sizing. Choosing a unit that’s too large or too small for your square footage causes short cycling (the unit turns on and off too frequently) and poor humidity control. Always use a Manual J load calculation to size your system correctly.
- Skipping the nitrogen purge. When brazing refrigerant lines, you must flow nitrogen through the lines to prevent oxidation inside the copper tubing. Skipping this step introduces contamination that damages the compressor over time.
- Uneven outdoor pad. An outdoor condenser that isn’t perfectly level causes the compressor oil to migrate away from the pump, leading to premature failure.
- Leaky duct connections. Poorly sealed duct joints allow conditioned air to escape into unconditioned spaces like attics, reducing efficiency significantly.
- Incorrect flare angles. Flared refrigerant connections that are too shallow or too steep will leak refrigerant slowly over time.
- Ignoring drain line slope. The condensate drain line must slope consistently downward to prevent water from backing up into the air handler.
“Improper sizing causes short cycling and humidity issues; leaky ducts lose 20 to 30% of air; an uneven outdoor pad tilts the unit; and no nitrogen purge during brazing causes internal contamination.” These are the four most expensive mistakes in residential AC installation.
How to troubleshoot after installation
If your system isn’t performing as expected after installation, work through these checks before calling for service:
- Weak airflow: Check the air filter first. A clogged filter restricts airflow immediately. Then inspect duct connections for gaps or disconnected sections.
- Warm air from vents: Verify the thermostat is set correctly. If settings are right, the system may be low on refrigerant due to a leak or improper charge.
- Water leaking indoors: Check the condensate drain for clogs. Clear the drain line with a wet/dry vacuum or a mixture of water and white vinegar.
- Loud noises: Rattling can indicate loose panels or debris in the outdoor unit. A grinding sound may point to a failing motor bearing.
- System short cycling: This is almost always a sizing issue or a refrigerant problem. Both require professional diagnosis.
Pro Tip: Always double-check outdoor unit levelness and duct installation tightness immediately after completing the install, before you power the system on. Fixing these issues before startup saves significant time and money.
Verifying your AC installation and ongoing maintenance
Once installed, ongoing care is crucial for efficiency and compliance. Here’s how to verify your setup and keep things running smoothly.
Local inspection and HERS procedures
After completing your installation, your local building department will schedule an inspection. The inspector will check that all electrical connections meet code, that the unit is properly secured, and that the permit documentation matches the installed equipment. In California, many installations also require a HERS field verification, where a certified rater tests duct leakage and verifies refrigerant charge.
To pass these inspections smoothly, make sure you have all documentation ready: the equipment spec sheets, the permit application, and any test results from your HVAC technician. Failing an inspection means re-scheduling and potentially re-doing work, which adds cost and delays.
Pro Tip: Verify that your vacuum pump pulled the system down to 500 microns or lower before refrigerant was released, and confirm the system charge matches the manufacturer’s specifications. These two data points are often checked during HERS verification.
DIY maintenance schedule
Changing filters every 1 to 3 months, clearing condenser debris, and checking the drain line are the core DIY maintenance tasks every homeowner can handle. A professional annual tune-up covering coils, refrigerant level, and airflow is also strongly recommended.
Here’s a practical maintenance checklist for Orange and Los Angeles County homeowners:
- Monthly: Visually inspect the air filter. Replace if visibly dirty or every 30 days in high-use periods.
- Every 3 months: Clear any leaves, dirt, or debris from around the outdoor condenser unit. Keep at least 18 inches of clearance on all sides.
- Every 6 months: Check the condensate drain line for algae buildup. Flush with diluted vinegar solution.
- Annually: Schedule a professional tune-up that includes coil cleaning, refrigerant level check, electrical connection inspection, and airflow measurement.
Signs that you need professional service right away:
- Ice forming on the refrigerant lines or indoor coil
- Refrigerant smell (sweet or chemical odor) near the unit
- Breaker tripping repeatedly when the AC runs
- Indoor humidity that feels unusually high despite the system running
For detailed guidance, the HVAC tune-up guide and HVAC maintenance tips pages offer additional resources. You can also review the HVAC maintenance steps page for a structured approach to keeping your system in top shape year-round.
Why careful planning beats rushed DIY installs
After working on residential HVAC jobs across Orange and Los Angeles County, one pattern stands out clearly: the homeowners who run into the most trouble are not the ones who attempted DIY work. They’re the ones who attempted DIY work without a plan.
We’ve seen cases where a homeowner installed a mini-split over a weekend, only to discover weeks later that the refrigerant lines were never properly vacuumed. The moisture that entered the system during installation corroded the compressor from the inside. The repair cost more than a full professional installation would have.
No credible source endorses unsupervised central AC DIY, and for good reason. The risks around electrical work and refrigerant handling are real, and local codes exist to protect you. Permits are not bureaucratic obstacles. They are the mechanism that ensures a licensed inspector verifies the work is safe.
The most cost-effective approach is a hybrid one: handle the mechanical prep work yourself where it’s safe and legal, and bring in licensed professionals for professional AC installation advice on electrical, refrigerant, and inspection-related steps. That combination saves money while keeping your family and your home protected.
Expert help for your next installation
If any part of your AC installation project feels outside your comfort zone, MDTech Services is ready to help. Our licensed technicians serve homeowners throughout Orange County and Los Angeles County, handling everything from full AC installation service to targeted repairs and inspections.

Whether you need a complete system installed, a permit inspection prepped, or a specific component handled by a pro, we offer responsive scheduling and reliable workmanship. You can also explore our HVAC repair residential guide for more context on common repair needs, or check out the appliance repair step-by-step guide for related home systems. Contact MDTech Services today to book your appointment and get your home cooling system running right.
Frequently asked questions
Do I need a permit for AC installation in Los Angeles or Orange County?
Yes, permits are required for all AC installations or replacements in both counties, including like-for-like swaps, along with mechanical and electrical compliance inspections.
Can I fully install a central AC system myself?
No, unsupervised central AC installation is not endorsed by any credible source; licensed professionals must handle electrical wiring, refrigerant charging, and code compliance to keep the installation safe and legal.
What maintenance tasks can homeowners safely do on their AC system?
You can change filters every 1 to 3 months, clear outdoor condenser debris, and check the drain line, but annual professional tune-ups covering coils, refrigerant, and airflow are strongly recommended.
What are the most common installation mistakes to avoid?
The most frequent mistakes include improper unit sizing, leaky ducts that lose 20 to 30% of conditioned air, uneven outdoor unit placement, and skipping the nitrogen purge during refrigerant line brazing.
How often should I change AC filters?
Check your filter monthly and replace it every 1 to 3 months depending on usage, household dust levels, and whether you have pets, following standard AC maintenance guidelines for best efficiency.