
If you find water pooling under your kitchen sink, shut off the two small valves directly under the basin first, then check whether the leak is constant or only happens when you drain the sink. A steady drip with the faucet off means a pressurized supply leak, which needs prompt attention. A leak that only shows up during draining is almost always a P-trap or fitting issue you can likely fix yourself in under an hour.
TL;DR:
- Most leaks caused by loose slip-joint washers or worn gaskets are quick fixes that homeowners can usually handle within 20 minutes.
- A persistent leak under constant pressure indicates a supply line issue, while leaks only during draining typically involve the P-trap or fittings and are less urgent.
- Moisture found uphill from a wet spot usually points to the real leak source, making thorough testing and drying essential before attempting repairs.
- Repairs should be avoided if water sprays under pressure, the shutoff valve is stuck, or there are signs of internal wall leaks, requiring a professional plumber.
- Preventive measures include installing leak sensors, replacing supply lines every 8 to 12 years, and labeling shutoff valves to catch problems early before they cause significant damage.
Table of Contents
- What to Do When You Find a Leak Under the Kitchen Sink
- How Do You Tell Supply-Side From Drain-Side Leaks?
- What’s Actually Causing Your Kitchen Sink to Leak?
- Step-by-Step Guide to Fixing a P-Trap or Supply Line Leak
- When Should You Call a Plumber Instead of Fixing It Yourself?
- How to Protect Your Cabinet From Future Leaks
- The MDTech View on DIY vs. Professional Repairs
- Book a Licensed Technician for Leaks You’d Rather Not Handle Alone
- Sources
- FAQ
What to Do When You Find a Leak Under the Kitchen Sink
The first move is always the shutoff valves. Most kitchen sinks have two small oval or round handles on the supply lines, usually mounted on the wall or floor under the basin, one for hot and one for cold. Turn both clockwise until they stop. If water keeps flowing or a valve won’t budge, don’t force it. Head to your home’s main shutoff instead, since a stuck angle stop under pressure is exactly the kind of failure that turns a small leak into a flooded cabinet.
Once the water is stopped, get the space ready for inspection:
- Clear everything out of the cabinet, including cleaning supplies, trash bags, and anything else stored below the sink.
- Lay towels down and set a bucket under the leak point to catch drips while you work.
- Wipe down every pipe, fitting, and hose so the cabinet floor and pipes are completely dry.
- Gather a flashlight, an adjustable wrench or channel-lock pliers, spare slip washers, and a replacement P-trap kit if you have one on hand.
Drying everything matters more than it sounds like it should. A wet pipe hides exactly where new water is coming from, and you’ll waste time chasing the wrong connection. If water is actively spraying, or a shutoff valve won’t close at all, that’s your cue to call for plumbing safety help rather than keep working under an open leak.
How Do You Tell Supply-Side From Drain-Side Leaks?
This distinction changes everything about how urgently you need to act. A supply-side leak is under constant water pressure, meaning it drips whether or not anyone touches a faucet, and it will keep getting worse. A drain-side leak, like a loose P-trap connection, only leaks when water is actively moving through the pipe, which makes it far less urgent and much easier to isolate.
A dependable diagnostic sequence, backed by common troubleshooting guides, runs in this order:
- With the faucet off and the cabinet dry, press a dry paper towel against each shutoff valve and the faucet’s tailpiece connections for a few seconds. Any dampness that transfers means a supply-side leak.
- Fill the sink basin with a few inches of water, then release the drain plug and watch the P-trap and drain assembly closely as the water rushes through.
- Turn the faucet on and let it run for 30 seconds while you watch the supply lines and valve connections under active pressure.
- Once the source area is damp, follow the moisture uphill rather than assuming the lowest wet spot is the source. Water travels along pipes and cabinet walls before it drips, so the highest damp point usually points closer to the real leak.
Pro Tip: Lay a strip of dry toilet paper or a paper towel along a suspect pipe joint and check it again after a few minutes. It will show the very first trace of moisture before your eyes would ever catch it.
Run each test twice if the first pass is inconclusive, and jot down what you saw before you loosen a single nut. Guessing at this stage is how homeowners end up replacing the wrong part twice.
What’s Actually Causing Your Kitchen Sink to Leak?
Five spots cause the overwhelming majority of under-sink leaks, and each one leaves a distinct clue.
- P-trap and slip-joint washers. This is the most common culprit by far. If water only shows up when you drain the sink, and the inside of the curved trap pipe is wet, a loose slip nut or a worn rubber washer is almost always the reason. It’s also the cheapest and fastest fix on this whole list.
- Supply lines and angle stops. A steady drip regardless of faucet use points to a worn braided supply hose or a failing washer inside the shutoff valve itself. These lines wear out with age even if they look fine from the outside.
- Drain flange and sink deck seal. If water appears only after you fill the sink and it seems to come from directly under the basin rather than the trap, the seal between the sink and the drain flange has likely failed. This one usually needs work from above the sink, not just below it.
- Garbage disposal and dishwasher hoses. A leak that shows up specifically when the disposal runs or the dishwasher drains points straight to a loose hose clamp or a cracked fitting on the disposal unit.
- Cracked pipes, corrosion, or in-wall sources. Persistent staining, a soft or discolored cabinet floor, visible mold, or a sewer smell are signs the problem has moved beyond a simple fitting and may involve corroded pipe or a leak hidden inside the wall.
Step-by-Step Guide to Fixing a P-Trap or Supply Line Leak
Two repairs handle most under-sink leaks, and both are well within reach for a homeowner with basic tools.
Fixing a leaking P-trap:
- Slide a bucket under the trap to catch residual water, then loosen the slip nuts on both ends by hand. They’re designed to be hand-tightened, not wrenched down hard.
- Remove the trap and inspect the rubber or nylon washers inside each slip joint for cracks, flattening, or grit buildup.
- Replace worn washers, or swap the entire trap for a new kit if the plastic itself looks warped or cracked.
- Reassemble the pieces, hand-tighten each slip nut until snug, then add a careful quarter-turn with pliers. Going further risks stripping the plastic threads.
Fixing a supply line or angle stop leak:
- Confirm the shutoff valve is fully closed, then disconnect the braided supply line from the valve or the faucet tailpiece.
- Check the small rubber washer inside the connection nut for wear, and replace the entire braided line if it’s more than a few years old.
- Reconnect and tighten by hand, then snug with pliers, being careful not to overtighten the compression fitting.
Pro Tip: Never wrap Teflon tape or plumber’s putty around plastic slip-joint threads that seal with a rubber washer. The washer is the seal; tape only interferes with the connection and can cause it to leak worse.
After either repair, run the faucet for a full 30 seconds to test the supply side, then fill and fully drain the basin to test the drain side. Check again after a few hours, and once more the next day, since a slow leak can take time to reappear. Skip anything involving valve replacement or pipe work inside a wall. Those jobs belong to a licensed technician.
When Should You Call a Plumber Instead of Fixing It Yourself?
Some situations call for a professional immediately, no troubleshooting required. If a shutoff valve won’t close, water is spraying under pressure, or you’re looking at a large, fast flow, shut off the main water line to the house and call for emergency service right away.
Beyond the emergency cases, bring in a plumber when:
- A DIY fix hasn’t held after a repeat attempt or two
- The cabinet floor is soft, swollen, or discolored
- You see visible corrosion, greenish staining, or mineral buildup on pipe joints
- There’s mold growth or a persistent musty smell in the cabinet
- You suspect the leak is happening inside a wall or floor rather than at a visible fitting
A professional’s typical fixes go beyond a slip nut swap: replacing a corroded angle stop, cutting out and repairing a section of damaged pipe, opening a wall or floor cavity to reach a hidden leak, or running dedicated leak detection equipment to pinpoint a source you can’t see. A small drain-side drip can usually wait a day or two for a scheduled repair. A pressurized supply leak cannot.
How to Protect Your Cabinet From Future Leaks
Preventing the next leak costs far less than repairing the damage from the last one. A few habits go a long way toward protecting the cabinet and catching problems early:
- Install a waterproof cabinet liner under the sink, and keep boxes, sponges, and cleaning supplies off the bare cabinet floor.
- Place a low-cost water leak sensor directly under the P-trap or near the supply valves. Most models trigger a phone alert the moment they get wet.
- Replace braided supply lines every 8 to 12 years even if they look fine, since the rubber inside degrades from the inside out.
- Label each shutoff valve so anyone in the house can find it fast, and keep a plumber’s number saved somewhere other than your phone’s contacts.
- Avoid storing electronics, small appliances, or anything irreplaceable directly under the sink.
Pro Tip: Check slip nuts and supply connections for the first sign of dampness once a year, ideally right before a holiday when the disposal and dishwasher see heavier use than usual.
Renters can apply nearly all of this without a landlord’s permission, and property managers juggling several units may find a rental maintenance checklist useful for scheduling these checks across every unit at once.
The MDTech View on DIY vs. Professional Repairs
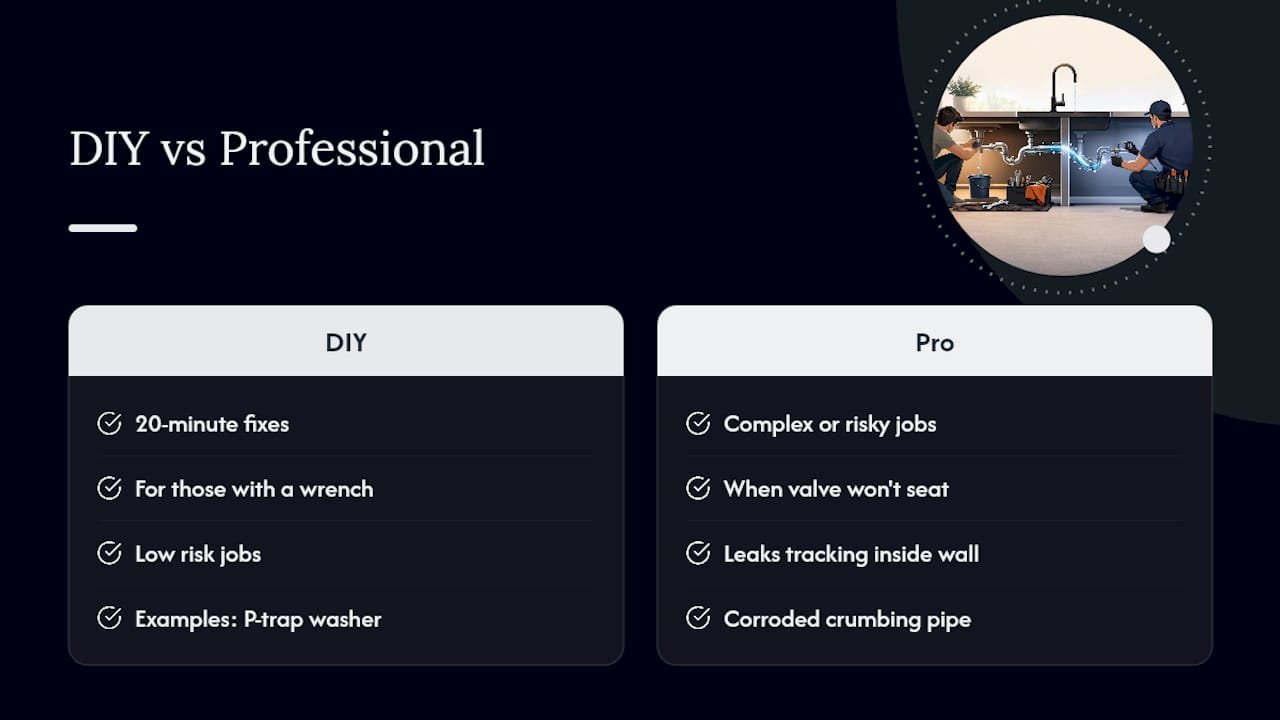
Most under-sink leaks genuinely don’t need a service call. A worn P-trap washer or a tired supply line is a 20-minute fix for anyone comfortable with a wrench, and we’d rather see homeowners save that money than pay a technician to hand-tighten a nut.
Where our licensed technicians earn their keep is different territory entirely: a shutoff valve that won’t seat, a leak that’s tracking inside a wall, corroded pipe that crumbles when you touch it, or a garbage disposal housing that’s cracked rather than just loose. Those jobs carry real risk of water damage if handled wrong, and they’re where experience matters more than a set of pliers. If your situation edges toward any of those, our appliance repair guide and plumbing safety resources are worth a look before you decide which path to take.
— MDTECH
Book a Licensed Technician for Leaks You’d Rather Not Handle Alone
Not every leak stops at a slip nut. When a valve won’t shut, the leak is tracking inside a wall, or your garbage disposal housing has actually cracked, Technicians are available who fix it once, correctly, instead of leaving you to retest the same joint for a week straight.

That’s the real advantage over trial-and-error DIY on anything beyond a P-trap or a washer: you get a technician who has already seen the failure mode you’re staring at, with the right parts on hand instead of a second trip to the hardware store. The service covers appliance repair, HVAC work, and plumbing fixes with online booking to avoid phone tag. If your leak is a stuck angle stop, a corroded fitting, or anything involving the wall behind your cabinet, book online through our appliance repair services or call us directly to get a technician scheduled.
Sources
- How to Fix a Leaky Pipe Under the Sink | Mackin & Sons, Akron OH
- Water under kitchen sink? How to find exactly which connection is leaking – HouseWise
- What causes a kitchen sink to leak underneath | Mr. Rooter
FAQ
What should I do first if my kitchen sink is leaking?
Shut off the hot and cold supply valves directly under the sink, then dry the cabinet completely so you can see exactly where new moisture appears.
Why is there water under my kitchen sink but no visible leak?
Water often tracks along a pipe or the cabinet wall before it drips, so the wet spot you see may be several inches from the actual source. Dry the area and use the follow the moisture technique to trace it uphill to the real connection.
How can I fix a pipe leak under my kitchen sink myself?
Most fixable leaks trace back to a loose P-trap slip nut or a worn washer. Hand-tighten the slip nuts with a quarter-turn using pliers, or replace the washer or the entire trap kit if it’s cracked or warped.
Why is my sink still leaking after I turned the water off?
Residual water sitting in the P-trap or drain line can continue dripping for a few minutes after the shutoff, especially if you disturbed the trap during inspection. If dripping continues well beyond that, the leak is likely drain-side rather than supply-side, and the trap or drain flange needs attention.
When does a kitchen sink leak require a plumber instead of a DIY fix?
Call a professional if a shutoff valve won’t close, the leak is pressurized and won’t stop, the cabinet floor is soft or discolored, or you suspect the leak is happening inside a wall.