
A warm patch on your floor, a rising water bill, and the sound of running water when every faucet is off are the three most reliable slab leak signs. If you notice even one, run a water-meter test right away, and shut off the main line if you see standing water. These checks can confirm a leak within minutes, but pinpointing its exact location under the slab is a job for a licensed plumber with the right detection tools.
TL;DR:
- Water meter readings before and after a 20-30 minute period with no water use can confirm the presence of a slab leak.
- Warm spots on the floor indicating a hot-water line leak can raise surface temperature by 5 to 10 degrees Fahrenheit, especially on tile or stone.
- A persistent sound of running water with all fixtures off strongly suggests pressurized water escaping beneath the slab.
- Signs like damp carpets, warped flooring, or cracked tiles usually indicate a leak that has been developing for weeks or months.
- Professional detection tools such as acoustic correlation, thermal imaging, ground-penetrating radar, and tracer gas are used to precisely locate leaks before concrete is cut.
Table of Contents
- What Are the Warning Signs of a Slab Leak?
- How Do You Test for a Slab Leak at Home?
- What Detection Methods Do Professional Plumbers Use?
- What Should You Do First If You Suspect a Slab Leak?
- How Can You Catch Slab Leaks Earlier Next Time?
- Why Waiting for Visible Water Is the Biggest Mistake
- Get a Professional Slab Leak Diagnosis Before It Spreads
- Sources
What Are the Warning Signs of a Slab Leak?
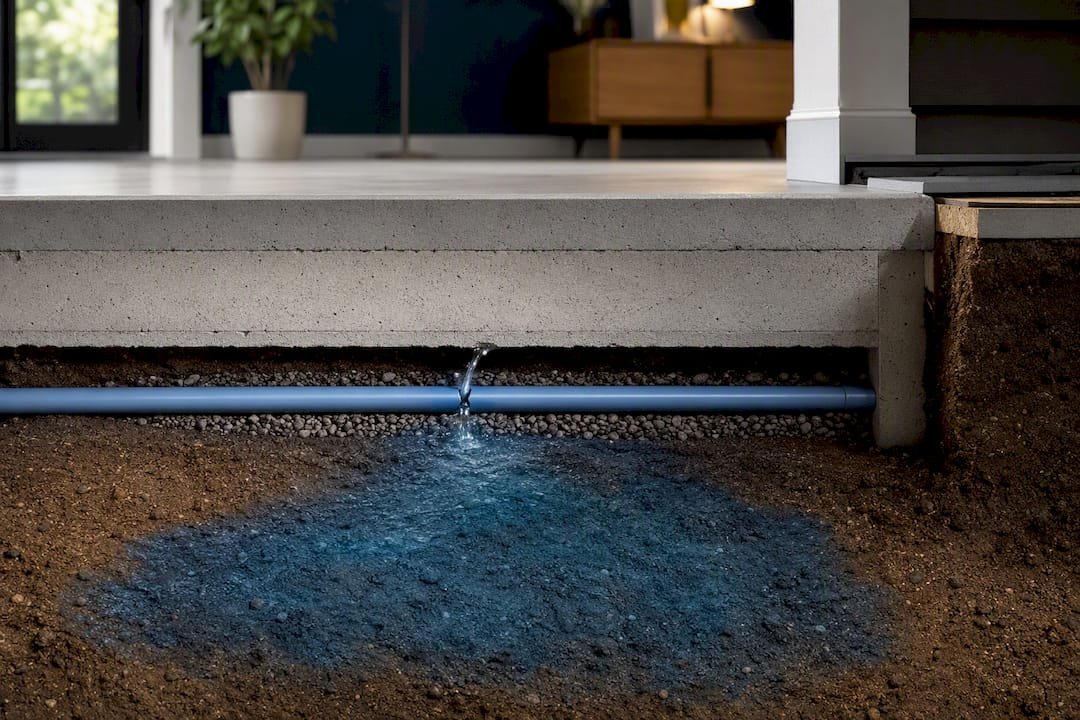
A slab leak happens when a water line running underneath your concrete foundation cracks, corrodes, or springs a pinhole opening. Because the pipe sits under a slab of concrete, the leak often stays hidden for weeks or months, quietly soaking soil, warping flooring, and pushing your water bill higher before you ever see a drop of water. Catching the signs early is the difference between a targeted repair and a torn-up living room.
Here’s what to watch for, ranked roughly by how commonly homeowners spot them first.
- Unexplained water bill spikes. A noticeable jump over your normal water usage, with no obvious change in household habits, is one of the clearest top warning signs of a slab leak. Compare two or three billing cycles side by side rather than judging off a single month.
- The sound of running water with every fixture off. Turn off all faucets, appliances, and irrigation, then walk through the house and listen near floors and walls. A faint hiss or trickle with nothing running is a strong indicator of pressurized water escaping somewhere in the slab.
- Warm or hot spots on the floor. This is one of the most specific signs there is. A hot-water line leak can raise the surface temperature of your flooring by 5 to 10 degrees Fahrenheit compared to the surrounding area. Tile and stone conduct heat well, so this sign shows up faster there than under carpet. The false positive to rule out is sun exposure through a window or a floor vent nearby.
- Damp carpet, warped flooring, or lifted tile. Moisture pushing up from below tends to show up first at the edges of a room or near baseboards, not in the middle of the floor. Press a dry paper towel against the suspect spot; if it darkens without any obvious spill nearby, that’s worth documenting.
- Low or fluctuating water pressure. If pressure drops at every fixture in the house rather than just one showerhead or faucet, water is likely escaping somewhere between the meter and your plumbing, and a slab leak is one of the top suspects.
- Musty odors or visible mold. Standing moisture under carpet pad, inside baseboards, or along the bottom of drywall creates the kind of damp, closed environment mold thrives in. A musty smell with no visible source is often your nose catching the problem before your eyes do.
- Cracked tile, grout, or shifting interior walls. Water saturating the soil beneath a foundation can cause uneven settling, which shows up as new cracks in grout lines, tile, or drywall corners. This is typically a later-stage sign, not an early one, so treat it as a signal to act quickly.
Pro Tip: No single sign is proof on its own. A warm floor patch plus a bill spike plus the sound of running water together make a slab leak far more likely than any one symptom alone.
The EPA’s household leak guidance points out that undetected leaks waste substantial amounts of water nationwide every year, which is exactly why catching these signs early saves both money and your foundation.
How Do You Test for a Slab Leak at Home?
You don’t need special equipment to get a strong first read on whether you have a slab leak. These checks take fifteen minutes to an hour and cost nothing but your time.
- Run the water-meter test. Turn off every fixture and appliance that uses water, including the icemaker and any irrigation timer. Find your water meter, note the reading, and check again after 20 to 30 minutes without using any water. If the dial has moved, water is escaping somewhere on your side of the meter. This static meter test is the cheapest and fastest way to confirm a leak exists.
- Do a barefoot thermal check. Walk your floors first thing in the morning, before the HVAC system kicks on and masks temperature differences. Note any spot that feels noticeably warmer than the rest of the floor, and mark it with a piece of tape so you can find it again.
- Isolate the water heater. Shut off the cold-water inlet valve to your water heater, then recheck the meter. If the meter stops moving once the water heater is isolated, the leak is likely on the hot-water side. If it keeps moving, you’re probably dealing with a cold-line leak instead.
- Run a paper-towel or probe check on damp spots. Press a dry paper towel firmly against carpet, baseboards, or grout lines you suspect are wet. Photograph the result with a timestamp, since this documentation matters later for both your plumber and your insurer.
- Track your results over 24 to 48 hours. A single reading can be thrown off by a running dishwasher or a leaky toilet flapper. Repeat the meter test at a different time of day to rule out those simpler explanations before assuming the worst.
Pro Tip: If your water heater cycles on and off constantly with no faucet running anywhere in the house, that’s often a sign of a hot-side slab leak. Track your gas or electric bill alongside your water bill. Rising numbers on both point to the same source.
These tests confirm that a leak exists and roughly which line it’s on. They won’t tell you exactly where under the slab it’s located, which is where professional diagnostics take over.
What Detection Methods Do Professional Plumbers Use?
Licensed technicians don’t guess and cut open a slab. They work through a sequence of tests designed to narrow the leak’s location as precisely as possible before anyone touches concrete.
- Acoustic correlation and ground microphones pick up the sound signature of pressurized water escaping a pipe. Under good conditions, these tools can localize a leak to within roughly a foot, according to detection industry data, though dense soil, thick slabs, and post-tension cables inside the concrete can all reduce that accuracy.
- Thermal imaging cameras detect surface temperature anomalies caused by a leaking hot-water line, which makes this method useful specifically for hot-side leaks rather than cold-side ones. Its usefulness depends heavily on having a genuine temperature differential to detect in the first place.
- Ground-penetrating radar (GPR) maps what’s below the slab, including pipe paths and soil voids, which helps in tricky cases where acoustic tools alone can’t pin down a location.
- Tracer-gas testing involves injecting a safe, detectable gas into the line and tracking where it surfaces, used as a confirmatory step when other methods produce ambiguous results.
| Detection Method | Best Suited For | Main Limitation |
|---|---|---|
| Acoustic correlation | Pressurized supply-line leaks | Accuracy drops with dense soil or thick slabs |
| Thermal imaging | Hot-water line leaks | Needs a real temperature differential to work |
| Ground-penetrating radar | Complex or ambiguous cases | Higher cost, requires trained interpretation |
| Tracer gas | Confirming exact leak point | Typically a final confirmatory step, not first-line |
A typical diagnostic visit moves through intake and symptom review, isolation testing similar to the meter test above, acoustic investigation, and only then a confirmatory method if needed. Cutting into the slab is always the last step, not the first, because concrete repair adds cost and time that good diagnostics can often avoid.
What Should You Do First If You Suspect a Slab Leak?
- Shut off the main water supply if you see any standing water or the leak seems to be worsening. Know where your main shutoff valve is before you need it in a hurry.
- Photograph everything, including warm floor spots, damp carpet, meter readings, and your last two or three water bills.
- Note water heater behavior. Constant cycling with no fixtures running is worth writing down and mentioning to whoever you call.
- Ask specific questions on your first call to a plumber: what detection tools they use, whether they attempt non-invasive methods before cutting concrete, and roughly how long diagnosis typically takes.
- Save documentation for your insurer. Most homeowner policies want dated photos, meter readings, and a written timeline of when you first noticed symptoms, since sudden water damage claims are often evaluated differently than gradual, long-term leaks.
A plumbing emergency checklist can help you keep this process organized if water damage is actively spreading through your home.
How Can You Catch Slab Leaks Earlier Next Time?
- Check your water meter quarterly, even without symptoms, and compare it against your last few bills to spot slow upward trends.
- Walk your flooring and utility closets seasonally, paying attention to baseboards and grout lines where early moisture tends to collect first.
- Weigh your pipe age and local water conditions. Homes with aging copper lines in areas with known chloride-related pitting issues face a higher long-term risk, which makes a proactive inspection worth the cost.
- Keep a dehumidifier and a plan on hand for damp areas, and address any grading issues that push water toward your foundation rather than away from it.
Pro Tip: Set a recurring reminder on your phone for a meter check every three months. It takes five minutes and it’s the single easiest habit for catching a leak before it becomes a foundation problem.
A regular plumbing inspection schedule catches most of these issues before they show up as a bill spike or a warm patch on your living room floor.
Why Waiting for Visible Water Is the Biggest Mistake
The homeowners who end up with the worst outcomes almost always share one habit: they wait for standing water before calling anyone. By the time water is visibly pooling on a slab floor, the leak has usually been running for weeks, and the soil beneath the foundation has already absorbed a lot of it.
The smarter approach is to act on the indirect signs. A warm patch, a climbing bill, or a water heater that won’t stop cycling are the kind of quiet indicators that let you catch a leak while the fix is still simple. When homeowners call in with a slab leak concern, what helps most is specifics: the meter reading before and after the static test, a photo of the warm spot, and the last two water bills side by side. That handful of details often tells a technician more than an hour of description would.
Early detection doesn’t just save money on the repair. It’s what stands between a targeted fix and a torn-up foundation.
— MDTECH
Get a Professional Slab Leak Diagnosis Before It Spreads
If your water-meter test confirms a leak, or you’re seeing warm floor patches and rising bills you can’t explain, waiting only lets the water travel further under your foundation. Licensed plumbers can be sent into homes with a diagnostic approach to confirm a leak’s presence and narrow its likely location, so you’re not paying for guesswork or unnecessary slab cutting.

Booking is straightforward: describe your symptoms, including your meter test results and any warm spots you’ve marked, and a technician can walk you through what to expect before they ever arrive. Review our plumbing safety checklist for what to do while you wait, then schedule your inspection through our plumbing checklist page to get a technician on-site and your foundation protected.
Sources
- Slab leak warning signs: 10 ways to catch it before the foundation goes — FixItReal
- Water leak under concrete symptoms: top signs of a slab leak — LeakTronics
- Slab leak detection: causes, signs, and methods — Leak Detection Authority
- Fix a Leak Week — EPA
- Corrosion and pinhole leak analysis (research report) — Virginia Tech / CDA analysis