
Yes, a propane dryer can be converted to natural gas, but only when the manufacturer offers a specific conversion kit for that exact model. Without one, conversion is unsafe and often impossible. Your first move is to find your dryer’s model number and check the manufacturer’s parts site for a natural gas conversion kit. If nothing turns up, or you are unsure how to read the results, call a licensed technician before touching the gas line.
TL;DR:
- Conversion kits are model-specific and must be purchased from the manufacturer to ensure safe and proper installation, avoiding dangerous modifications.
- The process involves replacing propane orifices with larger natural gas ones, recalibrating the regulator, and updating the rating label, typically performed by a licensed technician.
- Professional checks, including leak testing and combustion analysis, are essential to ensure safe operation and are usually conducted during the conversion at an additional cost.
- Most jurisdictions require a permit and inspection handled by a licensed technician to verify safety standards and proper documentation for the conversion.
- Converting a dryer costs roughly $150 to $500 in labor, and it may be more cost-effective to replace an old or incompatible dryer rather than convert, especially if additional plumbing upgrades are needed.
Table of Contents
- Parts and Tools You Need to Convert a Propane Dryer to Natural Gas
- How Do You Convert a Gas Dryer From Propane to Natural Gas?
- Do You Need a Permit or Licensed Installer for This Conversion?
- What Does a Propane-to-Natural-Gas Dryer Conversion Cost?
- When Should You Skip the Conversion and Replace the Dryer Instead?
- How Mdtechservices Handles Propane-to-Natural-Gas Conversions
- An Installer’s View: Where DIY Should Stop
- Get a Licensed, Documented Natural Gas Conversion
- Resources Worth Checking Before You Convert
- Sources
- FAQ
Parts and Tools You Need to Convert a Propane Dryer to Natural Gas
Every legitimate conversion starts with a manufacturer-specific kit, not a generic hardware-store bundle. Propane packs more energy per cubic foot than natural gas, so switching fuels means swapping burner orifices for larger ones sized for natural gas and recalibrating the regulator to match the lower supply pressure, according to a propane-to-natural gas conversion guide. Guessing at orifice size, or reusing a propane orifice, is where most DIY attempts go wrong.
A proper kit, sourced from the dryer’s manufacturer, typically includes:
- One or more natural gas burner orifices sized specifically for your model
- A replacement regulator spring or tower cap rated for natural gas pressure
- A new “converted to natural gas” rating label or plate
- Manufacturer installation instructions and a parts diagram
On the tool side, plan for a nut driver or socket set, an adjustable wrench, a flathead screwdriver, a soapy-water leak solution or an electronic gas leak detector, and a flashlight for tight cabinet spaces.
Finding the right kit starts with the model and serial number plate, usually inside the dryer door frame or on the back panel. Take that information to the manufacturer’s official parts department or an authorized appliance parts dealer. GE Appliances, for instance, publishes conversion kit guidance tied to specific model numbers, and Whirlpool sells a dedicated dryer conversion kit built for its own lineup. Skip generic “universal” kits sold on marketplace sites. Orifice dimensions vary by burner design, and an ill-fitting part creates a combustion problem, not just an installation headache.
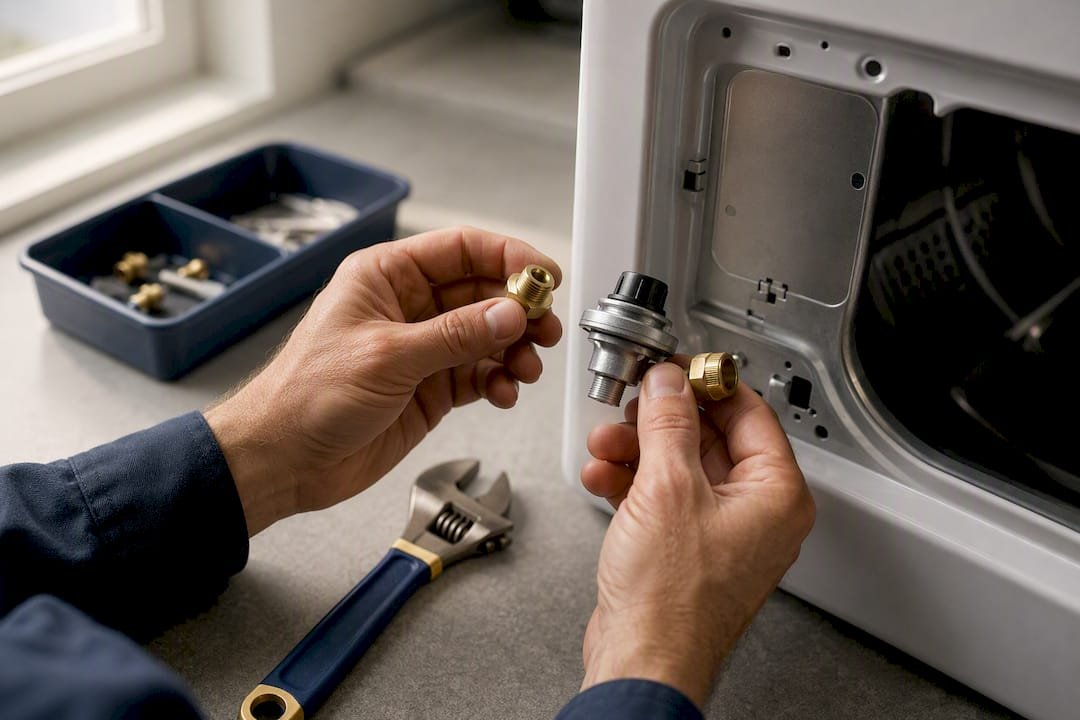
Some dryers simply cannot be converted. If the manufacturer’s site shows no kit for your model, if the appliance is old enough to be discontinued, or if the parts listing explicitly says “not convertible,” stop there. Trying to drill or ream an existing orifice to make it fit isn’t a workaround; it is a known cause of unsafe combustion.
How Do You Convert a Gas Dryer From Propane to Natural Gas?
Once you have the correct kit in hand, the conversion follows a predictable sequence. A licensed technician performs most of these steps as a matter of routine, but knowing what happens helps you evaluate the work and ask informed questions.
- Confirm compatibility one more time. Match the kit’s part number against your dryer’s model number before you unpack a single screw. A near-match is not a match.
- Shut off the gas and unplug the dryer. Close the gas supply valve behind the appliance, then disconnect the flexible gas connector and unplug the power cord.
- Pull the dryer away from the wall and remove the access panel. Most models expose the burner assembly through a rear or lower front panel held on by a handful of screws.
- Locate the burner orifice and the regulator tower. The orifice sits at the end of the gas line feeding the burner. The regulator, sometimes called a tower or pressure regulator, controls how much gas reaches it.
- Remove the propane orifice and install the natural gas orifice from the kit. This is a direct swap, not a modification. Never file, drill, or otherwise alter the original part; precision-drilled orifices are sized to exact tolerances for a reason.
- Reset or replace the regulator cap or spring per the kit instructions. Some models use a simple flip-cap regulator with “LP” stamped on one side and “NAT” on the other. Others require swapping an internal spring.
- Reassemble the access panel and apply the new rating label. The label documents that the appliance now runs on natural gas, which matters for future service calls and resale.
- Reconnect the gas line and restore power. Double check every fitting is hand tight, then snug with a wrench.
- Run a leak test on every reconnected joint. Brush on a soapy water solution and watch for bubbles, or sweep the connections with an electronic gas detector. Any bubbling or alarm means stop and recheck the fitting.
- Start the dryer and observe the burner flame. A properly converted burner shows a steady blue flame with a small, well-defined inner cone. Yellow, flickering, or lifting flames signal a pressure or orifice mismatch.
- Run a full drying cycle and check for carbon monoxide. A qualified technician measures combustion byproducts with a calibrated CO analyzer at the vent. This step is not optional, and it is where DIY conversions most often fall short.
- Document everything. Keep the kit packaging, instruction sheet, and any test readings. If your jurisdiction requires an inspection, this paperwork is what the inspector will ask to see.
Pro Tip: Photograph the burner assembly before removing anything. If a clip or bracket looks unfamiliar during reassembly, that photo saves you a frustrating half hour of guesswork.
The steps above describe the mechanical process, but two of them, the combustion check and the final leak verification, are exactly where professional training earns its cost. A flame that looks “close enough” to blue can still be producing dangerous carbon monoxide levels that only an analyzer catches.
Do You Need a Permit or Licensed Installer for This Conversion?
Most local jurisdictions treat a fuel-type conversion as gas appliance work, which means it typically falls under the same code requirements as installing a new gas line. The National Fire Protection Association’s standards for fuel gas code, enforced locally by your authority having jurisdiction, generally call for licensed technicians to handle modifications that change how an appliance burns fuel. This isn’t bureaucratic overreach. Incomplete combustion from a wrong orifice or a misadjusted regulator produces carbon monoxide, soot buildup, and in some cases fire, according to InspectAPedia’s technical notes on orifice conversions.
A licensed installer typically performs three safety checks that a permit or inspection will ask about:
- A soap-bubble or electronic leak test on every reconnected fitting
- A combustion and carbon monoxide check using a calibrated analyzer
- A vent and airflow check confirming exhaust clears the home properly
If your area requires a permit, prepare by keeping the manufacturer’s kit box, the installation instructions, and any receipts. Inspectors generally want to see the model-specific kit was used, not an improvised substitute, and that the rating label was updated. Expect the inspection itself to take well under an hour once the technician has documentation ready.
What Does a Propane-to-Natural-Gas Dryer Conversion Cost?
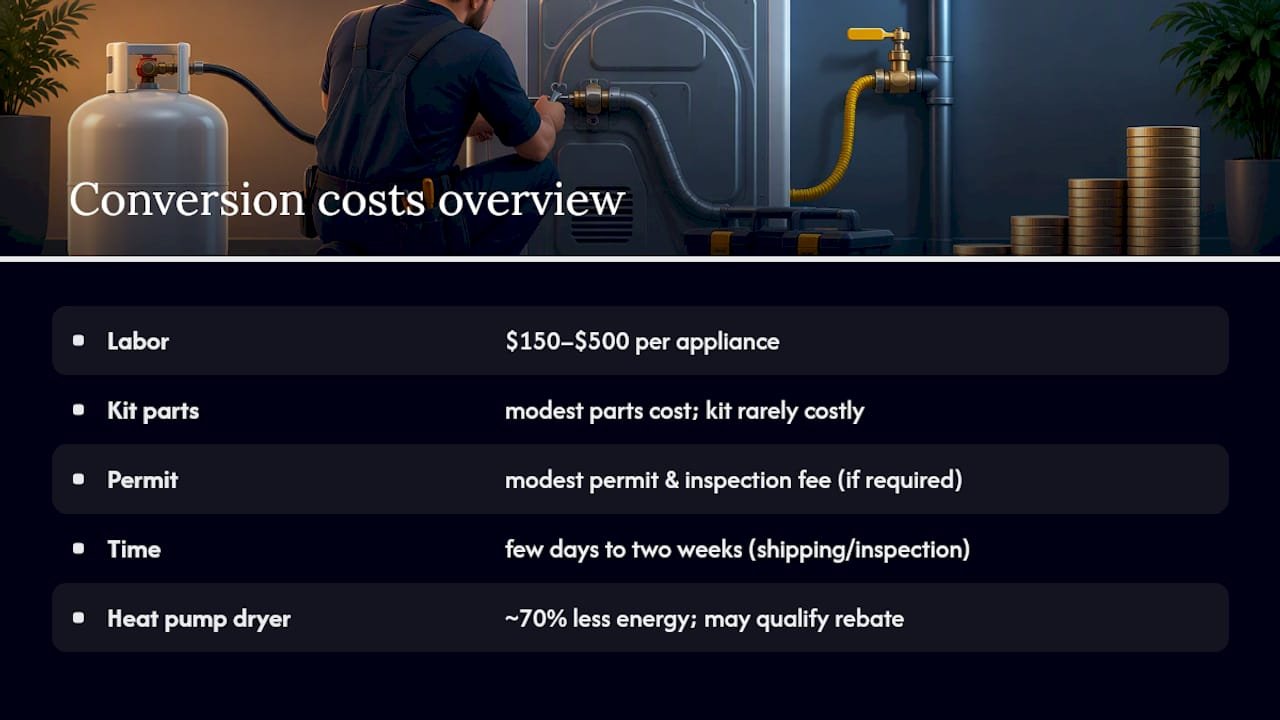
Manufacturer conversion kits generally run in the modest range for parts, and the kit itself is rarely the expensive part of this job. Labor is. Licensed technicians commonly charge in the range of $150 to $500 per appliance depending on model complexity and local labor rates, with whole-home fuel conversions running considerably higher. Add a modest permit and inspection fee if your city requires one.
From purchase to a signed-off, inspected conversion, budget roughly a few days to two weeks, mostly waiting on kit shipping and scheduling an inspector. If your dryer is older or your region only offers a costly retrofit, compare that total against the price of a new natural gas dryer, or an ENERGY STAR heat pump dryer, which uses roughly 70% less energy than a conventional electric unit and may qualify for a rebate that changes the math entirely.
When Should You Skip the Conversion and Replace the Dryer Instead?
Some situations make conversion the wrong call no matter how handy you are.
- The manufacturer lists no conversion kit for your model, or the appliance is discontinued.
- Your home’s gas piping would need upsizing to deliver adequate pressure, a job that adds real cost.
- Total conversion cost approaches or exceeds the price of a new, more efficient dryer.
- The dryer already shows wear elsewhere (drum, heating element, bearings) that suggests it’s near the end of its service life anyway.
When any of these apply, a licensed technician can confirm whether replacement or conversion makes more financial sense for your specific setup.
How Mdtechservices Handles Propane-to-Natural-Gas Conversions
Every conversion Mdtechservices performs starts with confirming your dryer’s model against the manufacturer’s approved kit list, not a generic part. Our licensed technicians handle the orifice swap, regulator recalibration, and relabeling, then run the pressure, leak, and carbon monoxide checks that a safe conversion actually requires, following the same process outlined in our guide to converting gas appliances from LP to natural gas. We serve homeowners across Orange County and Los Angeles County, and every job includes documentation you can hand directly to a local inspector if a permit applies.
An Installer’s View: Where DIY Should Stop
Homeowners can safely handle the easy part: finding the model number, ordering the correct kit, and reading the instructions before we arrive. Where we see trouble is orifice swaps done without a torque check, regulators left on the wrong setting, and skipped combustion tests. Save yourself the callback and let a licensed tech handle the final connections, leak test, and CO check.
— MDTECH
Get a Licensed, Documented Natural Gas Conversion
This service gives you what a parts catalog and a Saturday afternoon can’t: a licensed technician who confirms your kit is correct, performs the pressure and combustion checks an inspector will ask about, and hands you documentation the same day. Rather than gambling on a generic kit or an unverified online tutorial, you get a conversion tested to code the first time.
Our gas appliance conversion service covers the full process from kit verification to final relabeling, and we coordinate permit paperwork when your city requires it. If your propane dryer needs a second opinion before you order parts, or you’d rather skip the DIY risk entirely, request a quote through our appliance repair services page and we’ll schedule a technician to handle the conversion from start to finish.
Resources Worth Checking Before You Convert
Before ordering parts, review your manufacturer’s own conversion kit page (GE and Whirlpool both publish model-specific listings), InspectAPedia’s technical notes on orifice conversion safety, and ENERGY STAR’s comparison of dryer efficiency if you’re weighing replacement against conversion. Each source covers a different piece of the decision, from parts compatibility to long-term energy costs.
Sources
- InspectAPedia — Gas orifice conversion safety and technical notes
- GE Appliances — conversion kit guidance
- Plainpaper
- Whirlpool — Gas dryer conversion kit product page
FAQ
How much does it cost to convert a propane dryer to natural gas?
Kits themselves are inexpensive, but licensed labor typically runs $150 to $500 per appliance depending on model complexity and local rates. Add a modest permit fee if your jurisdiction requires an inspection.
Is there a real difference between a natural gas dryer and a propane dryer?
Yes. The two run on fuels with different BTU output per cubic foot, which means they use different burner orifice sizes and regulator settings, as explained in this propane-to-natural gas guide. A dryer built for one fuel type cannot simply be plugged into the other’s gas line without the correct conversion kit.
Is there a kit available to convert a GE gas dryer to propane or natural gas?
Many GE dryer models have manufacturer-approved conversion kits listed on the GE Appliances parts site, tied to specific model numbers. Always confirm your exact model against GE’s current listing before ordering, since not every model is convertible.
Is it cheaper to run a dryer on propane or electric?
Costs vary by local utility rates, but propane generally costs more per unit of heat delivered than electricity in many regions, and both often cost more than natural gas where it’s available. If ongoing fuel cost is your main concern, an ENERGY STAR heat pump electric dryer that uses about 70% less energy than a standard electric model is worth comparing against conversion costs.
Can Mdtechservices convert my dryer and handle the permit at the same time?
Yes. Mdtechservices technicians verify kit compatibility, perform the mechanical conversion, run pressure and combustion checks, and provide documentation for local permit or inspection requirements as part of the same visit. You can request a quote through our gas appliance repairs page.