Nearly 80 percent of American households rely on a dryer for their laundry needs, but many installations fall short of critical safety standards. The process might seem straightforward, yet skipping key steps can result in decreased efficiency or even serious hazards. By learning how to prepare properly and verify all connections, you can achieve a safe and reliable setup that protects both your home and your investment.
Table of Contents
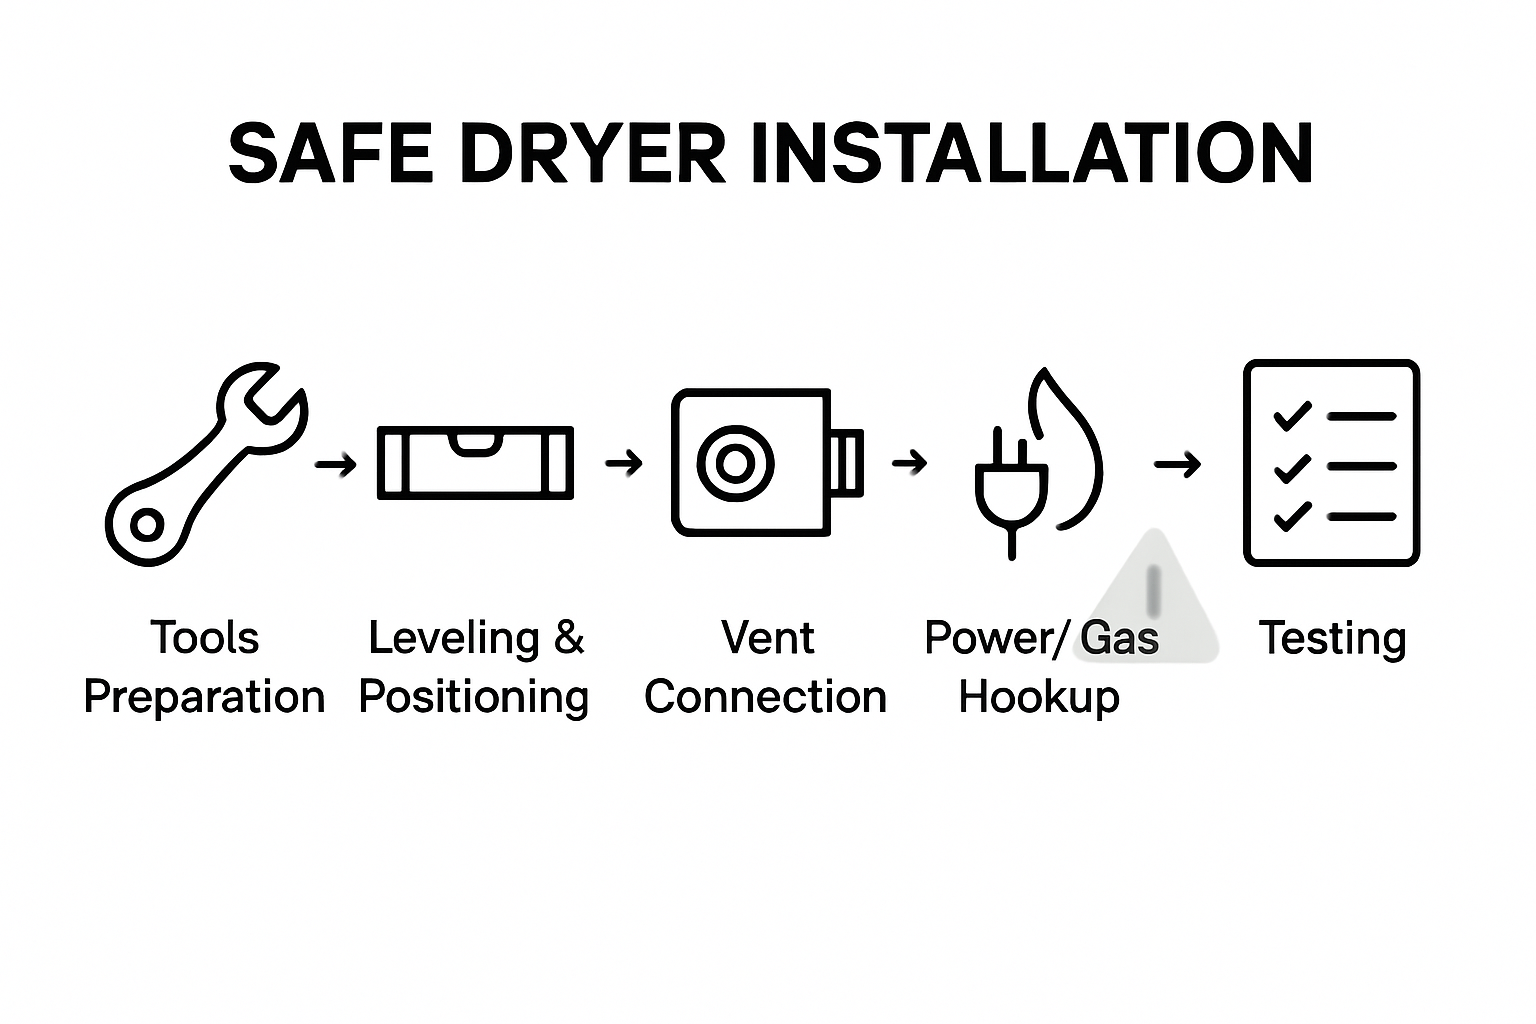
- Step 1: Gather Required Tools and Verify Connections
- Step 2: Position and Level the Dryer in Place
- Step 3: Connect Venting and Attach Ductwork
- Step 4: Install Power Source and Gas Line Properly
- Step 5: Test Dryer for Safe and Reliable Operation
Quick Summary
| Key Insight | Explanation |
|---|---|
| 1. Assemble the Right Tools | Preparing an adjustable wrench, screwdrivers, vent clamps, and measuring tape is essential for a successful dryer installation. |
| 2. Verify Electrical and Gas Connections | Ensure all connections are secure and compliant with safety standards to prevent hazards like fires or gas leaks. |
| 3. Position and Level the Dryer | Placing your dryer on a solid, level surface is crucial to ensure its efficient operation and stability. |
| 4. Use Proper Venting Techniques | Employ rigid metal ducts for safety, ensuring vents terminate outside away from openings to prevent blockages. |
| 5. Conduct a Thorough Test Cycle | Run a complete test cycle to check for unusual sounds or issues, ensuring safe and reliable operation for your dryer. |
Step 1: Gather Required Tools and Verify Connections
Before diving into your dryer installation, you need to prepare the right tools and check your connection points carefully. A successful setup begins with thorough preparation and strategic verification of all components.
Start by assembling your installation toolkit. You will need an adjustable wrench, Phillips and flathead screwdrivers, vent clamps, and a measuring tape. Proper tool selection is critical for safe installation and can prevent potential issues down the line. Pay close attention to your electrical and gas connections – each requires specific verification steps. For electrical connections, ensure you have the correct voltage and amperage for your specific dryer model, and verify that your outlet matches the plug type.
One key safety tip: always double-check your connections before powering on the appliance. Comprehensive connection verification helps prevent potential fire hazards and ensures efficient dryer performance. This means carefully examining the exhaust duct, confirming gas line integrity, and ensuring all electrical connections are secure and correctly configured.
Your next step will involve positioning the dryer and finalizing those critical connections, so having your tools ready and connections pre-verified sets you up for a smooth installation process.
Step 2: Position and Level the Dryer in Place
Now that you have your tools ready, it is time to carefully position and level your dryer for optimal performance and safety. This critical step ensures your appliance operates efficiently and remains stable during use.
Placing the dryer on a solid, level surface is fundamental to preventing potential operational issues. Start by clearing the installation area of any debris or obstacles. Measure the space to confirm your dryer will fit comfortably, leaving enough room for proper ventilation around the appliance. Most dryers require at least one inch of clearance on all sides to prevent overheating and ensure optimal air circulation.
Adjusting the leveling legs is crucial for maintaining stability. Use your adjustable wrench to carefully extend or retract the legs until the dryer sits perfectly level. A simple bubble level can help you verify the appliance is balanced correctly. Uneven positioning can cause unnecessary strain on the machine, potentially leading to premature wear or unbalanced drum rotation.
With your dryer now precisely positioned and leveled, you are ready to move on to connecting the electrical and gas lines, bringing you one step closer to a fully functional laundry setup.
Step 3: Connect Venting and Attach Ductwork
With your dryer positioned perfectly, it is time to tackle one of the most critical aspects of installation connecting the venting system to ensure safe and efficient operation. Proper venting is essential for preventing potential fire hazards and maintaining your dryer’s performance.
Using rigid metal ducts is recommended for the most secure and efficient venting setup. Begin by measuring the distance from your dryer to the exterior wall, cutting the ductwork to the appropriate length. Secure all joints carefully using approved foil tape or specialized duct clamps, avoiding standard screws that can trap lint and create potential fire risks. Ensure the exhaust path is as straight and short as possible, with minimal bends to maximize airflow and reduce potential obstruction points.
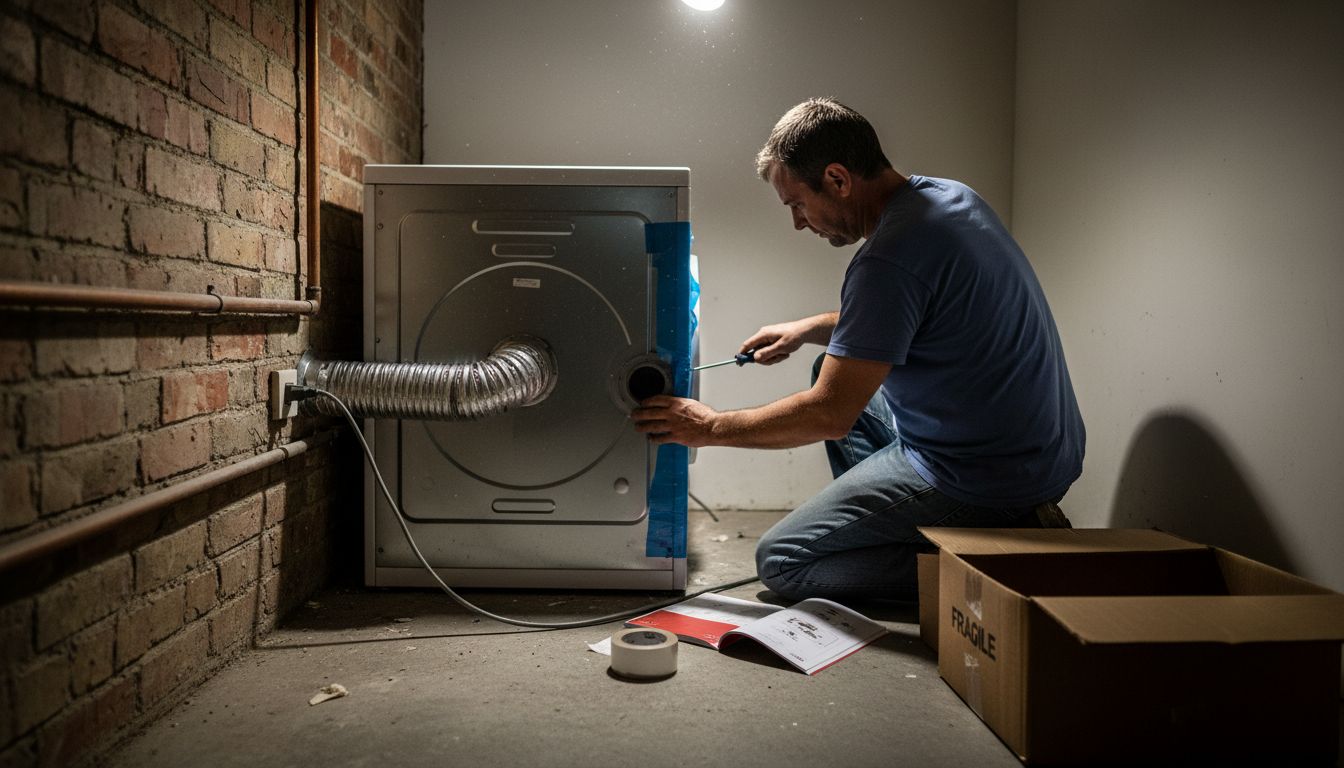
Pay special attention to the exterior termination point. The duct must terminate outside the home, away from windows and other openings, with a proper vent cover that prevents pests and debris from entering while allowing warm air to escape. A well-installed venting system not only protects your home but also significantly improves your dryer’s efficiency and longevity.
With the venting system securely in place, you are now ready to move on to the electrical and gas connections that will bring your dryer to life.
Step 4: Install Power Source and Gas Line Properly
With your dryer positioned and venting prepared, the next critical phase involves carefully installing the power source and gas line. This step requires precision and attention to safety to ensure your dryer operates correctly and without risk.
Electric dryers demand a specific electrical configuration, typically requiring a 120/240 volt, 30 amp dedicated circuit. Before beginning, turn off the main power supply at your circuit breaker to prevent any electrical hazards. Carefully connect the dryer cord to the terminal block, ensuring each wire is securely fastened and properly grounded. For gas dryers, you will need to connect the gas line using appropriate fittings and apply pipe sealant designed specifically for gas connections.
A critical safety warning never attempt to modify electrical or gas connections if you are not completely confident in your skills. Incorrect installation can lead to fire risks, gas leaks, or potential electrical shock. If you have any doubts about your ability to complete this step safely, it is strongly recommended to hire a licensed professional who can ensure the installation meets all local building and safety codes.
Once your power and gas connections are securely in place, you are ready for the final steps of testing and calibrating your new dryer.
Step 5: Test Dryer for Safe and Reliable Operation
With your dryer installed and connections complete, the final crucial step is thoroughly testing the appliance to ensure it operates safely and efficiently. This verification process will help identify any potential issues before they become serious problems.
Begin by running the dryer through a complete test cycle, paying close attention to its performance and any unusual sounds or behaviors. Carefully inspect the entire exhaust system during this initial test, checking for proper airflow and verifying that the external vent is expelling air consistently and without obstruction. Listen for any irregular noises and monitor the dryer’s temperature to ensure it is heating and operating within normal parameters.
Watch for critical warning signs during your test run. Excessive vibration, unusual smells, inconsistent heating, or restricted airflow could indicate installation problems that require immediate attention. If you notice anything concerning, stop the dryer immediately and consult a professional technician. A thorough initial test can prevent potential safety hazards and extend the lifespan of your new appliance.
Congratulations you have now successfully installed and tested your dryer, ready to handle your laundry needs with confidence and safety.
Ensure a Safe and Efficient Dryer Installation with Expert Help
Installing a dryer involves careful attention to detail from verifying power sources to proper venting and precise leveling. If you are facing challenges like uncertain electrical connections, gas line setup, or vent installation, you are not alone. Many homeowners struggle with the risks of improper setup that can lead to safety hazards or inefficient dryer performance. Key concerns such as securing exhaust ducts correctly and confirming safe gas connections highlight why professional assistance is often necessary.
Take the stress out of your dryer installation by letting licensed technicians handle the job with proven expertise and safety-first practices. MDTech Services specializes in residential appliance installation and repair with a local focus in Orange County and Los Angeles County. We understand the specific codes for electrical and gas hookups and guarantee secure venting solutions to keep your home safe.
Ready to avoid potential hazards and ensure your dryer runs smoothly from day one

Experience peace of mind and quick service by booking your professional dryer installation today. Visit MDTech Services for responsive local service you can trust. Learn more about our appliance repair and installation solutions or schedule your appointment directly online for fast expert help.
Frequently Asked Questions
What tools do I need for dryer installation?
You’ll need an adjustable wrench, Phillips and flathead screwdrivers, vent clamps, and a measuring tape. Gather these tools before starting to ensure a smooth installation process.
How do I verify electrical and gas connections before installing the dryer?
Check that the voltage and amperage match your dryer model and ensure the outlet matches the plug type. For gas connections, inspect the gas line integrity to confirm it is secure and ready for use.
How can I ensure my dryer is level during installation?
Position your dryer on a solid, level surface and adjust the leveling legs until it sits perfectly level. Use a bubble level to confirm it’s balanced, which helps prevent wear and operational issues.
What is the proper way to connect the venting system for my dryer?
Use rigid metal ducts for the venting system, and ensure they are cut to the appropriate length with minimal bends. Secure all joints using approved foil tape, and ensure the vent terminates outside your home to prevent lint buildup.
How do I safely connect the power source and gas line to my dryer?
For electric dryers, connect the dryer cord to the terminal block after turning off the main power supply. If you are connecting a gas line, use appropriate fittings and apply gas-specific pipe sealant to ensure a safe connection.
What should I check during the initial test run of my dryer?
Run your dryer through a complete test cycle and observe its performance for any unusual sounds or irregular heating. Pay attention to airflow and temperature to ensure everything operates within normal parameters.
Recommended
- Stackable Washer & Dryer installation – MDTech Services
- Washer Washing machine repair or Installation service Repairing Your Washer: Expert Tips for Fixing and Installing Washing Machines – MDTech Services
- Complete Guide to Residential Appliance Installation – MDTech Services
- Appliance Installation Guide for Safe Home Setup
- How to Care for Fabrics: Step-by-Step Guide for Lasting Quality – fabric fabric