
Descale your tankless water heater once a year as a baseline, more often if you have hard water. Clean the inlet filter every 3 to 12 months depending on water quality, run a quick visual check monthly for leaks, vent blockages, and error codes, and call a licensed technician for anything involving gas lines, burners, or combustion components.
TL;DR:
- Descaling your tankless water heater annually is essential, especially if you have hard water, to prevent scale buildup that can reduce efficiency by up to 30 percent.
- Always confirm your model has isolation valves before attempting a DIY flush; manually working around missing hardware risks damage and voids warranties.
- Homeowners can handle filter cleaning, inlet vent inspection, and descaling with approved solutions, but gas lines, combustion components, and vent repairs require a licensed technician.
- Error codes, inconsistent hot water, or reduced flow often indicate mineral buildup, requiring a flush, while recurring issues with ignition or air blockages need professional inspection.
- Keeping a maintenance log and scheduling annual professional service ensures proper function, preserves warranty rights, and extends the unit’s lifespan beyond 15 years.
Table of Contents
- Quick Tankless Water Heater Maintenance Checklist
- How Do You Flush and Descale a Tankless Water Heater Yourself?
- Checking Filters, Vents, and Condensate Drains
- What Does an Annual Professional Tankless Water Heater Service Include?
- DIY or Call a Pro? Where the Line Actually Falls
- Common Tankless Water Heater Problems and What to Check First
- Descaling and Filter Cleaning Schedule by Water Hardness
- Field Notes From MDTECH: What Actually Wears These Units Down
- Book a Tankless Water Heater Service With MDTECH
- Sources
Quick Tankless Water Heater Maintenance Checklist
You don’t need a toolbox and a Saturday afternoon to stay ahead of most tankless problems. A few short habits, tracked over the year, catch small issues before they become expensive ones.
Monthly:
- Walk around the unit and check for water pooling, drips, or corrosion near fittings.
- Listen for rattling, popping, or humming that wasn’t there before.
- Check the display for error codes and write down what you see, even if the unit seems fine.
Every 3 to 12 months (based on your water quality):
- Remove and rinse the inlet water filter or screen.
Seasonally:
- Look at the exterior vent termination for nests, leaves, or ice buildup.
- Check the condensate drain line on condensing models for slow drainage or algae growth.
Keep a simple log with dates, what you did, and any receipts from professional visits. If you ever need warranty service, that paper trail matters more than you’d think. A maintenance checklist for homeowners built specifically around seasonal reminders makes this easier to stick to than a mental note.
How Do You Flush and Descale a Tankless Water Heater Yourself?
Before you touch anything, open your owner’s manual and confirm two things: that your model permits homeowner flushing, and that it has isolation (service) valves installed. Some tankless units, especially older installs, were never fitted with these valves. If yours wasn’t, don’t improvise a workaround. Call a technician instead of forcing a flush without the right hardware.
Manufacturers like Bosch and Rheem both walk homeowners through similar descaling routines, and the process is more mechanical than technical once you have the right gear. Here’s what you’ll need on the counter before you start:
- A small submersible utility pump
- Two washing machine hoses with standard fittings
- A 5 gallon bucket (or larger)
- A descaling solution approved by your manufacturer, or food-grade white vinegar if your manual permits it
- Rubber gloves and safety glasses
- A small adjustable wrench
Step-by-step flush procedure:
- Power down the unit. Shut off electrical power at the breaker. If your manual instructs it, shut off the gas supply too, though most flush procedures don’t require touching the gas line at all.
- Close the isolation valves. Turn the hot and cold service valves to the closed position, cutting the heater off from your home’s plumbing.
- Connect your hoses. Attach one hose from the pump to the cold-side service port, and the other from the hot-side port into your bucket.
- Fill and circulate. Pour your descaling solution into the bucket, submerge the pump, and let it circulate through the heat exchanger for 30 to 60 minutes. Check your specific manufacturer’s recommended time, since this varies by unit.
- Drain the solution. Turn off the pump and let the used solution drain fully from the system.
- Flush with clean water. Disconnect the descaling bucket, run clean water through the same hose setup for 5 to 10 minutes to rinse out any remaining residue.
- Clean the inlet filter. While the unit is isolated anyway, pull the inlet screen and rinse off any sediment.
- Reopen the valves and restore power. Open the isolation valves fully before turning electrical power back on, then run a hot water tap to confirm normal flow and temperature.
Pro Tip: Label your hoses “hot” and “cold” with tape before you start. It sounds unnecessary until you’re mid-flush and can’t remember which port goes where.
A few safety notes worth repeating: never open a gas fitting yourself, never substitute a harsh household chemical for an approved descaling solution, and if you can’t locate isolation valves, stop and schedule a professional visit rather than working around the missing hardware. BobVila’s flushing guidance treats an annual flush as the baseline for most households, and waiting until you notice a performance drop usually means scale has already been accumulating for years.
Checking Filters, Vents, and Condensate Drains
Your inlet water filter is the first line of defense against sediment, and it’s also the easiest maintenance task to overlook because it’s small and often tucked behind a removable cap near the cold water connection. If you notice weaker hot water flow, fluctuating temperatures, or a filter-related error code on the display, that’s your cue to pull it and rinse it under a tap, even if you’re not due for a scheduled check.
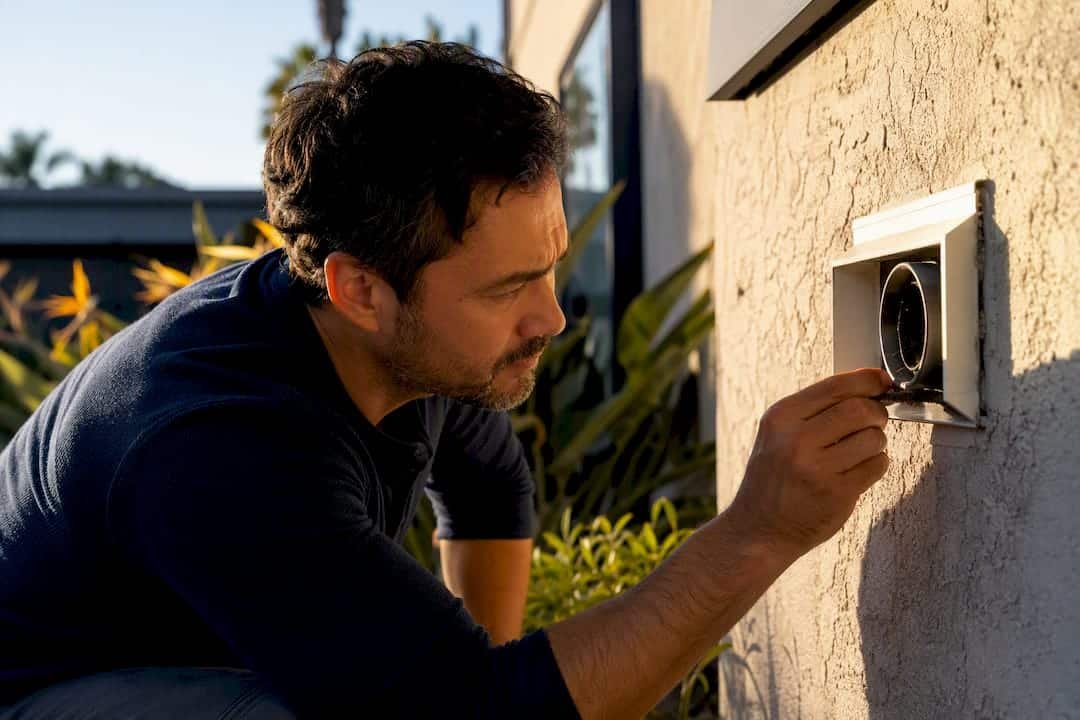
Venting deserves equal attention, especially if your unit vents through an exterior wall. Look for:
- Bird nests or spider webs blocking the intake or exhaust termination
- Cracked, disconnected, or corroded vent pipe sections
- Missing clearance around the termination (snow drifts and stacked storage bins are common culprits)
Condensing tankless models add one more item to the list: the condensate trap and drain line. These units produce mildly acidic condensation that needs a clear path out, often through a neutralizer cartridge. A slow drain, visible leak at the trap, or standing water near the base of the unit signals it’s time to check that pathway.
Here’s the practical line between homeowner and technician territory: you can safely handle filter cleaning and a visual vent inspection. Clearing debris from an exterior termination, replacing neutralizer media, or diagnosing a condensate leak inside the unit’s cabinet is technician work, particularly because those repairs often involve disassembly you don’t want to attempt without training.
What Does an Annual Professional Tankless Water Heater Service Include?
A licensed technician’s visit covers ground a homeowner flush simply can’t reach, and that’s exactly the point of scheduling one every year even if your unit seems to be running fine. Rheem’s maintenance guidance outlines burner and flame sensor cleaning as standard parts of a professional visit, tasks that involve partial disassembly and combustion safety checks most homeowners aren’t equipped to perform.
A thorough annual visit typically includes:
- Descaling the heat exchanger if scale buildup is present
- Visually inspecting the heat exchanger for leaks, soot, or corrosion
- Removing and cleaning the burner assembly and flame sensors
- Inspecting the venting system end to end, inside and out
- Testing the pressure-relief valve for proper operation
- Checking gas line connections and testing for leaks
- Verifying condensate drainage on condensing units
Unmaintained scale buildup can cut heat-transfer efficiency by 20 to 30 percent, which pushes your unit to work harder for the same hot water output and can shorten its service life considerably. That efficiency loss is exactly what the Department of Energy points to when it notes that tankless units only hold onto their efficiency advantage over tank models when they’re properly maintained.
Ask your technician for a written service checklist and a dated receipt every time. That paper record is often the difference between a manufacturer honoring a warranty claim and denying one for lack of documented maintenance. It’s also worth reading through a broader annual plumbing maintenance checklist so your water heater service lines up with the rest of your home’s upkeep schedule rather than happening in isolation.
DIY or Call a Pro? Where the Line Actually Falls
The safest way to think about tankless maintenance is to sort every task into one of two buckets: things you can do with basic tools and a manual in hand, and things that require a license and specialized diagnostic equipment. Blurring that line is where warranty claims get denied and, worse, where safety incidents happen.
Tasks you can safely handle yourself:
- Monthly visual inspections for leaks, corrosion, and unusual sounds
- Reading and logging error codes from the display
- Cleaning the inlet water filter
- Flushing the unit with an approved descaler, but only if your manual permits it and isolation valves are installed
Tasks that belong to a licensed technician:
- Any work on gas supply lines or fittings
- Burner, flame sensor, or combustion component service
- Vent repair, replacement, or clearance corrections
- Condensate drain repairs inside the unit cabinet
- Diagnosing persistent or recurring error codes
Several trade sources, including Waveworks’ guidance on self-servicing, draw this same distinction: filter cleaning and basic flushing are homeowner-friendly, but gas and combustion work should stay with a licensed professional every time.
Treat these as immediate stop-and-call signs, no exceptions: a gas odor near the unit, a CO alarm activation anywhere in the house, an error code that keeps returning after a reset, or any visible leak coming from the heat exchanger itself. None of those are DIY situations, and following your manual’s guidance while keeping dated service receipts is what actually protects your warranty if a dispute ever comes up. A step-by-step homeowner guide can help you sort a minor fix from a call-now situation before you decide which bucket a problem falls into.
Common Tankless Water Heater Problems and What to Check First
Most tankless failures trace back to one of four causes, and knowing which one you’re looking at saves a lot of guesswork. Eccotemp’s rundown of common failure modes covers the pattern most homeowners run into eventually.
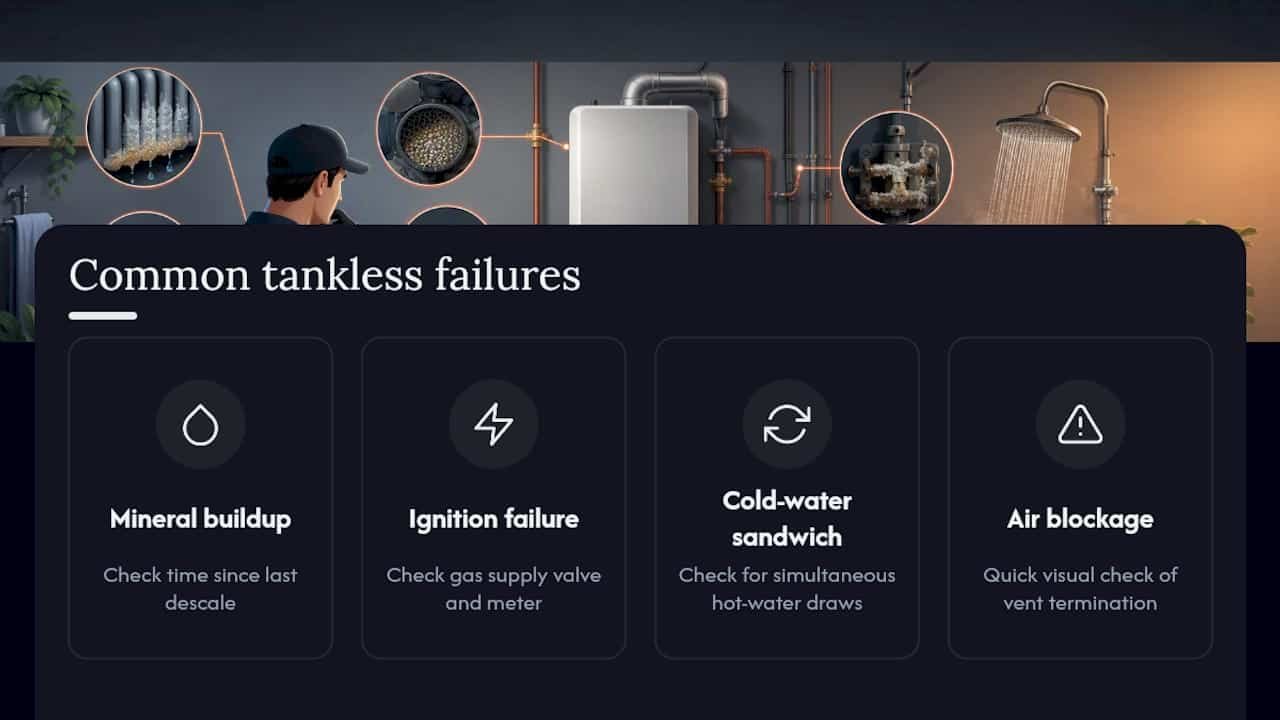
Mineral buildup shows up as inconsistent temperatures, reduced flow, or a rise in energy use for the same hot water output. If it’s been more than a year since your last descale, or you know you have hard water, this is usually the culprit. The fix is a flush, or shortening your descaling interval going forward.
Ignition and flame failures typically throw an error code before anything else happens. Check that your gas supply valve is fully open and that nothing has tripped at the meter, but don’t touch the gas fittings yourself. If the supply checks out and the error persists, that’s a technician call.
Cold-water sandwich feels like a brief burst of cold water between two hot draws, and it’s often a sign your unit is being asked to cycle faster than it’s designed for, especially if two showers or a shower and a dishwasher run simultaneously. Sometimes the fix is behavioral. Sometimes it means your household’s demand has outgrown a single unit’s capacity, and a second unit or a larger model is the real solution.
Air and exhaust blockages trigger shutdown codes and are worth a quick visual check of the vent termination before you call anyone.
Descaling and Filter Cleaning Schedule by Water Hardness
Your local water hardness determines your maintenance rhythm more than any other single factor. The USGS defines hardness in grains per gallon (gpg), based on dissolved calcium and magnesium, and that number should drive how often you descale.
Always defer to your manufacturer’s manual over this table if the two disagree, since some units are more scale-tolerant than others by design. If you’re descaling more than twice a year to keep performance steady, a whole-home water softener or treatment system is usually the more cost-effective long-term fix than repeated flushing.
Field Notes From MDTECH: What Actually Wears These Units Down
Most of the tankless failures we see at Mdtechservices trace back to the same root cause: nobody flushed the unit until it started acting up. By then, scale has usually been building for a year or more, and what should have been a routine 45 minute service call turns into a heat exchanger replacement conversation.
We specialize in repairing and installing major household appliances, including refrigerators and ice machines from brands like Sears, and that same responsiveness and safety-first approach carries into how we handle tankless water heaters across Orange County and Los Angeles County. Our technicians are licensed and trained specifically in gas appliance work, including LP to natural gas conversions, which means combustion and venting checks aren’t an afterthought during a service visit. They’re the priority.
The homeowners who avoid expensive repairs are almost always the ones who keep a simple log and book an annual check before anything feels wrong, showing how waterproofing maintenance protects your property value by preventing costly damage. That habit, more than any single tool or product, is what separates a tankless unit that lasts 15 years from one that needs major work at year six.
— MDTECH
Book a Tankless Water Heater Service With MDTECH
If descaling, vent checks, and gas connection tests sound like more than you want to handle alone, that’s exactly the gap Mdtechservices was built to close. We’re the local option for homeowners in Orange County and Los Angeles County who want a licensed technician handling the combustion, venting, and gas-line work that shouldn’t be a weekend project.
Booking is straightforward through our online scheduling system. Before your visit, jot down any error codes you’ve seen, note how long it’s been since your last descale, and have your unit’s model number ready so we can bring the right parts. Every visit comes with a written service checklist and a dated receipt, which keeps your maintenance records intact if you ever need to file a warranty claim. If you want to see how our appliance and HVAC repair process works before you book, our appliance repair overview walks through what to expect from a typical service call, and it’s a good place to start when you’re ready to get your tankless system back on a maintenance-friendly schedule.
Sources
- How to keep your tank and tankless water heaters running at peak performance — Rheem
- Hardness and alkalinity of water — USGS
- How to clean a tankless water heater — BobVila