Your ice maker stopped working right when you needed ice for guests. Most ice maker failures stem from simple issues like clogged filters, frozen water lines, or incorrect temperature settings. This guide walks you through practical repair steps you can complete yourself using basic tools and safety precautions. Following these instructions can restore ice production quickly while saving you the cost of an emergency service call.
Table of Contents
- Understanding How Your Ice Maker Works
- Preparing To Repair Your Ice Maker: Tools, Safety, And Settings
- Step By Step Repair For Common Ice Maker Problems
- Verifying Your Repair And Maintaining Your Ice Maker
- Get Expert Appliance Repair Help When You Need It
- Frequently Asked Questions
Key takeaways
| Point | Details |
|---|---|
| Maintain proper temperature | Keep freezer at 0°F for optimal ice production |
| Replace filters regularly | Change water filters every six months to prevent clogs |
| Thaw frozen lines safely | Use a hairdryer at a safe distance after unplugging the refrigerator |
| Check basic components | Inspect ice maker switch and water supply lines during routine maintenance |
Understanding how your ice maker works
Knowing how your ice maker operates helps you diagnose problems faster and repair them correctly. A refrigerator ice maker automates ice production by filling a mold, freezing water, softening ice edges, and ejecting cubes via a motorized arm. The entire cycle repeats automatically as long as the bin has space and the system receives adequate water supply.
The main components work together in a precise sequence. The water inlet valve controls water flow into the mold. A thermostat monitors temperature and signals when freezing is complete. The control module orchestrates timing for each cycle phase. The ejector arm pushes finished ice cubes into the storage bin. Understanding these parts helps you identify which component might be causing your specific problem.
Temperature control plays a critical role in ice formation quality and speed. If your freezer runs too warm, ice production slows or stops entirely. Too cold, and you might experience frost buildup that blocks mechanical parts. Most manufacturers design ice makers to function optimally within a narrow temperature range.
Routine cleaning and maintenance improve reliability significantly. Mineral deposits from hard water accumulate on surfaces and restrict water flow. Ice residue builds up in the mold and affects cube shape. Regular attention to ice machine servicing basics prevents these issues from escalating into complete failures.
Key components to familiarize yourself with include:
- Water inlet valve that opens and closes to fill the mold
- Ice mold where water freezes into cube shapes
- Ejector arm that pushes finished ice into the bin
- Thermostat that monitors freezing temperature
- Control module that coordinates the entire cycle
- Shutoff arm that stops production when the bin fills
Preparing to repair your ice maker: tools, safety, and settings
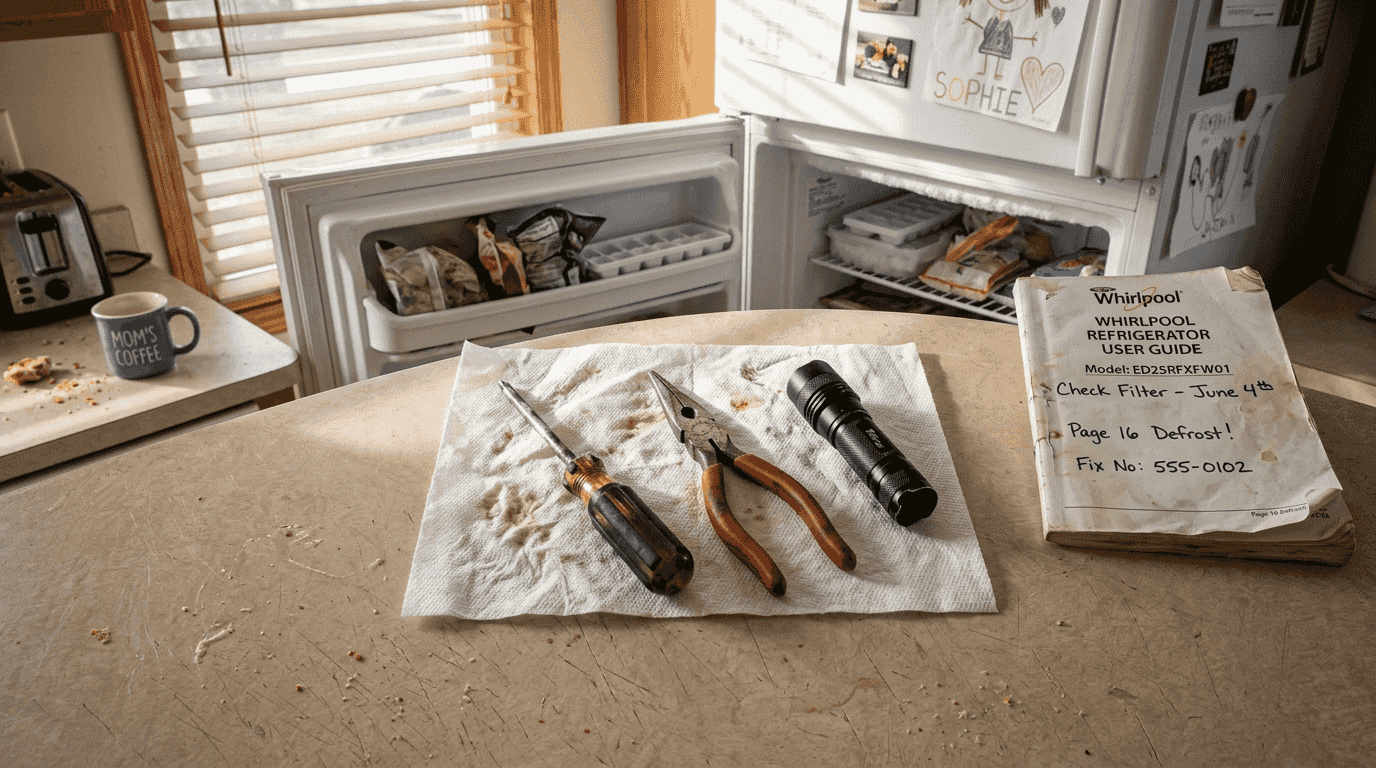
Gathering the right tools before starting saves time and prevents frustration during repairs. You need a Phillips head screwdriver for removing panels and accessing internal components. A hairdryer helps thaw frozen water lines safely. Keep replacement water filters on hand since clogged filters cause many ice maker failures. A flashlight illuminates tight spaces inside the freezer compartment. A small bucket catches water when disconnecting supply lines.
Safety comes first when working with any appliance. Unplug your refrigerator completely before starting any repair work. This prevents electrical shock and stops the ice maker cycle so you can work safely. If you cannot reach the plug easily, switch off the circuit breaker controlling the refrigerator. Wait five minutes after disconnecting power before touching any components.
Check and adjust your freezer temperature to 0°F before troubleshooting other issues. During warmer months, lowering it to negative 2°F may be helpful if ice production lags. Use the refrigerator’s built in thermometer or place an appliance thermometer in the freezer for accurate readings. Incorrect temperature causes more ice maker problems than any other single factor.
Pro Tip: Write down your refrigerator’s model number before starting repairs. This number appears on a sticker inside the fresh food compartment or on the back panel. Having it ready helps you find model specific troubleshooting guides and order the correct replacement parts if needed.
Document your refrigerator’s configuration with photos before disassembling anything. Take pictures of wire connections, panel positions, and component orientations. These images serve as reference points during reassembly and prevent confusion about where parts belong. Most modern smartphones capture sufficient detail for this purpose.
Create a clean workspace by removing food items from the freezer compartment. This gives you room to maneuver and prevents accidental spills on frozen goods. Place perishables in a cooler with ice packs if repairs will take more than 30 minutes. Wipe down surfaces to remove frost and ice buildup that might obstruct your view of components. Consult the refrigerator fix guide for additional preparation steps specific to your appliance type.
Step by step repair for common ice maker problems
Start with the simplest checks before moving to more complex repairs. Many ice maker failures result from issues you can spot and fix in minutes without tools.
-
Check that the ice maker switch is in the on position. This switch typically appears as a wire arm or electronic button near the ice mold. Verify the ice storage bin sits properly in position since many models include a sensor that stops production when the bin is removed or misaligned.
-
Replace the water filter every six months or sooner if you have hard water. Clogged filters restrict water flow and prevent the mold from filling completely. Locate the filter housing, usually inside the refrigerator compartment or in the base grille. Twist the old filter counterclockwise and pull it straight out. Insert the new filter and twist clockwise until it locks. Run water through the dispenser for several minutes to flush the new filter.
-
Inspect for frozen water supply lines and thaw them carefully using a hairdryer while power is off. Frozen tubes block water from reaching the ice maker mold. Locate the small plastic or copper tube running from the back of the refrigerator to the ice maker. Feel along its length for cold spots or visible ice. Hold the hairdryer 6 to 8 inches away and move it constantly to avoid melting plastic components. Thawing typically takes 10 to 15 minutes.
-
Examine the water supply line for kinks, clogs, or damage. Trace the line from the wall connection to the refrigerator inlet. Straighten any bent sections that might restrict flow. Disconnect the line at both ends and blow through it to check for obstructions. Replace damaged tubing with the same diameter and material.
-
Reset the control module if your model includes a test button. Press and hold this button for 3 seconds to initiate a manual cycle. Listen for the water valve to click and watch for water entering the mold. This test confirms the electrical system functions correctly even if ice production has stopped.
Pro Tip: Keep two replacement water filters in your pantry at all times. When you install one, order another immediately so you always have a spare ready. This habit prevents the temptation to delay filter changes when you run out of replacements.
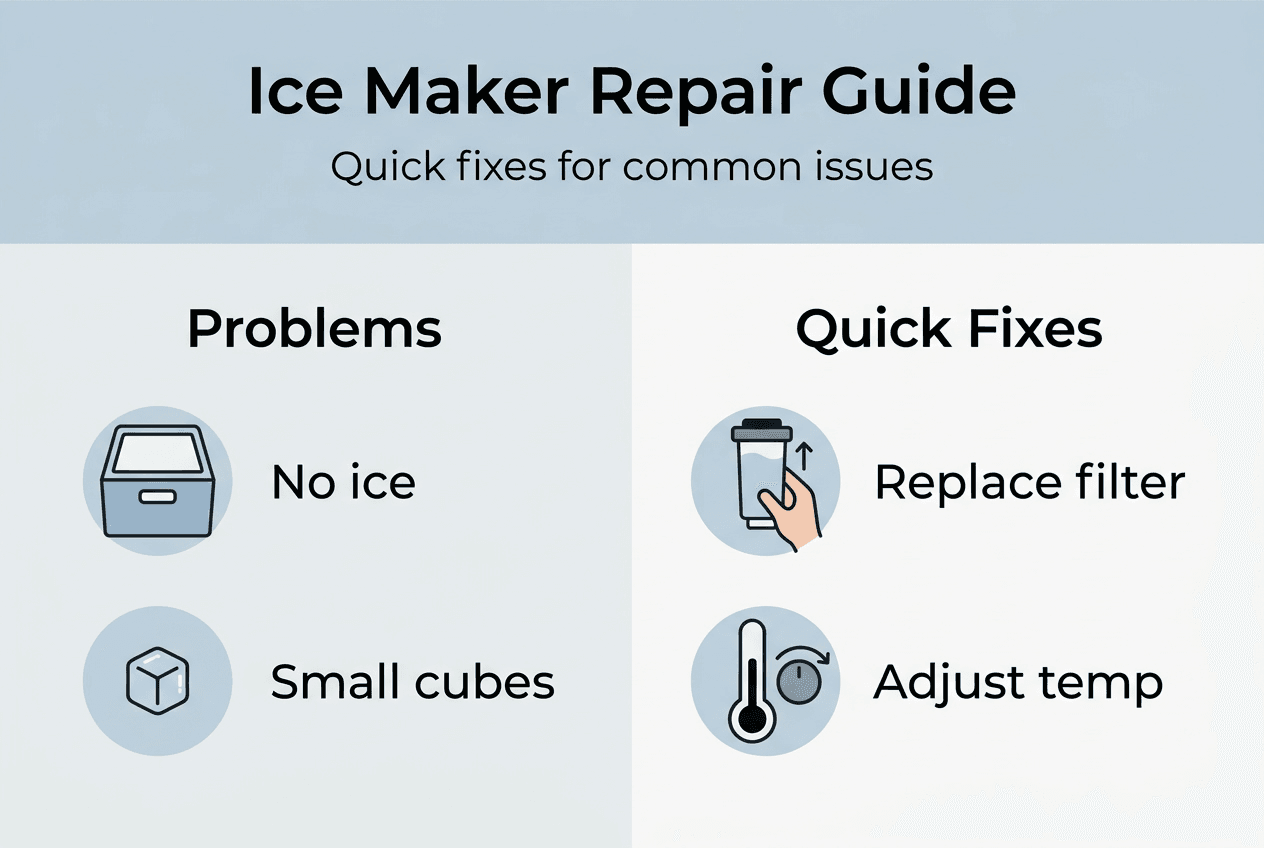
Many ice maker problems have simple, DIY solutions identifiable with basic troubleshooting steps. The table below summarizes common issues and their typical causes.
| Problem | Likely Cause | Quick Fix |
|---|---|---|
| No ice production | Clogged water filter | Replace filter immediately |
| Slow ice production | Freezer too warm | Lower temperature to 0°F |
| Small or hollow cubes | Low water pressure | Check supply line for kinks |
| Ice tastes bad | Old filter or dirty bin | Replace filter and clean bin |
| Maker runs but no ice | Frozen water line | Thaw line with hairdryer |
For detailed repair procedures specific to your ice maker type, reference the icemaker repair guide which covers brand specific variations. Additional troubleshooting for refrigerator related issues appears in the guide covering common refrigerator problems.
Verifying your repair and maintaining your ice maker
After completing repairs, run several test cycles to confirm ice production resumes properly. Press the test button if available, or simply wait 24 hours for the first batch of ice to form. The initial batch might appear smaller or oddly shaped as the system purges air from the water line. Discard these first cubes and evaluate the second batch for normal size and clarity.
Listen for unusual sounds during the ice making cycle. A properly functioning unit produces a quiet hum when water fills the mold and a gentle clicking when cubes eject. Loud grinding, buzzing, or knocking noises indicate mechanical problems that might require professional attention. Normal operation sounds rhythmic and consistent across multiple cycles.
Clean the ice mold and storage bin regularly to maintain hygiene and ice quality. Remove the bin and wash it with warm soapy water every month. Wipe the mold interior with a soft cloth dampened with mild detergent. Rinse thoroughly since soap residue affects ice taste. Dry all surfaces completely before reassembling to prevent frost buildup.
Schedule filter replacements based on your water quality and usage patterns. Regular maintenance including filter changes, cleaning ice mold and bin, and condenser coil cleaning optimize ice maker performance. Homes with hard water need more frequent filter changes, sometimes every three months instead of six. High usage households should also shorten the replacement interval.
The maintenance schedule below helps you plan routine tasks and avoid unexpected breakdowns.
| Task | Frequency | Benefit |
|---|---|---|
| Replace water filter | Every 6 months | Maintains water flow and ice quality |
| Clean ice bin | Monthly | Prevents bacteria and odor buildup |
| Wipe ice mold | Monthly | Removes mineral deposits |
| Check supply line | Quarterly | Catches leaks before damage occurs |
| Vacuum condenser coils | Every 6 months | Improves cooling efficiency |
Pro Tip: Mark filter replacement dates on your calendar or set smartphone reminders. Most people forget maintenance tasks without prompts. A simple reminder system prevents the gradual performance decline that comes from overdue maintenance.
Monitor ice production volume and quality over time. Sudden changes in cube size, clarity, or taste signal developing problems you can address before complete failure occurs. Keep notes about when you notice changes and what repairs you performed. This history helps identify patterns and guides future troubleshooting. Detailed maintenance records prove especially valuable when you need to describe symptoms to repair technicians.
Inspect visible components during regular cleaning sessions. Look for frost accumulation, water leaks, or loose connections. Catching these issues early prevents more extensive damage. The refrigerator repair guide offers additional inspection checklists for comprehensive appliance care.
Get expert appliance repair help when you need it
Some ice maker problems require professional diagnosis and repair, especially when basic troubleshooting does not restore function. Complex electrical issues, refrigerant leaks, or damaged control boards need specialized tools and expertise. Professional repair can save time if DIY approaches prove difficult or if you lack confidence working with appliance components.

MDTech Services offers guided repair support and comprehensive service options for homeowners throughout Orange County and Los Angeles County. Their licensed technicians handle everything from simple filter replacements to complete ice maker replacements. Whether you need advice on a repair you are attempting yourself or want a professional to handle the entire job, their team provides responsive and reliable assistance. The appliance repair homeowner guide explains what to expect during professional service calls.
Understanding what appliance repair involves helps you decide when to tackle problems yourself and when to call for help. For immediate professional assistance with ice maker issues, explore the icemaker repair service options available in your area.
Frequently asked questions
How often should I replace the water filter in my ice maker?
Replace your water filter at least every six months to maintain optimal ice production and quality. Filters should be replaced more frequently with hard water, sometimes as often as every three months. Clogged filters reduce water flow and cause small or hollow ice cubes. Mark your calendar when you install a new filter so you remember the replacement date.
What is the recommended freezer temperature for ice makers?
Set your freezer to 0°F for optimal performance. During warm months, lowering the temperature to negative 2°F may be needed if ice production slows. Use an appliance thermometer to verify accuracy since built in displays sometimes drift over time. Temperature too high prevents proper freezing while temperature too low can cause frost buildup that blocks mechanical components.
How can I safely thaw a frozen water line in my ice maker?
Turn off refrigerator power completely before attempting to thaw frozen water tubes. Use a hairdryer at a safe distance, holding it 6 to 8 inches from the frozen section and moving it constantly. Never apply direct heat or use open flames as these can melt plastic components or cause fires. Thawing typically takes 10 to 15 minutes of gentle, indirect heat application.
Why does my ice maker produce small or hollow cubes?
Small or hollow ice cubes usually indicate low water pressure reaching the ice maker mold. Check your water supply line for kinks, clogs, or damage that restricts flow. A clogged water filter also reduces pressure and should be replaced immediately. Verify the water inlet valve opens fully by listening for a strong flow sound when the cycle starts. Low household water pressure might require a booster pump for consistent ice production.
How do I know if my ice maker control module has failed?
A failed control module typically shows no response when you press the test button or attempt to start a manual cycle. The ice maker remains completely silent with no clicking, humming, or water flow sounds. Check for power to the unit first by verifying the switch is on and the refrigerator receives electricity. If power reaches the ice maker but nothing happens during a test cycle, the control module likely needs replacement by a qualified technician.
Recommended
- Step by Step Refrigerator Fix Guide for Homeowners – MDTech Services
- What is ice machine servicing? Cut breakdowns 35% in 2026
- Refrigerator Repair Explained: Complete Homeowner Guide – MDTech Services
- Refrigerator Repair: Common Issues Explained – MDTech Services
- 7 Steps Water Damage Insurance Checklist For Homeowners