More than 60 percent of refrigerator breakdowns could be avoided with simple at-home maintenance and repair steps. A faulty refrigerator does not just risk spoiled food, it can also increase energy bills and disrupt your daily routine. By learning how to safely prepare, inspect, and troubleshoot your fridge, you have the power to prevent bigger problems and save money. This guide walks you through every crucial step to restore your refrigerator’s function quickly and confidently.
Table of Contents
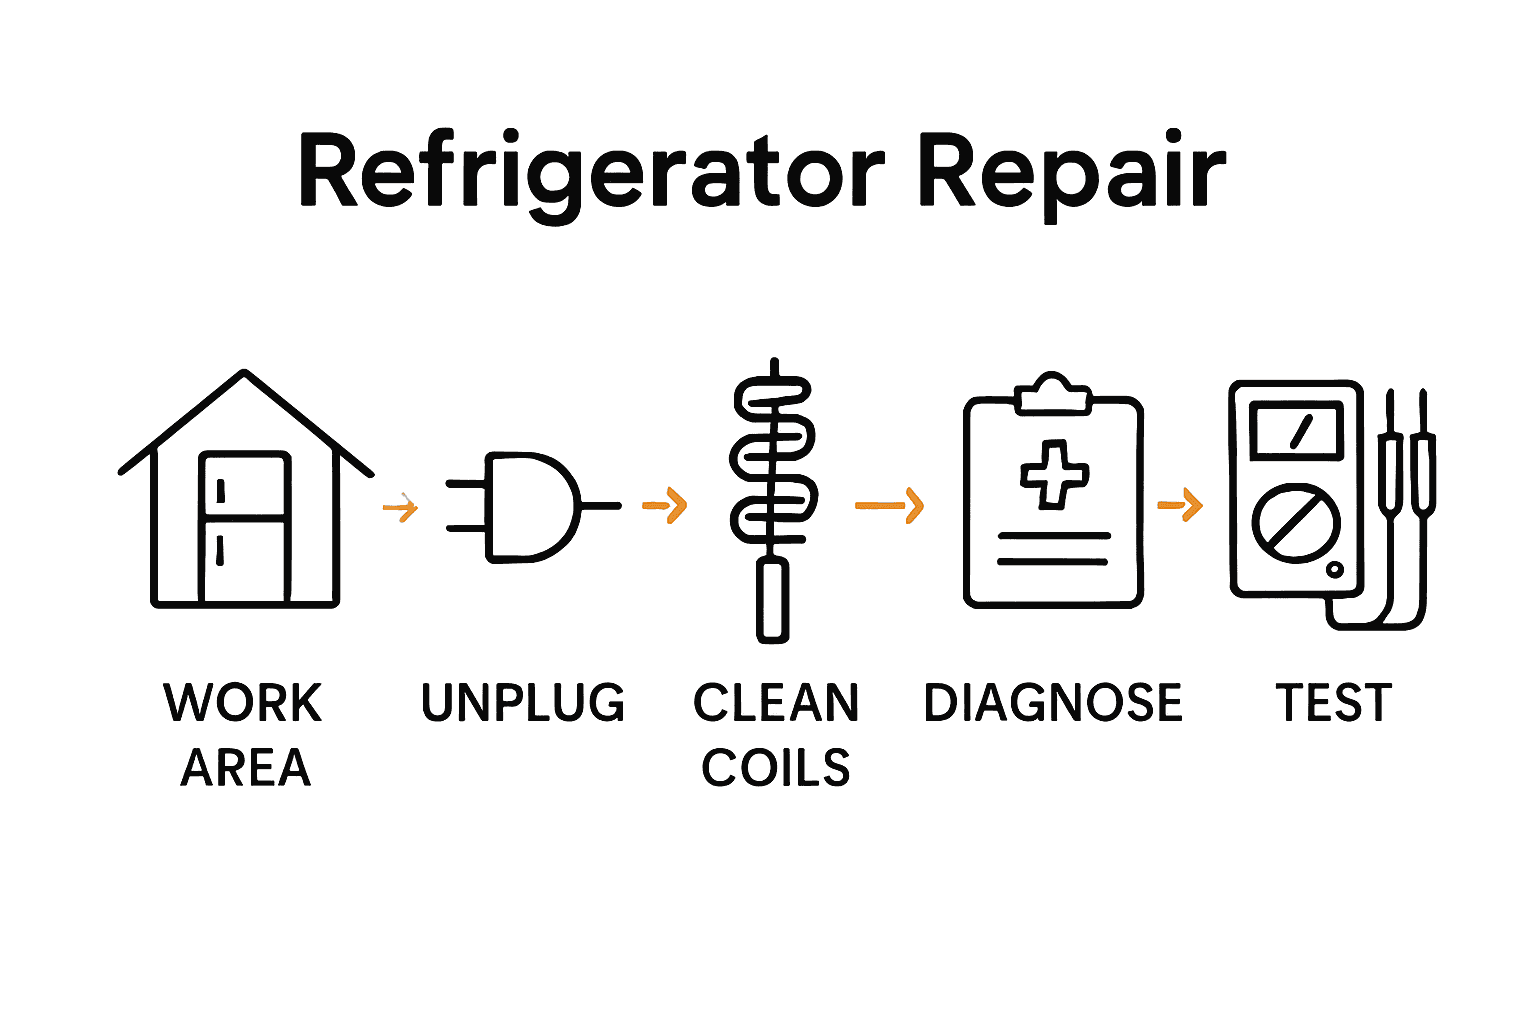
- Step 1: Prepare Workspace and Gather Tools
- Step 2: Disconnect Power and Inspect Components
- Step 3: Clean Coils and Check Door Seals
- Step 4: Diagnose Common Cooling Issues
- Step 5: Test Repairs and Restore Operation
Quick Summary
| Key Point | Explanation |
|—————————|——————————-|
| 1. Prepare a Safe Workspace | Organize an area with proper lighting and tools before starting the repair process to ensure safety and efficiency. |
| 2. Disconnect Power Before Inspection | Unplug the refrigerator from the outlet to prevent electrical hazards during the inspection and repair. |
| 3. Clean Condenser Coils Regularly | Regularly clean the coils to maintain efficiency and prevent overheating issues that can affect cooling performance. |
| 4. Check Door Seals for Damage | Inspect seals for cracks or wear; replace if necessary, as they play a crucial role in maintaining temperature. |
| 5. Test and Monitor After Repairs | After completing repairs, monitor the refrigerator’s performance for at least 24 hours to ensure everything works properly.
Step 1: Prepare Workspace and Gather Tools
Before diving into refrigerator repair, setting up a safe and organized workspace is crucial. You will need a clean, well-lit area with enough room to maneuver and inspect your appliance. According to the safety guidelines from Virginia Institute of Marine Science, it’s essential to notify anyone in the vicinity that you will be servicing equipment and identify potential energy sources before beginning work.
Gather your tools in advance to ensure a smooth repair process. Recommended tools include screwdrivers (flathead and Phillips), an adjustable wrench, pliers, a multimeter, work gloves, safety glasses, and a flashlight. As Consumers Credit Union recommends, have cleaning supplies ready to maintain your refrigerator during the repair process.
A pro tip before starting: unplug the refrigerator from its power source and consider placing a towel or drop cloth underneath to catch any water or debris. This preparation will help protect your floor and create a controlled workspace for your repair. With your workspace prepped and tools gathered, you are now ready to begin diagnosing and fixing your refrigerator.
Step 2: Disconnect Power and Inspect Components
Now that your workspace is prepared, it is time to safely disconnect power and thoroughly inspect your refrigerator. According to the Universal Group refrigerator manual, the first critical step is to unplug the unit completely from its electrical outlet. This ensures your safety and prevents any potential electrical hazards during the repair process.
Carefully pull the refrigerator away from the wall to access the power cord and outlet. Inspect the cord for any signs of fraying, damage, or wear that might indicate electrical problems. As recommended by MetaFridge, avoid using wet cloths near electrical components and ensure the area around the appliance is clear of any inflammable materials. Take a moment to visually examine the refrigerator exterior for any obvious signs of damage such as dents, cracks, or unusual wear that might relate to the issue you are experiencing.
Before proceeding further, double check that the power is completely disconnected. A helpful tip is to use a small nightlight or voltage tester plugged into the same outlet to confirm there is no electrical current. With power safely disconnected and your initial inspection complete, you are now ready to move on to the next stage of diagnosing your refrigerator’s specific problem.
Step 3: Clean Coils and Check Door Seals
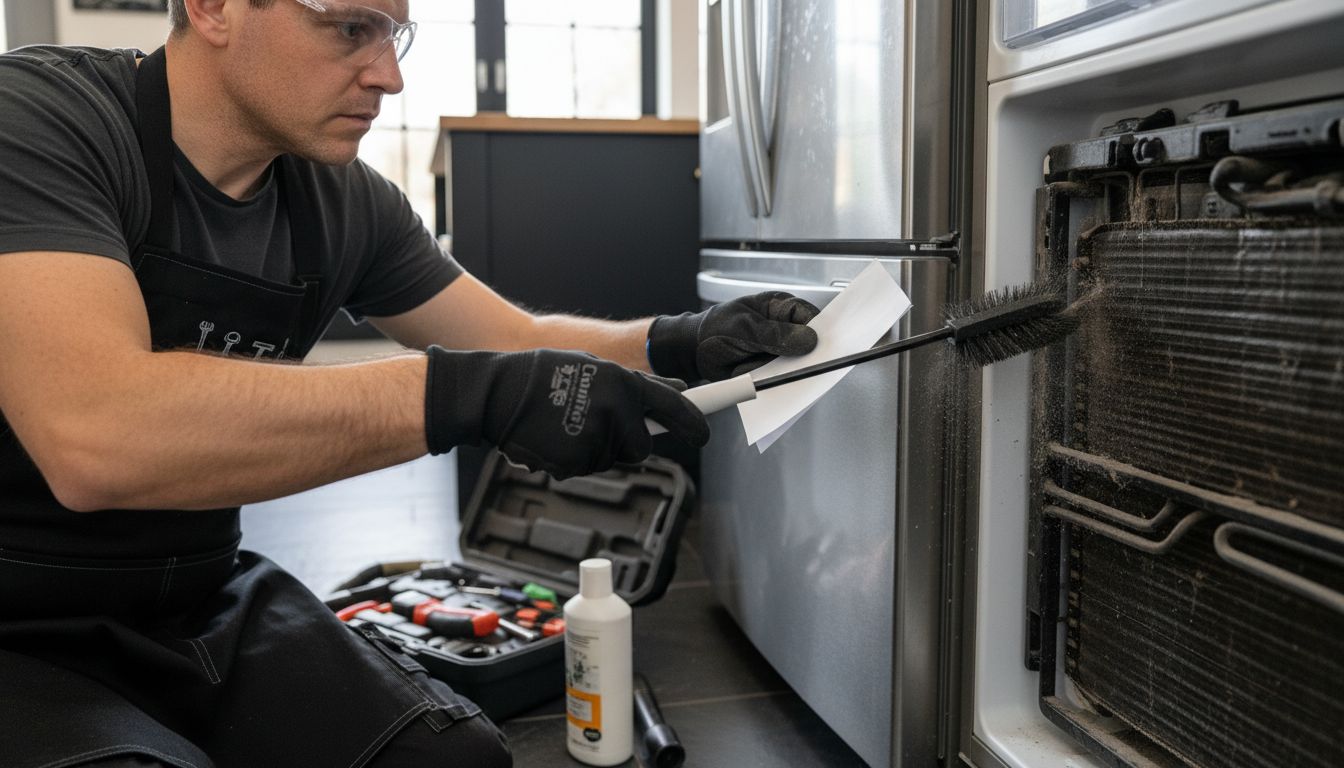
As you continue your refrigerator repair process, it is time to focus on cleaning critical components and ensuring proper sealing. According to Consumers Credit Union, cleaning the compressor, condenser, and fan at least twice a year is crucial for maintaining your refrigerator’s efficiency and preventing potential performance issues.
Begin by locating the condenser coils typically found at the back or underneath the refrigerator. Use a vacuum cleaner with a brush attachment or a specialized coil cleaning brush to gently remove dust and debris. Take care not to bend or damage the delicate coils during cleaning. Next, inspect the door seals carefully by running your hand along the edges to check for any cracks, gaps, or areas of wear. A simple test is to close the door on a piece of paper. If the paper slides out easily, your seal might need replacement. As recommended by Universal Group, use a mild bicarbonate of soda solution to clean the door seals thoroughly, which helps remove grime and maintain their flexibility.
A pro tip for maintaining your refrigerator is to clean the seals and coils regularly. Dirty or damaged seals can cause your refrigerator to work harder, increasing energy consumption and potentially leading to more serious mechanical issues. With your coils cleaned and door seals inspected, you are now ready to move forward in diagnosing and resolving your refrigerator’s specific problem.
Step 4: Diagnose Common Cooling Issues
Diagnosing cooling problems requires a systematic approach to pinpoint potential issues within your refrigerator. According to Common Good Ventures, one critical component to examine is the defrost timer, which regulates the refrigerator’s temperature cycling and can significantly impact cooling performance.
Start by checking the refrigerator’s internal temperature using a standalone thermometer. Ideal refrigerator temperature should be between 37 and 40 degrees Fahrenheit. Listen for the compressor sounds. If the compressor is not running consistently or you hear unusual cycling, this could indicate a problem. As suggested by Common Good Ventures, inspect the capacitor for any signs of physical damage or malfunction, which might prevent proper cooling and compressor operation.
A helpful tip is to check the frost buildup in the freezer. Excessive frost can indicate a problem with the defrost system, while no frost might suggest a defrost timer malfunction. If these initial diagnostics do not reveal the issue, you may need to consider more complex electrical testing or professional intervention.
With these initial diagnostic steps completed, you are now prepared to take the next steps in resolving your refrigerator’s cooling challenges.
Step 5: Test Repairs and Restore Operation
After performing repairs, it is critical to systematically test your refrigerator to ensure everything functions correctly. According to Common Good Ventures, always use a multimeter to measure voltage, current, and resistance when testing refrigerator components, and remember to disconnect the power supply before conducting any measurements.
Reconnect the refrigerator to power and carefully observe its performance. Listen for normal compressor sounds and monitor the internal temperature using your thermometer. Check that both the refrigerator and freezer compartments are cooling uniformly. As recommended by Common Good Ventures, pay close attention to the specific areas where you made repairs, ensuring all components are securely reinstalled and functioning as expected.
A key tip is to wait at least 24 hours after repair before fully assessing performance. This allows the refrigerator to stabilize and reach its optimal operating temperature. If you notice any persistent issues or unusual sounds, it might be time to consult a professional technician. With your repairs tested and operation restored, you have successfully completed your refrigerator repair process.
Expert Refrigerator Repairs When You Need Them Most
If the step-by-step guide to fixing your refrigerator brought you face to face with challenges like diagnosing cooling issues or handling delicate components such as defrost timers and coils, you are not alone. Many homeowners feel overwhelmed trying to maintain appliance efficiency and safety without the right tools or expertise. You want your refrigerator working reliably without risking electrical hazards or costly damages.
At MDTech Services, we understand the frustration of a malfunctioning fridge and the urgency to restore your home’s comfort quickly. Our licensed technicians specialize in repairing major appliances including refrigerators and ice machines tailored to your needs in Orange County and Los Angeles County. With a focus on responsiveness and safety, we bring professional solutions right to your doorstep so you can avoid the worry of continued cooling problems or ineffective DIY fixes.

Don’t let a broken refrigerator spoil your day or your food. Reach out now to book an appointment with trusted local experts at MDTech Services. Experience the peace of mind that comes with professional repair, efficient service, and lasting results. Take the next step to secure your home appliance’s performance and save yourself time and stress today.
Frequently Asked Questions
How can I prepare my workspace for refrigerator repairs?
Before starting refrigerator repairs, ensure a clean and organized workspace with sufficient light and room to maneuver. Gather essential tools like screwdrivers, a multimeter, and safety equipment to streamline the repair process.
What steps should I take to safely disconnect power from my refrigerator?
To safely disconnect power, unplug the refrigerator from its outlet and pull it away from the wall for access. Use a voltage tester or nightlight to confirm that no electrical current is present before proceeding with any repairs.
How do I clean the condenser coils and check door seals?
Locate the condenser coils at the back or underneath the refrigerator and gently clean them with a vacuum or coil brush. To check door seals, run your hand along the edges and perform a paper test; if a piece of paper slides out easily, the seals may need replacement.
What common cooling issues should I look for in my refrigerator?
Look for signs like an inconsistent compressor sound or excessive frost buildup in the freezer, which can indicate problems with the defrost timer or cooling components. Conduct an internal temperature check, aiming for a reading between 37 and 40 degrees Fahrenheit.
How can I test my repairs after fixing the refrigerator?
Reconnect the refrigerator to power and observe its performance for normal compressor sounds and uniform cooling in both compartments. Wait about 24 hours to ensure the appliance stabilizes at its optimal operating temperature before assessing any persistent issues.
What should I do if my refrigerator still has issues after repairs?
If problems persist after your repair attempts, consider consulting a professional technician for a more thorough evaluation. Document any symptoms or unusual patterns to provide helpful information during the consultation.
Recommended
- Refrigerator Repair Explained: Complete Homeowner Guide – MDTech Services
- How to Repair Appliances: Step-by-Step Homeowner Guide – MDTech Services
- Appliance Repair Plumbing repair – Air Conditioning repair
- How to Choose Appliance Repair Service: Easy Local Guide – MDTech Services
- Step by Step iPhone Repair Guide for Local Users | Dash Cellular Repair | Cell Phone, iPhone, Laptop Repair in Oklahoma