
TL;DR:
- Regular yearly maintenance improves water heater efficiency, prevents failures, and extends its lifespan.
- Most tasks are simple DIY steps, but complex repairs should be performed by licensed technicians.
A water heater maintenance checklist is a prioritized set of annual tasks that prevents costly failures, extends your unit’s lifespan, and keeps your home safe. Annual maintenance extends a water heater’s life from 8–12 years to over 15 years, and the full routine takes about 60 minutes with zero cost if you do it yourself. Skipping these steps leads to sediment buildup, corroded tanks, and dangerous pressure spikes. This guide walks you through every task on the checklist, explains the seasonal rhythm that makes upkeep manageable, and tells you exactly when to call a licensed technician.
1. What your water heater maintenance checklist must include
Every homeowner’s service checklist should cover the same core tasks, regardless of whether you have a gas, electric, or tankless unit. These tasks protect your investment, lower your energy bill, and prevent the kind of failures that flood a utility room without warning.
| Task | Frequency | Purpose |
|---|---|---|
| Flush sediment from tank | Annually | Restores heating efficiency |
| Test T&P relief valve | Annually | Prevents dangerous pressure buildup |
| Inspect anode rod | Every 1–3 years | Stops tank corrosion |
| Check thermostat setting | Annually | Safety and energy savings |
| Inspect burner or heating elements | Annually | Confirms proper operation |
| Visual leak inspection | Annually | Catches problems early |
| Inspect flue pipe (gas units) | Annually | Prevents carbon monoxide risk |
Pro Tip: Set a recurring calendar reminder every october to run through this checklist before winter demand peaks.
2. Flush sediment from the tank
Sediment is the single biggest threat to your water heater’s efficiency. Minerals from hard water settle at the bottom of the tank, forming a layer that forces the burner or heating element to work harder and longer to heat the same amount of water.
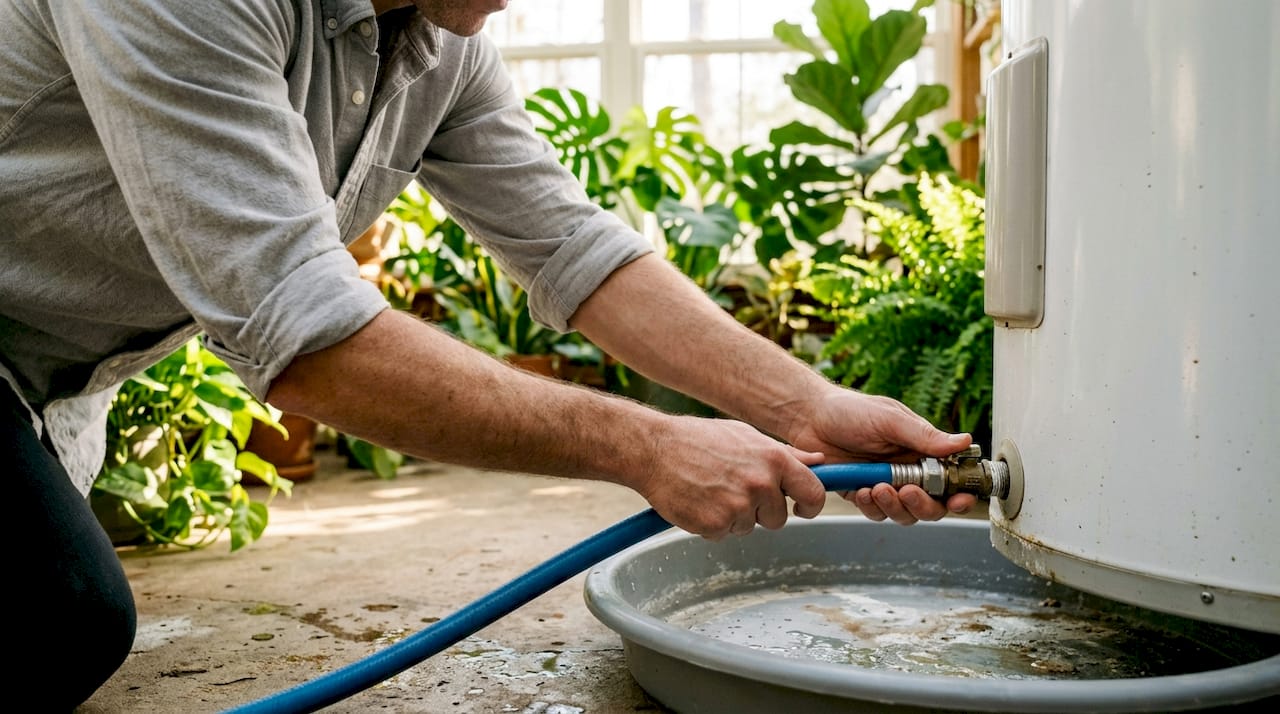
To flush the tank, turn off the power or gas supply first. Connect a garden hose to the drain valve at the base of the unit and run it to a floor drain or outside. Open the drain valve and let water flow until it runs clear. You do not need to empty the full tank for most maintenance flushes. A partial drain removes the loose sediment sitting at the bottom without the time and mess of a full empty.
3. Test the temperature and pressure relief valve
The T&P relief valve is a safety device that releases water if pressure or temperature inside the tank reaches a dangerous level. A faulty valve is a serious hazard. Testing it takes less than two minutes.
Lift the lever on the valve briefly and let it snap back. You should hear a rush of water or steam into the discharge pipe. If nothing happens, or if the valve drips continuously after the test, replace it before the next heating cycle. Setting your thermostat to 120°F balances energy efficiency and safety by preventing scalding while also stopping microbial growth inside the tank. This is the 2026 standard recommendation for residential units.
4. Inspect and replace the anode rod
The anode rod is a metal rod, typically magnesium or aluminum, that sits inside your tank and corrodes in place of the steel tank walls. When the rod is gone, the tank starts corroding instead. Anode rods should be inspected every 1–3 years and replaced when the diameter drops below 1/2 inch or the core wire is exposed.
How to remove and replace an anode rod safely
- Turn off the power or gas supply to the unit.
- Shut off the cold water inlet valve.
- Drain 3–5 gallons from the tank to lower the water level below the rod port. A full drain is not necessary.
- Locate the hex head on top of the tank. It is usually under a plastic cap.
- Use a 1 1/16-inch socket wrench to loosen the rod. If the rod is stuck, apply penetrating oil and wait 15 minutes before trying again.
- Pull the old rod straight out. Inspect its diameter and surface condition.
- Wrap the threads of the new rod with 3–4 wraps of PTFE tape in a clockwise direction.
- Thread the new rod in by hand, then tighten 1/4 to 1/2 turn past hand-tight. Do not overtighten.
- Restore water and power or gas supply.
Pro Tip: If your hot water smells like rotten eggs, the standard magnesium rod may be feeding sulfate-reducing bacteria. Zinc-aluminum alloy rods are the recommended fix for eliminating sulfur odors.
Rods installed at the factory are often sealed with heavy-duty thread sealant, making removal genuinely difficult. Professionals use breaker bars and penetrating oil to avoid stripping the tank threads. If you cannot break the rod loose after two attempts, stop and call a technician. Forcing it risks permanent tank damage.
One alternative worth knowing: powered impressed current anode rods cost $150–$200 upfront but require no future replacement. They run on a small electrical current that protects the tank continuously, making them a practical choice for homeowners who want a lower-maintenance setup long term.
5. Check and adjust the thermostat setting
Your water heater thermostat controls the temperature of every drop of hot water in your home. Most units ship from the factory set between 130°F and 140°F, which is higher than necessary for most households.
The correct setting is 120°F. At this temperature, water is hot enough for showers, dishes, and laundry, but not hot enough to cause scalding burns within seconds of contact. For gas units, the thermostat dial is usually on the front of the gas valve. For electric units, you will find one or two thermostats behind access panels on the side of the tank. Turn off the breaker before removing those panels.
6. Inspect the burner or heating elements
Gas and electric units each have a different component responsible for generating heat, and each requires its own check.
- Gas units: Look at the burner flame through the sight glass. A steady blue flame with a small yellow tip is normal. An orange or yellow flame, or a flame that keeps going out, signals a dirty burner or a gas supply issue.
- Electric units: Use a multimeter to test each heating element for continuity. An element that shows no continuity has burned out and needs replacement. Also check that all electrical connections at the element terminals are tight and free of corrosion.
- Tankless units: Clean the inlet filter screen annually and descale the heat exchanger with a descaling solution to remove mineral deposits that reduce flow rate.
7. Perform a full visual leak inspection
Water damage from a slow leak is often more expensive than the water heater itself. Walk around the unit and check every connection point: the cold water inlet, the hot water outlet, the T&P valve discharge pipe, and the drain valve at the base.
Look for white mineral deposits, rust stains, or damp spots on the floor. Any of these signs points to a slow drip that will worsen over time. Tighten loose fittings with a wrench, but do not force connections that feel corroded. Corroded fittings need replacement, not more torque. Check the plumbing connections around your water heater as part of your broader annual home inspection.
8. Inspect the flue pipe on gas units
Gas water heaters produce combustion exhaust that must vent safely out of your home. A damaged or disconnected flue pipe allows carbon monoxide to build up indoors, which is a life-threatening hazard.
Check that all flue pipe sections are connected, free of rust holes, and sloping upward toward the vent cap. The pipe should have at least 1/4 inch of rise per foot of horizontal run. If you see gaps, rust-through spots, or sections that have pulled apart, do not use the water heater until the flue is repaired. This is one task where calling a licensed technician is the right call.
9. Follow a seasonal rhythm for easier upkeep
A seasonal approach to water heater maintenance makes the full checklist far more manageable. Breaking tasks into four shorter sessions across the year increases the likelihood that each task actually gets done.
- Spring: Full visual inspection, check for winter pipe stress, test the T&P valve.
- Summer: Flush sediment, clean the burner or air intake, descale tankless units.
- Fall: Check the thermostat setting, inspect the anode rod, confirm the flue is clear before heating season.
- Winter: Monitor for cold-weather pipe issues, check insulation on exposed pipes near the unit.
Keep a simple maintenance log, either a notebook or a notes app, with the date and what you checked each session. That log becomes valuable if you ever need to make a warranty claim or sell your home.
Pro Tip: Pair your water heater checks with your seasonal HVAC maintenance schedule so both systems stay covered without requiring separate reminders.
10. Know when gas and electric units need different care
Gas and electric water heaters share most maintenance tasks, but each fuel type has specific requirements that the other does not.
Gas units require:
- Pilot light verification or electronic ignition testing
- Burner cleaning to remove dust and debris from the combustion chamber
- Annual flue and vent inspection for blockages or damage
- Checking the gas line connection for leaks using soapy water
Electric units require:
- Testing both upper and lower heating elements with a multimeter
- Tightening electrical connections at the element terminals
- Checking the high-limit reset button, which trips when the unit overheats
- Confirming the breaker is sized correctly for the unit’s amperage draw
Tankless units, whether gas or electric, need annual descaling above all else. Mineral scale inside the heat exchanger is the primary cause of reduced hot water output and premature failure in tankless systems.
Key takeaways
Annual water heater maintenance takes about 60 minutes, costs nothing if done yourself, and extends your unit’s lifespan from 8–12 years to over 15 years.
| Point | Details |
|---|---|
| Flush sediment annually | Sediment buildup forces the unit to work harder and shortens its life. |
| Set thermostat to 120°F | This temperature prevents scalding and stops microbial growth inside the tank. |
| Replace anode rod every 1–3 years | A depleted rod leaves the steel tank exposed to corrosion and early failure. |
| Use a seasonal rhythm | Splitting tasks across four seasons makes completion far more consistent. |
| Know your fuel type | Gas and electric units each have specific checks the other does not require. |
What we’ve learned from years of water heater calls
After handling water heater repairs across Orange County and Los Angeles County, the pattern is clear: the homeowners who call us with the worst damage are almost always the ones who skipped routine upkeep for three or more years. The failures are rarely dramatic at first. A slow drip at the drain valve. A slightly off-color flame. A faint sulfur smell from the tap. These are all warnings the unit gives before it fails completely.
The anode rod is the most overlooked item on any water heater upkeep guide. Most homeowners have never heard of it, and yet it is the single component standing between a functioning tank and a corroded one. We have pulled rods that were completely consumed, leaving nothing but a thin wire core, from tanks that still had years of potential life left in them. Catching that rod at the two-year mark instead of the five-year mark makes a real difference.
We also hear from homeowners who are nervous about DIY maintenance, and that is a reasonable position. Flushing sediment and checking the thermostat are genuinely low-risk tasks. Removing a seized anode rod or repairing a flue pipe is not. Knowing where your skill level ends is not a weakness. It is what keeps a $400 maintenance call from turning into a $3,000 tank replacement.
The seasonal rhythm approach is something we recommend to every homeowner we work with. One annual appointment feels like a chore. Four short seasonal checks feel like normal home care. The result is a water heater that runs efficiently, lasts longer, and never surprises you with a cold shower on a Monday morning.
— MDTECH
Professional water heater support from Mdtechservices
Some water heater tasks are straightforward enough for any homeowner to handle on a Saturday morning. Others, like flue repairs, element replacements, or a seized anode rod, call for a licensed technician with the right tools.

Mdtechservices serves homeowners across Orange County and Los Angeles County with responsive, licensed appliance repair and plumbing services. Whether you need a full water heater inspection or help deciding between repair and replacement, our team is ready to assist. You can also review our appliance repair services to understand exactly what a professional visit covers. Book an appointment online or call us directly to get your water heater running safely and efficiently.
FAQ
How often should I flush my water heater?
Flush your water heater once a year to remove sediment buildup. Homes with hard water may benefit from flushing every six months.
What temperature should I set my water heater to?
Set the thermostat to 120°F. This setting prevents scalding, reduces energy use, and stops bacterial growth inside the tank.
How do I know if my anode rod needs replacement?
Inspect the rod every 1–3 years. Replace it when the diameter is below 1/2 inch or the core wire is visible through the surface.
Can I do water heater maintenance myself?
Most tasks, including flushing, thermostat checks, and T&P valve testing, are safe for homeowners. Flue repairs, seized anode rods, and element replacements are best handled by a licensed technician.
How long does a water heater last with proper maintenance?
A well-maintained water heater lasts over 15 years, compared to 8–12 years for a neglected unit. Annual upkeep is the single most effective way to extend its life.