
A leaking water heater is a problem you address today, not next weekend. Most leaks trace back to a failing valve, a loose fitting, sediment damage, or internal tank corrosion, and the right response depends entirely on where the water is coming from. If the tank itself is actively leaking, shut off the power or gas supply and the cold water inlet valve right away, then figure out the source before you decide on repair or replacement.
TL;DR:
- Water heater leaks from the tank body or seams usually indicate internal corrosion, making replacement the most practical solution.
- Persistent discharge from the T&P relief valve often signals upstream pressure or temperature issues that need addressing to prevent damage.
- Quick response involves shutting off power or gas, turning off the cold water supply, and avoiding capping the relief valve to prevent pressure buildup.
- Regular maintenance, such as annual flushing and inspection of the anode rod, can prevent sediment buildup and internal damage that cause leaks.
- Repairs are generally suitable for leaks at fittings or valves on units under 8 years old, while older units with rust or recurring failures should be replaced promptly.
Table of Contents
- What Are the Common Causes of Water Heater Leaks?
- What Should You Do the Moment You Spot a Leak?
- Where Is the Water Coming From, and What Does It Mean?
- When Do You Repair a Water Heater, and When Do You Replace It?
- How Do You Prevent a Water Heater From Leaking in the First Place?
- What We See Most Often on Service Calls
- Get a Straight Answer on Your Water Heater, Fast
- Where to Verify This Information
- Sources
- FAQ
What Are the Common Causes of Water Heater Leaks?
Water heater leaks almost always start in one of six places, and each one leaves a distinct signature you can learn to recognize.
- The temperature and pressure (T&P) relief valve. This valve is designed to discharge when pressure or temperature inside the tank climbs too high, so occasional dripping isn’t always a defect. But persistent T&P valve discharge signals a system pressure or temperature issue upstream, not just a worn valve, and swapping the valve alone usually leads to a repeat failure within weeks.
- The drain valve. Plastic drain valves crack over time from thermal stress or a rough flush, and a slow drip at the base of the tank often starts here.
- Loose or corroded connections. Inlet and outlet fittings, along with dielectric unions, can loosen from vibration or corrode from galvanic reaction between mismatched metals. Look for greenish crust, rust streaks, or a damp union joint.
- Anode rod depletion and tank corrosion. The anode rod sacrifices itself to protect the steel tank. Once it’s fully consumed, the tank starts rusting from the inside, and a leak from corrosion means the tank itself is failing, not something you can patch.
- Sediment buildup. Minerals settle at the bottom of the tank and, when left unaddressed, cause popping or rumbling noises while cooking the tank lining from underneath, which speeds up corrosion and shortens the tank’s life.
- Component-specific failures. Electric units can leak from a worn heating element gasket; gas units can develop trouble at the gas fittings or a failing thermocouple. Both call for a technician who can distinguish a water leak from a gas or electrical fault.
What Should You Do the Moment You Spot a Leak?
Speed matters here, but so does do things in the right order. Follow these steps as soon as you notice standing water or an active drip.
- Cut power to an electric unit at the breaker, or turn the gas control valve to “off” on a gas unit.
- Shut off the cold water supply valve feeding the tank to stop it from continuing to fill.
- Leave an actively discharging T&P valve alone. Do not cap or plug it. Capping a relief valve traps pressure that has nowhere safe to go.
- Limit the damage. Move nearby belongings, mop up standing water, and set a bucket or towels under the drip while you wait for help.
- Call a licensed plumber once the immediate risk is contained, especially if you smell gas, hear a hissing sound, or see any sign of sparking near the unit.
Pro Tip: If you smell gas or notice sparking anywhere near the unit, don’t troubleshoot further. Leave the area, call 911 or your gas utility’s emergency line, and let a professional confirm it’s safe before anyone goes back in.
For a broader triage routine you can keep on the refrigerator, the plumbing emergency checklist for homeowners covers scenarios beyond just water heaters.
Where Is the Water Coming From, and What Does It Mean?
Where a leak shows up tells you almost everything about how serious it is and whether it’s worth fixing.
- Top of the tank. Water pooling near the inlet, outlet, or anode rod port usually points to a loose fitting or a failed seal. These are typically repairable by tightening a connection or replacing a gasket.
- Side or middle of the tank. Moisture running down the tank’s body, with no visible connection nearby, almost always means the steel shell has corroded from the inside. A leaking tank body, with pooling in the middle or bottom when no fixtures are open, usually means internal corrosion that can’t be repaired, so replacement is usually the realistic path forward.
- Bottom of the tank. Check the drain valve first, since a cracked valve is common and cheap to fix. If the drain valve is dry and water is still pooling at the base, it may be seeping from a corroded seam higher up and running down the outside of the tank.
A simple test clears up most confusion: dry the entire area with a towel, run the heater through a short cycle, and watch exactly where moisture reappears first. One coherent, low-tech first step is drying the area and watching where water shows up again, which narrows down the source faster than guessing from a puddle alone. Rust colored streaks trace back to a corroding fitting or tank wall, while clean water without discoloration more often points to condensation or a loose connection rather than corrosion.
When Do You Repair a Water Heater, and When Do You Replace It?
Age and location decide this more than anything else. A unit under 8 years old with a leak at a valve or fitting is usually worth repairing. A unit past 10 to 15 years old, especially one showing rust at the seams or a leak from the tank body itself, is a replacement conversation.
Repair typically makes sense for:
- T&P valve replacement, once the underlying pressure or temperature cause is identified and corrected
- Drain valve replacement
- Heating element gasket replacement on electric units
- Loose or corroded fitting repairs at inlet, outlet, or union connections
Replacement is the right call when:
- The leak is coming from the tank shell itself, mid-body or at a seam
- The unit is older than roughly 10 to 15 years and shows rust or repeated failures
- You’ve already paid for one or more repairs in the past year and the unit keeps failing
ENERGY STAR notes that replacing an inefficient or repeatedly failing unit with a modern, efficient model can save energy and often costs less over time than continuing to chase repairs on an aging tank.
Urgency also breaks into three tiers: an active tank leak or any gas or electrical hazard is an emergency that needs same-day attention; continuous discharge from a valve or fitting deserves a same-day call even without an obvious hazard; and slow seepage or condensation can typically be scheduled within the week. Repair costs for a valve or fitting generally run well below the cost of a new water heater installation, but get a professional estimate before committing either way, since tank condition isn’t always obvious from the outside.
How Do You Prevent a Water Heater From Leaking in the First Place?
Most of the causes covered above are preventable with a handful of maintenance habits spread across the year.
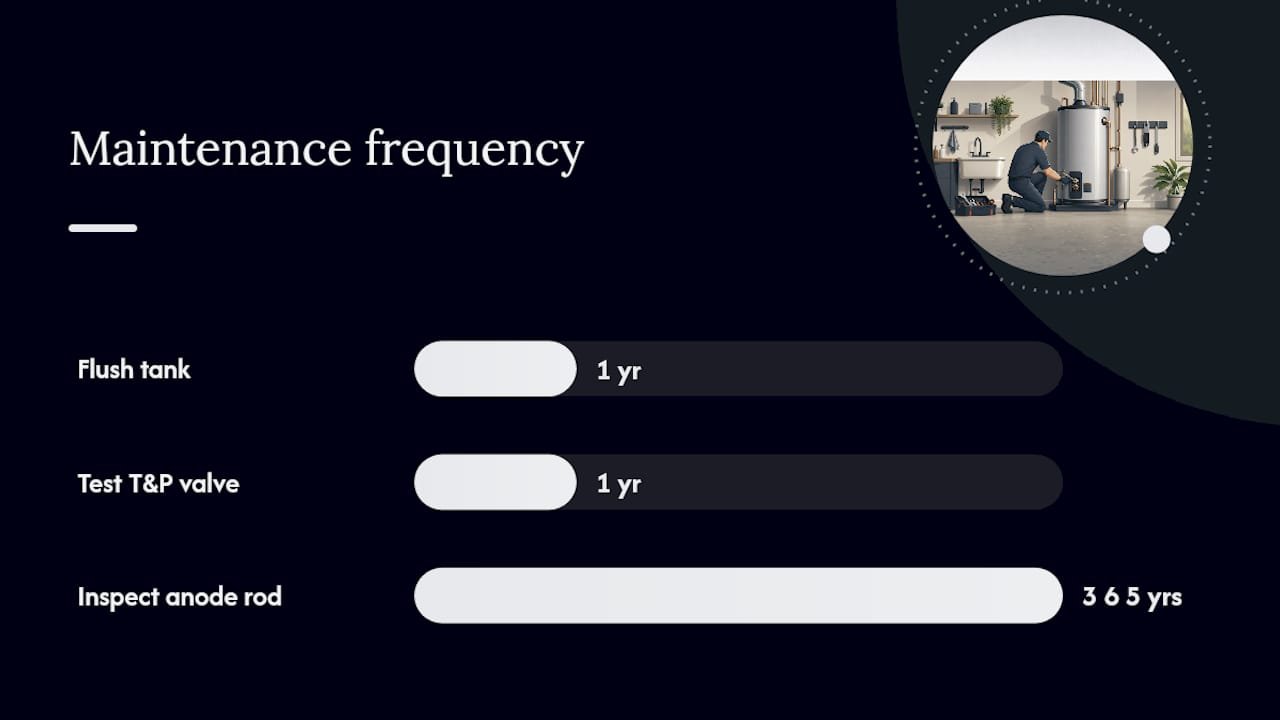
- Flush the tank annually. Draining a few gallons and refilling clears out sediment before it can insulate the burner or heating element from the water above it, which is what causes overheating and premature tank stress.
- Test the T&P valve once a year and confirm household water pressure sits in a safe range. If your home lacks an expansion tank, thermal expansion without one, or a poorly set pressure-reducing valve, can cause persistent T&P discharge and stress every fitting on the unit.
- Call a licensed technician the moment you see corrosion at a gas fitting, a union joint, or anything that looks like an electrical hazard near the unit. These aren’t DIY repairs.
Pro Tip: Mark your anode rod inspection on the same calendar reminder as your smoke detector battery check. Both get forgotten for the same reason: nothing seems wrong until it suddenly is.
The water heater maintenance checklist for homeowners walks through each of these steps with more detail on timing and tools.
What We See Most Often on Service Calls
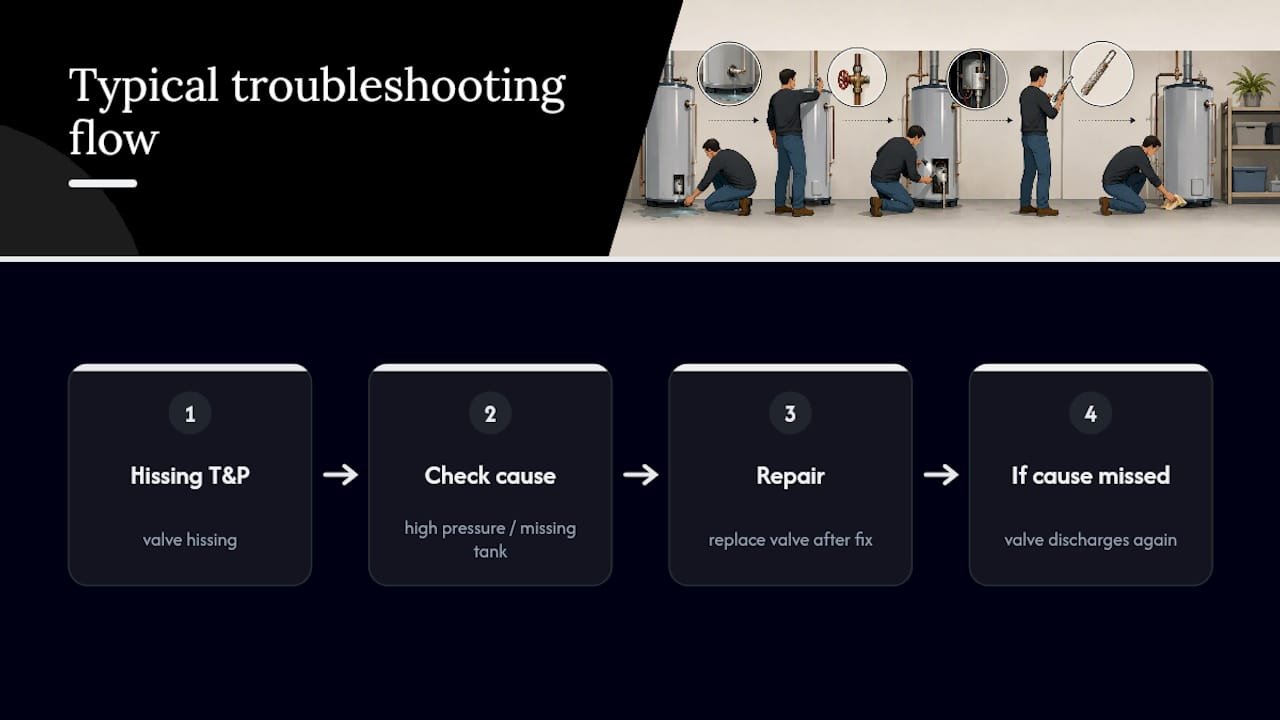
The most common mistake we run into isn’t ignorance. It’s homeowners doing the right instinct in the wrong order. Someone hears a hissing T&P valve, replaces it themselves, and calls it solved, without ever checking whether high water pressure or a missing expansion tank caused the original failure. The valve discharges again within a month, and now there’s a repair on top of a repair.
The second mistake is delay. A slow drip at the base gets a towel and a mental note to “deal with it later,” and later turns into a flooded closet. Every water heater leak deserving same-day attention got there because someone assumed a small leak stays small.
Our technicians run diagnostics before touching a wrench, because a fitting repair and a tank replacement look almost identical from across the garage. Emergency calls get same-day response; anything short of active flooding gets scheduled properly so the diagnosis is right the first time.
— MDTECH
Get a Straight Answer on Your Water Heater, Fast
You don’t have to guess whether that drip is a $40 fitting or a tank on its way out. Licensed technicians diagnose the actual source of the leak on the first visit, secure the site, contain the water, and provide a clear repair or replacement estimate before any work begins, backed by warranty-safe parts and labor.

If your tank is actively leaking right now, call immediately rather than waiting for a callback slot. For anything short of an emergency, browse how water heater repair works in California homes or head straight to the appliance repair services page to book a visit. Technicians serve local counties, and the same team that handles water heater issues can also cover HVAC and plumbing repairs if other issues turn up during the visit.
Where to Verify This Information
The maintenance intervals and safety guidance in this article come from established authorities on home energy systems. The Department of Energy’s water heater maintenance page covers flushing schedules and anode rod care in detail. This Old House’s diagnostic guide breaks down step by step how to trace a leak to its source. For a closer look at how leak location maps to repairability, the Water Heater Repair Authority’s leak guide is worth a read.
Sources
- How To Diagnose and Repair a Leaking Water Heater | This Old House
- Water Heater Leaking: Causes, Locations, and Fixes | Water Heater Repair Authority
- When should you replace your water heater? | ENERGY STAR
FAQ
Should I be concerned if my water heater is leaking?
Yes, treat any active leak as worth addressing right away, even if it looks minor. A small drip from a fitting is a quick fix, but a leak from the tank body itself signals internal corrosion that will only get worse and can lead to sudden flooding.
Can I still use water if the water heater is leaking?
It depends on where the leak is. A leak from a top connection or the drain valve usually allows continued limited use until a technician arrives, but any leak from the tank body itself means you should shut off the water supply and stop using the unit until it’s inspected.
How long will a water heater last once it starts leaking?
A leak from a fitting or valve doesn’t shorten the tank’s lifespan once repaired, but a leak from the tank shell means the unit has reached the end of its service life and can fail completely within days to weeks. Replacing a unit that’s leaking from internal corrosion is the recommended path rather than attempting a temporary patch.
Where is the most common place a water heater leaks?
Leaks most often start at the T&P valve, the drain valve, or a loose inlet and outlet connection at the top of the tank, since these are the parts most exposed to pressure changes and wear. Leaks from the middle or bottom of the tank body, when no fixtures are open, typically point to internal corrosion rather than a simple fitting problem.