A sudden squeal or grinding sound from your refrigerator or washing machine can turn any Orange or Los Angeles County home upside down. These strange noises often signal a problem lurking inside the appliance, and catching it early makes all the difference. By following a clear approach that combines careful visual inspection and smart listening, you lay the groundwork for fast, effective diagnosis and repair without unnecessary stress.
Table of Contents
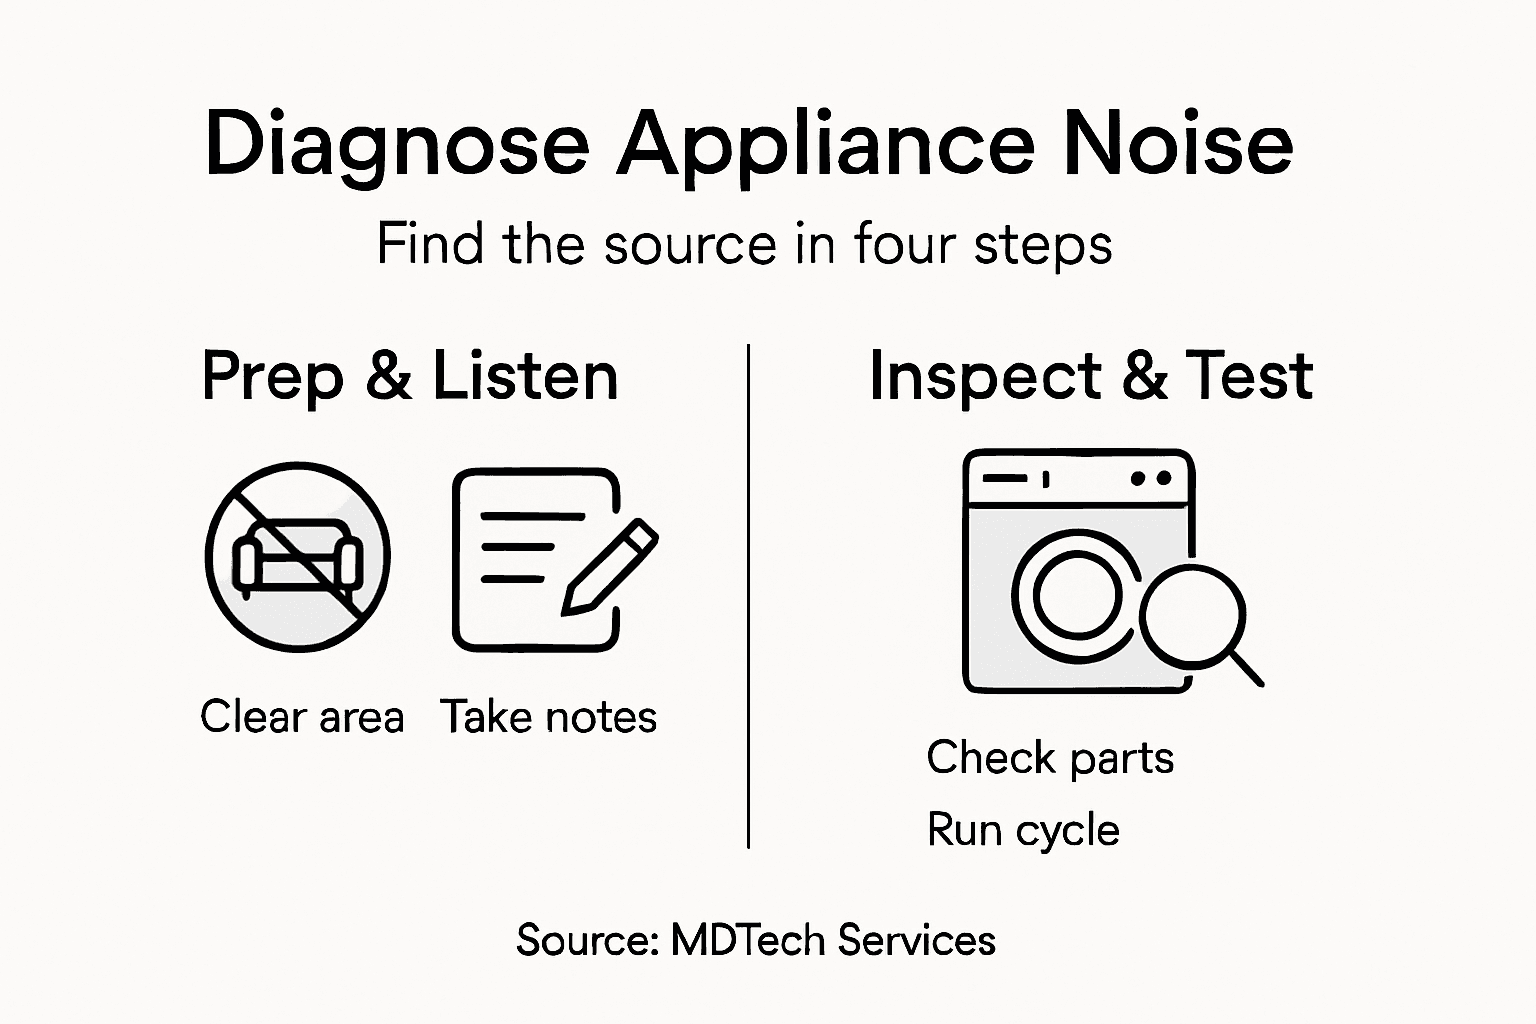
- Step 1: Prepare the Area and Gather Needed Tools
- Step 2: Identify the Type and Source of Noise
- Step 3: Inspect Key Appliance Components
- Step 4: Test the Appliance After Intervention
Quick Summary
| Key Point | Explanation |
|---|---|
| 1. Prepare Your Workspace | Clear the area around the appliance and ensure you have proper tools to work efficiently. |
| 2. Identify Noise Type | Listen carefully to the noise and describe it to narrow down potential causes quickly. |
| 3. Inspect Appliance Components | Conduct a visual inspection of key parts to find the source of the problem effectively. |
| 4. Test After Repairs | Run the appliance through cycles to confirm if the noise is resolved and check for new issues. |
| 5. Document Observations | Keep notes on observations before and after repairs to aid professional help if needed. |
Step 1: Prepare the Area and Gather Needed Tools
Before you start diagnosing that strange noise coming from your refrigerator or washing machine, you need to set up a safe, organized workspace and collect the right equipment. Taking 10 minutes upfront to prepare saves frustration and helps you work efficiently. This step separates homeowners who make progress from those who end up frustrated halfway through.
First, clear the area around your appliance where you’ll be working. Remove any items on top of or immediately beside the unit, and make sure you have at least 2 to 3 feet of space to move around it. This gives you room to listen carefully to where the noise is coming from and access different parts of the machine if needed.
Next, gather your basic diagnostic tools. You don’t need an entire professional toolkit to pinpoint the problem. The essential items include:
- A digital multimeter to check electrical connections and motor function
- A headlamp or flashlight for visibility inside tight spaces
- A ratcheting driver with multiple bits for opening access panels
- A notepad to record when the noise occurs and what it sounds like
- Your phone camera to photograph how panels connect before removing them
Portable power tools and equipment require proper inspection before use, so check that any tools you’re using are in good working condition. Look for cracks, loose parts, or frayed cords. A tool with a safety issue won’t help you and could create new problems.
Make sure you have good lighting. Many appliance components sit in dimly lit spaces, and you cannot diagnose what you cannot see clearly. Position your headlamp so it illuminates the area without casting shadows.
Turn off power to the appliance at the circuit breaker before you begin any work. This is not optional, even if you’re only listening and observing. Safety comes first when diagnosing electrical appliances.
Proper preparation and inspection of your tools ensures you stay safe while diagnosing the issue effectively.
Pro tip: Keep a small notebook nearby to document the exact time of day the noise happens and whether it occurs during specific cycles—this information becomes invaluable when you describe the problem to a repair technician if professional help is needed.
Step 2: Identify the Type and Source of Noise
Now that your workspace is ready, it’s time to listen carefully and figure out what kind of noise you’re dealing with. Different sounds point to different problems, and identifying the noise type narrows down the cause significantly.
Start by listening intentionally to the appliance while it operates. Run the appliance through its normal cycle and pay close attention to when the noise starts and stops. Does it happen continuously or only during specific functions? Does it change pitch or intensity? Write down your observations.
Next, try to describe the noise accurately. Use specific words that match what you hear:
- A squealing or squeaking sound typically indicates friction or worn bearings
- A grinding or crunching noise often signals something mechanical is breaking or rubbing
- A humming or buzzing sound usually points to electrical issues or motor problems
- A rattling noise suggests loose parts or components vibrating inside the casing
- A banging or thumping sound often means something is hitting the drum or walls
- A whining or high-pitched sound can indicate motor strain or belt issues
Understanding sound properties like frequency and amplitude helps you recognize what part of the appliance is failing. Higher-pitched sounds come from smaller, faster-moving components like motors or fans. Lower, rumbling sounds often come from drums, pumps, or compressors.
Locate the source of the sound by placing your ear near different parts of the appliance while it runs. Listen near the back, underneath, and along the sides. Does the noise seem to come from the motor area, the drum or tub, the pump, or the compressor? Try to pinpoint the general location as precisely as possible.
If the appliance has multiple cycles, run each one and note whether the noise appears in all of them or only specific ones. A noise that happens only during the spin cycle behaves differently than noise during the fill or drain cycle.
Here’s a quick reference for matching appliance noise types to likely causes and suggested inspection points:
| Noise Type | Likely Cause | Where to Inspect |
|---|---|---|
| Squealing | Belt wear or friction | Belts, pulleys, bearings |
| Grinding | Mechanical damage | Motor, bearings, fan blades |
| Humming | Electrical or motor issues | Wiring, motor, electrical connections |
| Rattling | Loose parts or debris | Panels, screws, drum or tub |
| Banging | Object hitting moving parts | Drum, tub, internal hardware |
| Whining | Motor strain or belt issues | Motor, drive belt, tension |
| Thumping | Drum imbalance | Drum, load distribution |
The more specific you can be about the sound and when it occurs, the faster you’ll identify the actual problem.
Pro tip: Record a short video or audio clip of the noise on your phone; hearing it again later or describing it to a repair technician becomes much easier when you have the actual sound to reference.
Step 3: Inspect Key Appliance Components
With the noise type identified, it’s time to examine the parts most likely causing the problem. Most appliance noises originate from a handful of common components, and a careful visual inspection often reveals the culprit without disassembly.
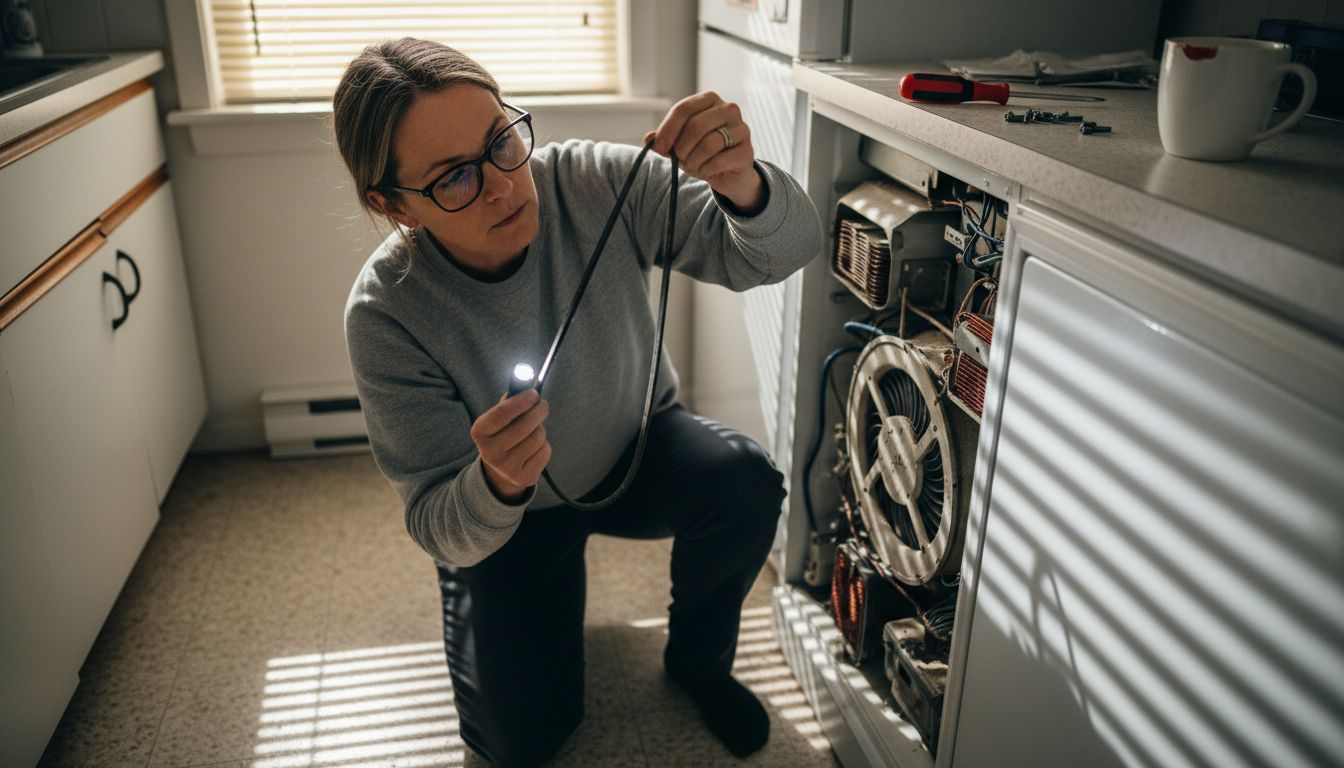
Start by checking the belt and pulleys. Many appliances rely on belts to transfer power from the motor to the drum or fan. Look for visible cracks, fraying, or separation from the pulleys. A worn belt often produces squealing or squeaking sounds. If you can see the belt easily, inspect it for wear without removing anything yet.
Next, examine the motor and bearings. The motor is typically mounted near the rear or bottom of the appliance. Look for signs of corrosion, loose wiring, or visible damage. Bearings that are wearing out often create grinding or rumbling noises. Check that the motor mounting bolts are tight and haven’t worked loose over time.
Inspect the fan blades if your appliance has one. Refrigerator condenser fans, dryer exhaust fans, and air conditioning units all rely on fans. Look for bent blades, debris wrapped around the fan, or a bent motor shaft. Even slight damage can cause rattling or grinding sounds.
Check the drum or tub for loose objects. Coins, buttons, underwire from bras, and small metal parts frequently find their way inside washers and dryers. Shine your flashlight inside and look carefully around the edges. Careful visual inspection of mechanical parts helps isolate the exact source of noise problems.
Examine all visible electrical connections. Look for corroded terminals, loose wires, or burned contacts. Buzzing or humming noises often trace back to loose electrical connections. Make sure you’re working with the power off when checking these areas.
Finally, check for loose screws and fasteners holding panels and internal components in place. Vibration during operation can gradually loosen hardware. A single loose screw can create surprising rattling noises that seem to come from everywhere.
Finding the problem component through inspection often saves you from unnecessary disassembly and potential damage.
Pro tip: Take photos of each component before and after inspection; if you need to call a repair technician, these images help them understand exactly what you’ve observed and speeds up their diagnosis.
Step 4: Test the Appliance After Intervention
Once you’ve made an adjustment, tightened a component, or replaced a part, testing is the only way to know if you’ve actually solved the problem. A proper test confirms the noise is gone and that nothing else has broken in the process.
Start by restoring power to the appliance. Turn the circuit breaker back on or plug the unit back in if you disconnected it. Wait a few seconds for the appliance to stabilize before proceeding.
Run the appliance through its normal cycle, just as you did when diagnosing the noise. Listen carefully to determine if the original noise is still present. Pay attention to whether the sound has changed in pitch, intensity, or frequency. Sometimes fixing one problem reveals a second noise you didn’t hear before.
Test the appliance through multiple cycles if possible. Run it with the specific settings where you first noticed the problem. For example, if the noise happened during the spin cycle of your washing machine, run several spin cycles in a row. If it occurred during the defrost cycle of your refrigerator, let the unit run long enough for that cycle to activate.
While testing, systematically observe the appliance after any fixes to confirm proper function and ensure no new issues have developed. Document your observations:
- Is the original noise completely gone or just reduced?
- Are there any new noises you didn’t hear before?
- Does the appliance perform its intended function correctly?
- Are there any unusual vibrations or movements?
- Do all control buttons and settings respond as expected?
If the noise persists or has changed character, stop and reassess. The problem may be more complex than initially suspected. Check your work to ensure you’ve fully addressed what you thought was loose or worn.
If the noise is completely resolved and the appliance functions normally, you’ve successfully diagnosed and fixed the issue. Document what you did so you can explain it clearly if you ever need professional service.
Use this summary to review essential steps for safe and effective appliance diagnosis:
| Step | Key Action | Impact on Diagnosis |
|---|---|---|
| Prepare Area | Clear space, gather tools | Prevents hazards, speeds work |
| Identify Noise | Listen and describe sound | Targets specific issues |
| Inspect Parts | Visual check of components | Locates likely faults efficiently |
| Test Appliance | Run cycles after fix | Confirms solution, checks for new problems |
Thorough testing after any intervention validates your fix and prevents incomplete repairs that leave problems unsolved.
Pro tip: Record audio or video of the appliance running after your fix; this gives you a baseline to compare against if the noise returns later, helping you spot patterns in when problems develop.
Get Professional Help When Appliance Noise Becomes Overwhelming
Diagnosing strange noises in your refrigerator or washing machine can be frustrating and time-consuming. If you have followed steps like identifying the type of noise, inspecting key components, and testing the appliance but the problem persists or feels too complex, turn to experts you can trust. At MDTech Services, our licensed technicians specialize in repairing major household appliances with a safety-first approach and fast, reliable service across Orange County and Los Angeles County.

Do not let unusual appliance sounds disrupt your daily life or cause further damage. Contact MDTech Services today for professional appliance repair and installation. Benefit from our expertise handling everything from motor issues to belt replacements and electrical problems. Schedule your service online now and experience why local homeowners choose us for quick, accurate solutions that put an end to appliance noise for good.
Frequently Asked Questions
How do I prepare my workspace for diagnosing appliance noise?
To prepare your workspace, start by clearing any items around the appliance and ensuring you have at least 2 to 3 feet of space to move around. Gather essential tools like a digital multimeter, flashlight, and notepad to document your findings before starting your diagnosis.
What types of noises should I listen for in my appliance?
Listen for specific types of noises, such as squealing, grinding, humming, or rattling. Each sound can indicate different issues; for example, a squealing noise usually points to friction or worn bearings, while a grinding noise may suggest mechanical damage.
How can I identify the source of the noise in my appliance?
Identify the source of the noise by placing your ear near different parts of the appliance while it operates. Carefully note if the noise comes from areas like the motor, drum, pump, or specific cycles, and write down your observations for better accuracy.
What should I inspect first when diagnosing appliance noise?
Start by inspecting key components like belts, motors, and bearings. Check for visible wear, loose parts, or debris that could be causing the noise, focusing on the areas most likely to produce sound based on your previous observations.
How do I test my appliance after making adjustments?
Run the appliance through its normal cycle to see if the noise is resolved after making any repairs or adjustments. Listen closely for changes in the noise, and check if the appliance performs its intended function correctly to ensure the issue is addressed.
What steps should I document during the diagnosis process?
Document the times and conditions under which the noise occurs, your observations of the sound type, and any findings from your inspections. Keeping a clear record helps you articulate the problem if you need to consult a repair technician later.