Appliance malfunctions never seem to happen at a convenient time, and for many American homeowners in Orange or Los Angeles County, the frustration can quickly build. With over 80 percent of American households relying on major appliances daily, a sudden breakdown disrupts your routine, adds stress, and can even create safety concerns. This guide walks you through practical diagnostic steps to help you organize, troubleshoot, and decide when to call a local licensed technician for fast, reliable repairs.
Table of Contents
- Step 1: Prepare Your Workspace and Gather Tools
- Step 2: Observe Appliance Symptoms and Listen for Clues
- Step 3: Inspect Power Supply and Connections
- Step 4: Check Key Components for Visible Damage
- Step 5: Test Functionality and Confirm the Issue
Quick Summary
| Key Insight | Explanation |
|---|---|
| 1. Organize Your Workspace | Create a clean and efficient area to minimize accidents and enhance focus during repairs. |
| 2. Observe Appliance Symptoms | Use all your senses to detect unusual sounds or visuals that indicate underlying problems. |
| 3. Inspect Electrical Connections | Check power cords and outlets for damage to ensure safety and prevent electrical issues. |
| 4. Examine Key Components | Conduct a thorough visual inspection of critical parts for any signs of wear or damage. |
| 5. Document and Test Functionality | Record observations while testing to confirm issues and assist professionals if needed. |
Step 1: Prepare Your Workspace and Gather Tools
Successfully diagnosing appliance issues starts with creating an organized and safe workspace. You will prepare a clean, efficient area that allows you to work smoothly and safely while minimizing potential accidents or equipment damage.
Begin by clearing a large, flat surface like a workbench or sturdy table where you can comfortably spread out your tools and examine the appliance. Maintaining a clean and organized workspace is crucial for safety and efficiency, so remove any unnecessary items that could interfere with your repair work. Make sure you have good lighting and enough room to maneuver around the appliance.
Next, gather all the tools you might need before starting your repair. Your essential toolkit should include screwdrivers with multiple head types, adjustable wrenches, needle nose pliers, a multimeter, electrical tape, work gloves, and safety glasses. Arrange these tools within easy reach but away from the edge of your workspace to prevent accidental drops. Organizing your workspace is essential for efficient and safe appliance repair, so take time to lay out your equipment methodically.
Pro Tip: Create a dedicated tool zone on one side of your workspace where you can quickly access and return tools, keeping your primary work area clear and reducing the chances of misplacing critical repair equipment.
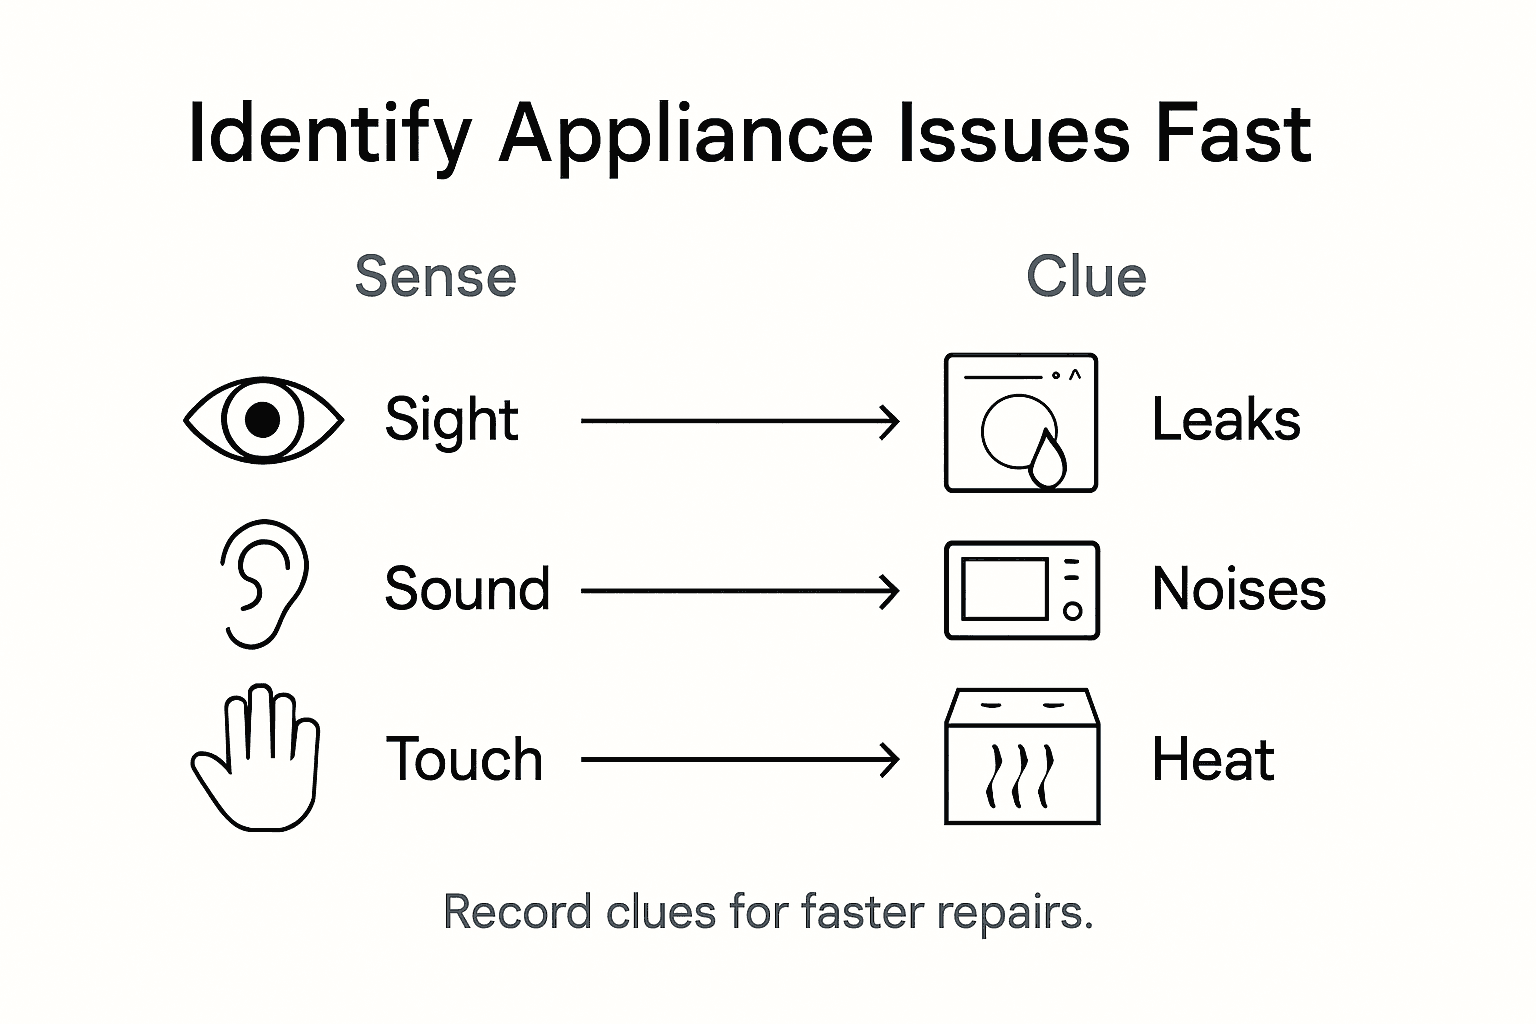
Step 2: Observe Appliance Symptoms and Listen for Clues
Identifying appliance problems early can save you significant time and money by catching minor issues before they escalate into major repairs. In this step, you will learn how to become a detective for your home appliances by recognizing subtle signs of potential mechanical troubles.
Start by using all your senses to evaluate your appliance’s performance. Listen carefully for any unusual sounds like grinding, squealing, buzzing, or clicking that differ from the appliance’s normal operational noise. Pay attention to sensory cues such as unusual noises or vibrations from appliances, as these can signal underlying mechanical problems that need immediate investigation. Watch for visual signs like frost buildup in refrigerators, water leaks, inconsistent temperatures, or strange discoloration on surfaces.
Beyond mechanical symptoms, be aware of potential health indicators. Be vigilant for symptoms like headaches, dizziness, or sleepiness, which might suggest issues with combustion appliances like gas stoves or heaters. These symptoms could indicate potential gas leaks or improper ventilation that require professional assessment. When in doubt about an appliance’s performance or your safety, always consult a licensed technician who can provide a comprehensive diagnostic evaluation.
Pro Tip: Create a simple log or smartphone note where you record the date, specific symptom, and your observation each time you notice something unusual with an appliance tracking potential developing issues over time.
Here is a quick reference table summarizing the senses and clues to watch for when diagnosing appliance issues:
| Sense Used | Clue Detected | Possible Cause or Issue |
|---|---|---|
| Hearing | Grinding, buzzing, clicks | Worn parts or electrical faults |
| Sight | Leaks, discoloration | Water damage or overheating |
| Smell | Burning, gas odors | Electrical burning or gas leak |
| Touch | Unusual vibrations | Loose or unbalanced components |
| Health Symptoms | Headache, dizziness | Gas leaks or poor ventilation |
Step 3: Inspect Power Supply and Connections
Understanding your appliance’s electrical connections is crucial for accurate diagnosis and safe troubleshooting. This step will guide you through carefully examining power sources and electrical pathways to identify potential issues that might be affecting your appliance’s performance.
Before disassembling any machine, remove oil and check power connections to ensure safety, a critical first step in your diagnostic process. Begin by unplugging the appliance and inspecting the power cord for any visible signs of damage such as fraying, cuts, or exposed wires. Look closely at the plug prongs for discoloration, bending, or corrosion which might indicate electrical resistance or connection problems. Check the outlet itself for any signs of burning, scorching, or unusual discoloration that could suggest underlying electrical issues.
Ensure that combustion appliances are properly connected and ventilated to prevent health hazards, particularly for gas or fuel-powered equipment. Use a multimeter to test outlet voltage and continuity, verifying that the electrical supply matches your appliance’s specifications. Pay special attention to grounding connections and look for any signs of loose or corroded wiring that could interrupt power delivery or create safety risks. If you encounter any complex electrical problems or feel uncertain about your findings, it is always recommended to consult a professional technician who can provide a comprehensive assessment.
Pro Tip: Keep a small notebook near your workspace to document your electrical connection findings, including measurements, observations, and potential areas of concern for future reference or professional consultation.
Step 4: Check Key Components for Visible Damage
Careful visual inspection of your appliance’s key components is crucial for identifying potential issues before they escalate into costly repairs. By methodically examining each critical part, you can catch early signs of wear, damage, or potential failure that might compromise your appliance’s performance.
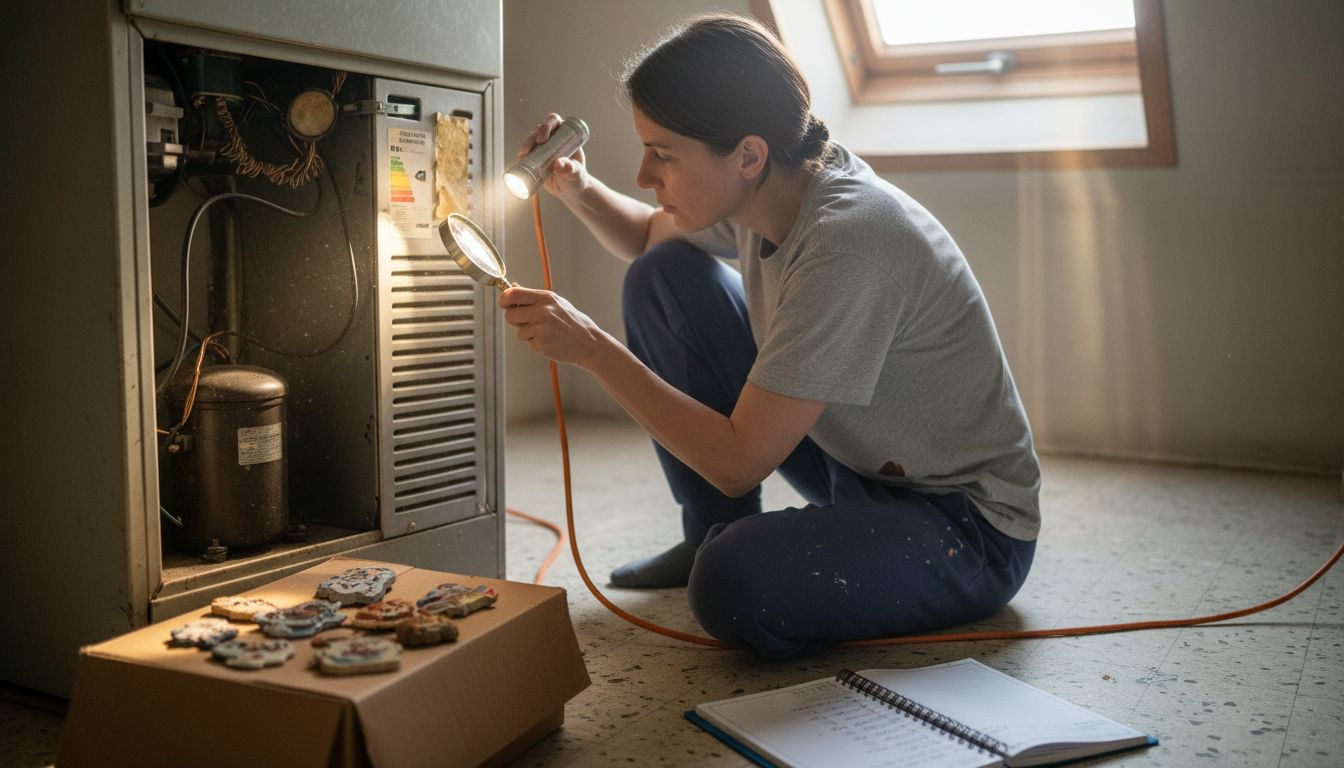
Before reassembling, inspect key components for visible damage to ensure proper functioning, focusing first on high stress areas. Start with mechanical parts like belts, seals, and moving components. Look for signs of cracking, excessive wear, discoloration, or deformation. Pay special attention to rubber components like gaskets and seals, which can deteriorate over time and cause leaks or inefficient operation. Check for rust, corrosion, or any unusual discoloration that might indicate internal breakdown or water damage.
Regularly inspect tools and equipment for visible damage and apply the same principle to your appliance. For electrical components, examine wiring for fraying, melted insulation, or signs of overheating. Look for burnt marks, warping, or discoloration around electrical connections and circuit boards. In refrigeration units, check the condenser coils for dust buildup, and in heating appliances, inspect heating elements for signs of wear or damage. If you notice any significant issues that seem beyond simple repair, it is recommended to consult a professional technician who can provide a comprehensive assessment.
Pro Tip: Use a bright flashlight and magnifying glass during your inspection to help you spot minute details and potential damage that might be invisible to the naked eye.
Step 5: Test Functionality and Confirm the Issue
After thorough visual inspection, the next critical step is to systematically test your appliance’s functionality to precisely diagnose the underlying problem. This stage requires a methodical approach to verify your initial observations and pinpoint the exact source of malfunction.
Engage in manufacturer recommended diagnostic techniques to enhance skills in accurately identifying appliance issues, starting with a comprehensive functional test. Reconnect the appliance safely and run it through its complete operational cycle, paying close attention to performance variations. Listen for unusual sounds, monitor temperature consistency, check for proper mechanical movements, and observe any irregular behaviors. For refrigeration units, verify cooling efficiency by measuring internal temperature. In washing machines, run a complete wash cycle to detect issues with spinning, drainage, or water fill mechanisms. For heating appliances, test temperature regulation and consistency.
Documentate each observed anomaly with specific details including time of occurrence, duration, and precise symptoms. This systematic documentation will be invaluable if you need to consult a professional technician. If the issue appears complex or potentially dangerous electric or gas components are involved, stop your investigation and contact a licensed repair professional who can safely diagnose and resolve the problem. Remember that some appliance issues can pose significant safety risks if improperly handled.
Pro Tip: Record a short video of the appliance during its malfunction to provide visual evidence that can help technicians diagnose the problem more quickly and accurately.
The following table summarizes the main diagnostic steps and the value each adds to the repair process:
| Diagnostic Step | Main Action | Value Added to Repair |
|---|---|---|
| Prepare Workspace & Tools | Organize area and tools | Reduces mistakes and improves safety |
| Observe Symptoms | Use senses to detect issues | Helps early issue identification |
| Inspect Power & Connections | Check cords, outlets, and wiring | Prevents electrical mishaps |
| Examine Key Components | Look for physical damage | Catches wear before failure |
| Test & Confirm Issue | Functional testing and recording | Confirms diagnosis and helps professionals |
Get Expert Help for Quick and Reliable Appliance Repairs
Struggling to identify what exactly is wrong with your home appliances can be frustrating and costly. This article highlights how important it is to observe symptoms carefully, inspect power supplies, and test functionality to catch issues early. If you want to avoid unsafe electrical faults, hidden damage, or escalating problems that disrupt your daily routine, professional support is just a click away.

At MDTech Services, we specialize in fast and dependable appliance repair and installation in Orange County and Los Angeles County. Our licensed technicians have the skills to thoroughly diagnose issues using the same detailed process described here, from checking power connections to inspecting key components for damage. We prioritize your safety and the longevity of your appliances with every service. Don’t let appliance troubles linger and cause further inconvenience. Visit our website now to schedule your appointment and experience trusted local expertise. Whether you need refrigerator repair, appliance conversions, or HVAC service, we are ready to get your home running smoothly again.
Frequently Asked Questions
How do I prepare my workspace for identifying appliance issues?
To prepare your workspace, clear a large, flat surface like a workbench and ensure it is well-lit. Gather your essential tools, such as screwdrivers, pliers, and a multimeter, and organize them in a dedicated area to streamline your repair process.
What signs should I look for when observing appliance symptoms?
When observing appliance symptoms, listen for unusual noises like grinding or buzzing and watch for physical signs such as leaks or discoloration. Use a simple log to track these symptoms, making it easier to pinpoint issues as they develop over time.
How can I inspect the power supply and connections of my appliance?
Inspect the power supply by unplugging the appliance and checking the power cord for fraying or damage. Conduct a visual check of the outlet for discoloration, and use a multimeter to test the voltage, ensuring proper electrical connections.
What key components should I examine for visible damage?
Examine mechanical parts such as belts and seals for cracks or excessive wear, and check electrical components for fraying wires or burning marks. Look closely at each component to catch signs of deterioration early, as this can prevent further appliance failure.
How do I test my appliance’s functionality to confirm the issue?
To test your appliance’s functionality, reconnect it and run it through its normal operation cycle, paying attention to any anomalies. Document your observations to create a clear picture of the issue, which will be helpful if you need to consult a repair professional.
What should I do if I cannot identify the appliance issue myself?
If you’re unable to identify the appliance issue after following the steps, stop any further investigation and consult a licensed technician. Provide them with your observations and notes, which can significantly expedite the diagnosis process.
Recommended
- Dishwasher repair or Installation Garbage disposal repair or Installation Airgap repair pump repair Fixing Dishwashers, Garbage Disposals, and More! – MDTech Services
- Appliance repair or Installation service Appliance Repair vs. Replacement: How to Make the Right Decision for Your Home – MDTech Services
- Washer repair Washing machine repair. A Second Chance for Washers: How We Transformed Broken Machines into Like-New Appliances – MDTech Services
- Refrigerator and Freezer Repair Hacks: Insider Tips from Industry Professionals – MDTech Services
- Akkus reparieren Guide: So bringen Sie Ihre Akkus zurück ins Leben – accu.blog
- How to Minimize Downtime: Efficient Diesel Injection Repairs – My WordPress