
The best thermostat placement is an interior wall in a central, frequently used room, mounted about five feet above the floor, away from sunlight, vents, doors, windows, and heat sources. Larger or multistory homes often need remote sensors or zoning to get an accurate read on the whole house. Get this right and your system runs less, cycles properly, and keeps rooms at the temperature you actually set.
TL;DR:
- Placing the thermostat on an interior wall in a central, frequently used room about five feet above the floor ensures accurate temperature readings, especially in larger or multistory homes.
- Avoid mounting thermostats in direct sunlight, near vents, on exterior walls, or in unused hallways, as these locations can cause inaccurate readings and inefficient system cycling.
- Using remote sensors or zoning is essential for homes with multiple floors or rooms with irregular heat gain, such as sunrooms or basements, to maintain consistent comfort.
- Proper wiring and installation by a licensed technician help prevent issues such as short-cycling, wiring problems, or sensor incompatibilities that can mimic placement errors.
- In homes with outlier spaces like basements or sunrooms, keep the main thermostat in a representative room and add sensors or zones to better control those environments.
Table of Contents
- 1. Choose an interior wall in a central, frequently used room
- 2. Placement mistakes that throw off your temperature readings
- 3. Mounting height, orientation, and wiring basics
- 4. Smart thermostats and sensors that adapt to tricky rooms
- 5. Quick checks before you decide it is a placement problem
- 6. Considerations for homes with multiple stories
- 7. Special environments: basements, sunrooms, and other outliers
- 8. Installer perspective: practical tradeoffs and MDTECH priorities
- MDTech Services: installation, wiring, and sensor setup done right
- Sources
- FAQ
1. Choose an interior wall in a central, frequently used room
A thermostat can only respond to the air around it, so its job is to sample a spot that represents how the rest of your home actually feels. Placing it on an interior wall in your main living space, rather than a room you rarely enter, gives your HVAC system a fair read on the temperature your family experiences most. The Building America / DOE forced air guide recommends mounting on an interior wall in a location that reflects the conditioned space it serves, since exterior walls swing with outdoor temperature and skew the reading.
Walk your home and note which rooms get used most during the day: living rooms, family rooms, and central hallways are usually good candidates.
- Skip rooms with unusual heat gain, like sunrooms or kitchens, since appliances and glass distort the reading.
- Favor a wall shared with other conditioned rooms rather than one facing the garage or attic.
- Pick a spot with steady airflow, not a dead-end nook where air barely circulates.
In a single-story home, one well-placed thermostat in the main living area usually does the job. In a multistory home, a thermostat on one floor cannot represent the temperature upstairs or downstairs. This is where secondary sensors or zoning start to matter.
2. Placement mistakes that throw off your temperature readings
Certain spots consistently cause problems, and each one has a specific mechanism behind it.
- Direct sunlight or south-facing walls heat the thermostat itself, so it reads the room as warmer than it is and shuts the system off too early.
- Above or below supply registers exposes the sensor to blasts of conditioned air, which triggers short-cycling because the thermostat reacts to the vent, not the room.
- Near doors and windows means drafts and outdoor air swings skew the reading every time someone comes and goes.
- On exterior walls or in unused hallways puts the thermostat in a microclimate that never matches the rooms you actually live in.
- Near kitchens or heat-producing appliances like ovens, lamps, or TVs adds artificial warmth that has nothing to do with overall comfort.
The DOE’s quality-installation guidance flags thermostat location near vents or sunlight as one of the more common field problems affecting comfort and equipment performance. If you suspect your placement is the issue, compare a portable thermometer’s reading in two or three rooms against what the thermostat shows, and watch whether the system turns on and off more frequently than it should.
3. Mounting height, orientation, and wiring basics
Most guidance points to a mounting height of about 50 to 62 inches, roughly five feet off the floor. That range keeps the sensor at chest to head height for an average adult, away from the cooler air that settles near the floor and the warmer air that rises toward the ceiling, so it reads a temperature closer to what you actually feel while standing or sitting in the room.
- Mount the thermostat level and centered on the wall stud area, not tilted or off to one side.
- Avoid walls with plumbing, wiring chases, or ductwork running behind them, since hidden heat sources can bias the reading.
- Check whether your system uses line-voltage wiring or needs a C-wire, since many smart thermostats require one for full functionality.
Pro Tip: If your wall has no existing low-voltage wiring or you are unsure whether a C-wire is present, have a licensed technician check before you buy a smart thermostat, since a missing C-wire is one of the most common reasons a new unit will not power on correctly.
4. Smart thermostats and sensors that adapt to tricky rooms
Smart thermostats with remote or occupancy sensors solve a real limitation: one fixed wall spot cannot represent every room in a home with uneven sun exposure or multiple floors. ENERGY STAR’s guidance on choosing a smart thermostat recommends checking system compatibility, including wiring and C-wire requirements, before installation, and notes that external and occupancy sensors are effective in larger homes or in rooms that run consistently warmer or cooler than the rest of the house.
- Add remote sensors in rooms far from the main thermostat, especially bedrooms or offices with heavy solar gain.
- Use occupancy sensing to average temperature readings across the rooms you use most, rather than relying on one fixed spot.
- Keep the thermostat reasonably close to your Wi-Fi router, or use a range extender, since ENERGY STAR notes that connectivity affects reliable performance.
Systems with heat pumps, ductless mini-splits, or variable refrigerant flow equipment behave differently than standard forced-air setups. Federal guidance on installing air-source heat pumps recommends sensing offsets of about 2 to 4 degrees Fahrenheit for high-wall indoor units, or the use of remote sensors, to keep comfort accurate at occupied level. If your home runs one of these systems, professional integration avoids guesswork.
5. Quick checks before you decide it is a placement problem
Before you relocate anything, run through a few home checks.
- Place an accurate thermometer in two or three rooms and compare readings against the thermostat over a few hours.
- Watch for short-cycling: a system that turns on and off in rapid bursts rather than running steady cycles.
- Look at nearby vents, doors, and windows, and note whether the thermostat sits in direct airflow or sunlight at any point in the day.
- Try a temporary fix, like a portable sensor in the room that runs hottest or coldest, or rebalancing supply dampers.
- Check filters and return-air paths, since a blocked return can mimic a placement problem even when the thermostat location is fine.
If uneven temperatures persist after these checks, or if the issue involves wiring, zoning, or a heat pump and you are not confident diagnosing it, call a licensed technician. Duct imbalance and blocked returns are common root causes that relocating a thermostat will not fix on its own, a point covered in more detail in our guide to airflow balancing in home HVAC systems.
6. Considerations for homes with multiple stories
A single thermostat on one floor cannot account for the natural temperature differences between floors. Heat rises, so upper floors tend to run warmer in summer and can feel colder near windows in winter, while basements and ground floors often stay several degrees cooler year round. Placing the main thermostat on the floor where your family spends the most time gives you the most representative baseline, but it will rarely satisfy every floor equally.
For homes with two or more distinct living levels, zoning is usually the more reliable fix rather than hunting for a single perfect spot. A zoned system uses separate thermostats or sensors per floor, each controlling its own dampers or equipment stage, so upstairs bedrooms are not held hostage to a thermostat reading from the main floor living room. Our guide to HVAC zone systems covers how that setup works in more detail.
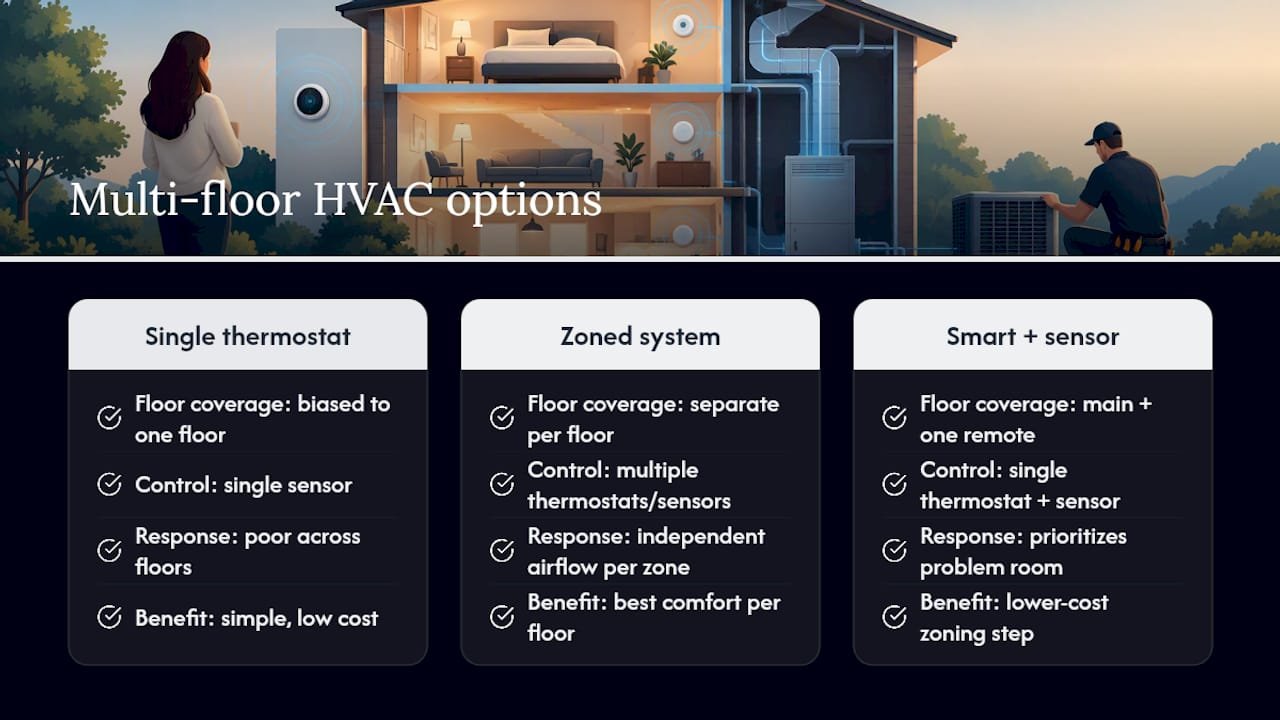
If full zoning is not in the budget yet, a smart thermostat with a remote sensor placed on the problem floor is a reasonable middle step. It will not control airflow independently the way a true zoned system does, but it lets the thermostat average or prioritize the temperature from the room that actually needs attention, which is far better than guessing based on a reading from two floors away.
7. Special environments: basements, sunrooms, and other outliers
Humid basements and sun-heavy rooms both distort thermostat readings, just in opposite directions. A finished basement often runs cooler and more humid than the rest of the house, and a thermostat placed there will call for more heating or cooling than the upper floors actually need. If a basement has its own HVAC zone, a dedicated thermostat there makes sense. If it shares equipment with the rest of the home, it is rarely the right spot for the main control.
Sunrooms and rooms with large south-facing windows swing the other direction, heating up fast during the day and cooling quickly after sunset. A thermostat here will overreact to short bursts of solar heat rather than reflecting how the rest of the home feels, and it commonly causes the AC to run longer than it needs to elsewhere in the house.
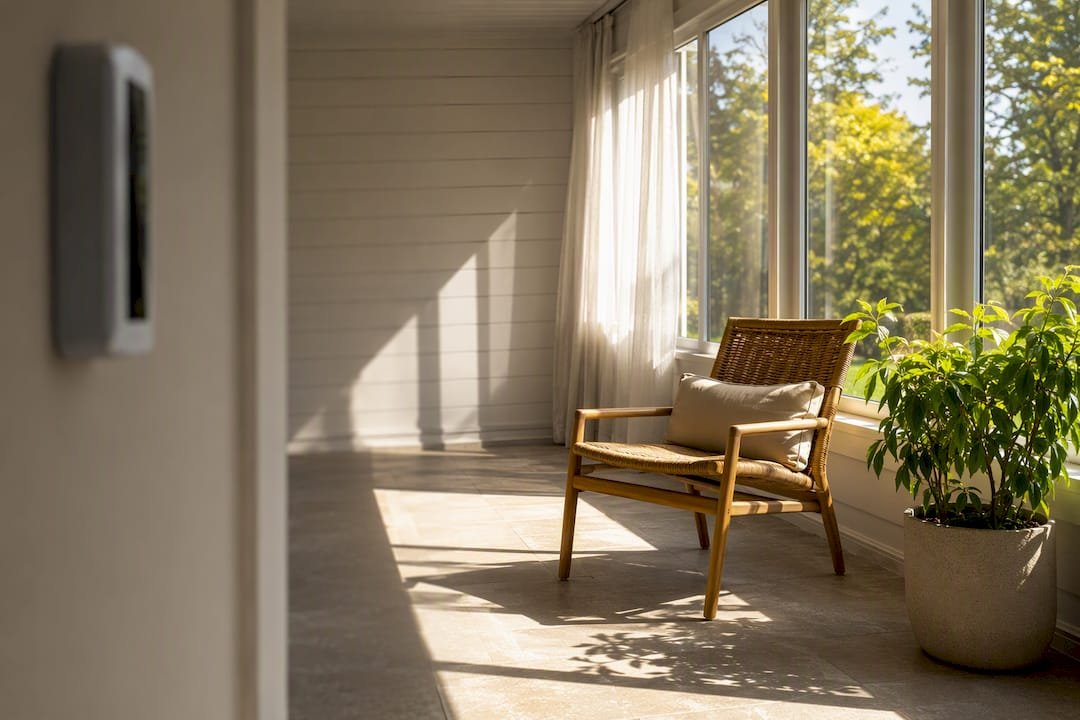
For both environments, the fix is usually the same: keep the main thermostat in a representative, centrally used room, and treat basements, sunrooms, or other outlier spaces as candidates for a remote sensor, a separate zone, or, at minimum, a spot thermometer check when the room feels off. Attempting to solve a whole-house comfort problem by relocating the main thermostat into an outlier room typically makes things worse, not better.
8. Installer perspective: practical tradeoffs and MDTECH priorities
We prioritize representative sensing and long-term energy savings over placement that just looks tidy on the wall. When a single spot cannot fairly represent a home, we recommend a sensor or a zoning setup instead of chasing the impossible perfect wall. Moving or replacing a thermostat is a modest job, and a licensed technician catches wiring and compatibility issues a DIY move often misses.
— MDTECH
MDTech Services: installation, wiring, and sensor setup done right
Getting placement right on paper is one thing. Getting the wiring, compatibility, and sensor setup right in your actual walls is another, and that is where a licensed technician earns their keep.

Thermostat installation and replacement, HVAC compatibility checks, C-wire and wiring work, sensor installation, and zone control planning are services offered by some local providers. If your system keeps short-cycling, your upstairs never matches the thermostat, or you are not sure whether your heat pump needs a sensor offset, our HVAC Services team can diagnose it on-site rather than have you guess room by room. For systems already showing signs of strain from poor placement, our HVAC Repair technicians can fix the airflow or wiring issue at the same visit. Book a service call and get it sorted properly the first time.
Sources
- Forced Air HVAC Guide (Building America / DOE)
- Guide to Installing Air-Source Heat Pumps in Cold Climates
- Energy
FAQ
Where is the best placement for a thermostat?
The best spot is an interior wall in a central, frequently used room, mounted about five feet above the floor. This keeps the sensor away from drafts, sunlight, and vents while giving it a fair read on the temperature your household actually experiences, as outlined in DOE placement guidance.
Where not to place a thermostat?
Avoid direct sunlight, exterior walls, supply registers, doors, windows, kitchens, and rarely used hallways. Each of these spots introduces heat, drafts, or airflow that does not reflect the rest of your home, and can trigger short-cycling.
Should the thermostat be in the coldest room?
No, the thermostat should go in a room that represents typical living conditions, not the coldest or warmest extreme. If one room runs consistently colder, such as a basement or sunroom, a remote sensor or separate zone is a better fix than moving the main thermostat there, as covered in the section on special environments above.
What is the best temperature to keep your thermostat set at?
There is no single correct setting since it depends on the season, your comfort preference, and your system type. Focus on consistent placement and accurate sensing first, since a well-placed thermostat makes any temperature setting more reliable to maintain.