
The most effective way to prevent water leaks is to act on eight specific steps right now: locate and label your main shutoff valve, find every appliance-level shutoff, install at least one leak detector or flow-monitoring device, inspect and replace aging supply hoses, clean gutters and check your yard’s grading, insulate exposed pipes before cold weather, test your sump pump, and monitor your water bill monthly for unexplained spikes. Fewer than 20% of homeowners take these routine precautions, yet household leaks can waste thousands of gallons per year. One inch of standing water in an average home can cause roughly $25,000 in damage. The cost of prevention is a fraction of that.
Here is your quick-start checklist:
- Find your main shutoff valve and confirm it turns off completely.
- Locate appliance shutoffs for your washing machine, dishwasher, toilet, ice maker, and water heater.
- Install a point-of-use moisture sensor under high-risk appliances and consider a whole-house flow monitor.
- Inspect and replace washing machine hoses if they are older than five years.
- Clean gutters and downspouts and confirm water drains away from your foundation.
- Insulate exposed pipes in crawl spaces, garages, and exterior walls before winter.
- Test your sump pump by pouring water into the pit and watching the float trigger.
- Check your water meter during a no-use period to catch hidden leaks.
Pro Tip: If you find an active leak, shut off the nearest valve first, then turn off electricity to the affected area if it is safe to do so. Call a licensed plumber for anything beyond a simple fixture drip. Keep your plumber’s number saved in your phone before you need it.
Key Takeaways
Preventing water leaks comes down to five consistent habits: know your shutoffs, maintain your appliances, monitor your usage, protect your exterior, and call a licensed plumber when the situation exceeds a simple fix.
| Point | Details |
|---|---|
| Know your shutoffs | Locate and label the main valve and every appliance shutoff before a leak occurs. |
| Replace hoses on schedule | Washing machine rubber hoses should be replaced every 5 years; braided stainless every 10 years. |
| Monitor your water bill | A sustained 20% spike with no change in habits warrants a meter test and visual inspection. |
| Install leak detectors | Combine point-of-use sensors with a whole-house flow monitor for the fastest detection coverage. |
| Mdtechservices for professional help | Licensed plumbing inspections, leak diagnostics, and appliance servicing across Orange County and Los Angeles County. |
Table of Contents
- How to find and use your shutoff valves
- How to choose and install leak detectors and flow monitors
- Inspecting appliances, supply hoses, and visible plumbing
- How exterior maintenance keeps water out of your home
- Sump pump testing and basement drainage
- How to monitor water use and find hidden leaks
- What to do the moment you find a leak
- When to call a licensed plumber and what to ask
- What a professional inspection and repair actually looks like
- Practical habits that actually reduce leak risk over time
- Mdtechservices is ready to help with leaks and plumbing repairs
- Sources
How to find and use your shutoff valves
Knowing where your shutoff valves are before a leak starts is one of the most practical things you can do. In a crisis, every second counts.
Finding the main shutoff
The main shutoff is usually in one of three places: near the water meter at the curb or in the yard, in the basement or crawl space along the front foundation wall, or in a utility room near the water heater. In Southern California homes, it is often in a covered box at the curb. Turn the valve clockwise to close it. If it is a ball valve (lever handle), rotate the lever 90 degrees until it sits perpendicular to the pipe.
Appliance-level shutoffs to locate now
- Toilet: Behind or below the tank, on the supply line coming from the wall.
- Washing machine: Two valves on the wall behind the machine (hot and cold).
- Dishwasher: Under the kitchen sink, on the hot-water supply line.
- Ice maker: Behind the refrigerator or under the sink, on a small saddle valve or angle stop.
- Water heater: On the cold-water inlet pipe at the top of the unit.
Step-by-step: turning off the main valve safely
- Locate the valve (curb box, basement, or utility room).
- Turn the handle clockwise until it stops. Do not force it past resistance.
- Open a faucet on the lowest floor to confirm water stops flowing.
- Once the leak is addressed, open the main slowly to avoid a pressure surge.
Pro Tip: Label every shutoff valve with a waterproof tag. Keep a valve key or adjustable wrench near the main shutoff so you are not searching for tools during an emergency. If a valve is stuck, corroded, or leaking at the stem, call a licensed plumber rather than forcing it.
If a shutoff valve itself is leaking or will not close fully, that is a professional repair. Forcing a stuck gate valve can break the stem and leave you with no shutoff at all.
How to choose and install leak detectors and flow monitors
Point-of-entry flow monitors and point-of-use moisture sensors serve different purposes, and the best protection combines both. Understanding the difference helps you spend wisely.
Point-of-use sensors sit on the floor under a washing machine, water heater, or sink. They detect moisture that has already escaped and trigger an alert. They are inexpensive, battery-powered, and easy to place without a plumber.
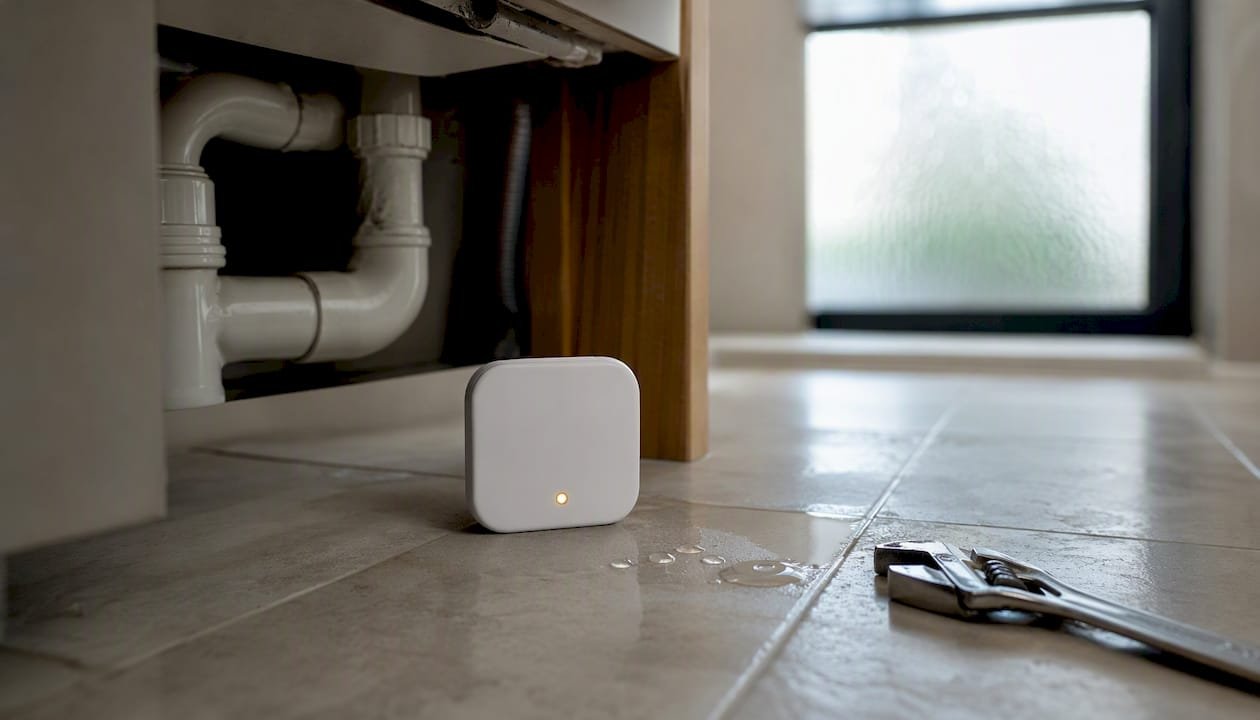
Point-of-entry flow monitors attach to the main supply line and track flow rate and pressure continuously. They can detect a slow drip anywhere in the house by noticing that water keeps moving when it should not. Many models include an automatic shutoff valve that closes the main line when an anomaly is detected. These devices are more likely to catch small or hidden leaks before they become visible.
Selection checklist
- Notifications: Does the device send smartphone alerts via Wi-Fi or cellular?
- Auto shutoff: Does it close the main valve automatically, or only alert you?
- Pipe size compatibility: Confirm the flow monitor fits your supply line diameter (typically ¾ inch or 1 inch in residential homes).
- Power and backup: Battery backup or hardwired? What happens during a power outage?
- False-alarm tolerance: Can you set sensitivity thresholds to avoid nuisance shutoffs?
- Maintenance needs: Does the device require annual calibration or firmware updates?
Installation considerations
Point-of-use sensors require no tools and no plumber. Point-of-entry flow monitors with automatic shutoff valves involve cutting into the main supply line, which most homeowners should leave to a licensed plumber. After installation, test the device by running water and confirming the app receives data, then simulate a leak with a wet cloth to verify the sensor triggers.
For a deeper look at leak detection device selection, including calibration schedules and device comparisons, the Mdtechservices guide covers the full process.
Between 2019 and 2023, about 1.5% of homeowners filed a water damage or freezing claim, with average costs in the mid-five figures. A whole-house flow monitor with automatic shutoff typically costs a few hundred dollars installed, a fraction of a single claim.
Maintenance schedule
- Test point-of-use sensors monthly by pressing the test button.
- Replace batteries annually or when the low-battery alert triggers.
- Run a full flow-monitor test (simulate a drip) every six months.
- Check for firmware updates quarterly if the device is app-connected.
Inspecting appliances, supply hoses, and visible plumbing
Washing machine hoses, dishwasher supply lines, and refrigerator ice-maker connections are among the most common causes of household water damage, along with burst pipes and clogged gutters. Most of these failures give visible warning signs before they become floods.
What to inspect and how often
- Monthly: Look under sinks, behind the washing machine, and around the water heater base for moisture, discoloration, or pooling.
- Quarterly: Flex each supply hose gently and look for cracks, bulges, or soft spots. Check faucet bases and toilet bases for staining.
- Annually: Pull the washing machine forward and inspect the full length of both hoses. Check the dishwasher supply line at both connection points.
Replacement intervals
Replacing a washing machine hose costs under $30 and takes 15 minutes. A hose failure can release hundreds of gallons per hour. That trade-off makes hose replacement one of the highest-return maintenance tasks in the home.
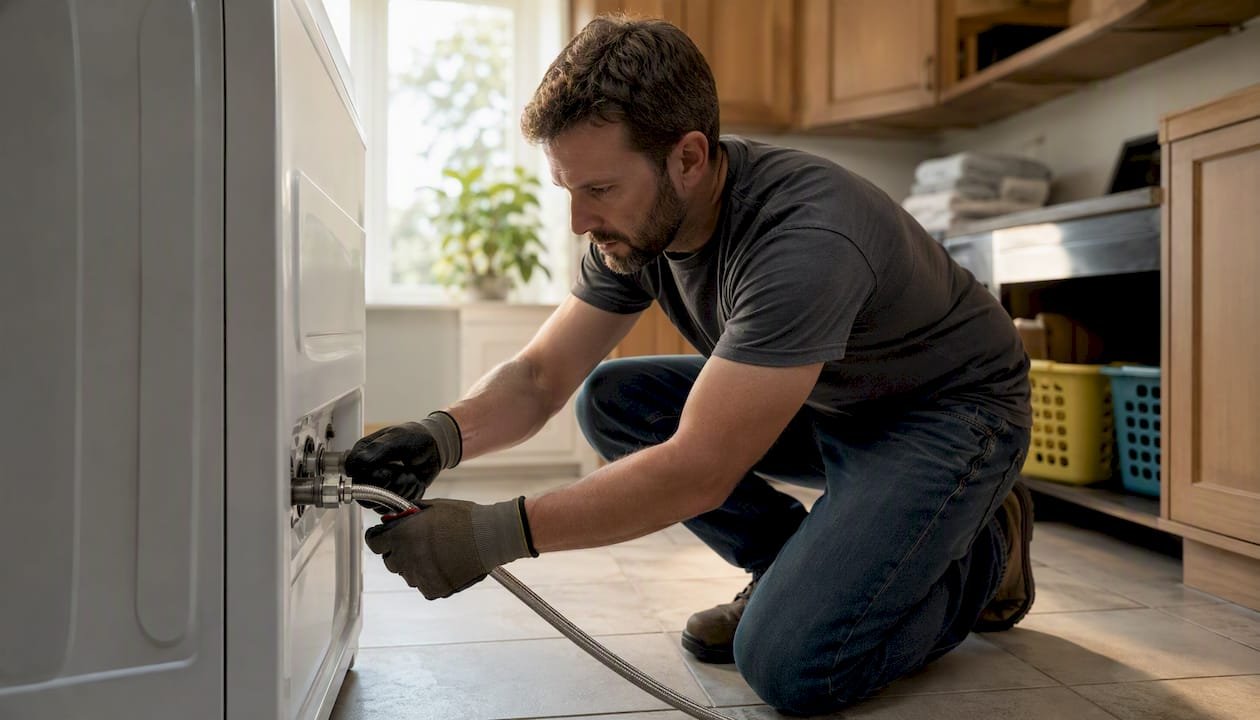
Pro Tip: When replacing rubber washing machine hoses, upgrade to braided stainless steel. They resist bursting under pressure and last twice as long. For bathroom waterproofing around plumbing penetrations, a bead of silicone caulk at the wall connection point prevents moisture from wicking into the substrate.
For quick fixes: a dripping faucet with a worn washer or O-ring is a DIY repair. A toilet flapper replacement takes five minutes and costs under $10. Anything involving the supply line inside the wall, a water heater connection, or a corroded shutoff valve belongs with a licensed plumber.
How exterior maintenance keeps water out of your home
Water that enters through the roof, foundation, or exterior walls causes the same damage as a burst pipe, and it is just as preventable. Clogged gutters are a direct cause of roof and foundation water intrusion.
Gutters and downspouts
- Clean gutters at least twice a year: once in late spring and once in late fall after leaves drop.
- Confirm downspouts extend at least 6 feet from the foundation before discharging.
- Check that gutters slope toward downspouts (no standing water after rain).
- Install gutter guards if trees overhang the roof.
Roof inspection basics
Walk the perimeter of your home and use binoculars to check for missing or curled shingles, lifted flashing around chimneys and vents, and gaps in chimney cap mortar. After any storm with winds above 50 mph, do a visual check from the ground. A licensed roofer should inspect the roof every three to five years, or after any significant storm.
Grading and drainage
The ground around your foundation should slope away from the house at roughly 1 inch per foot for the first 6 feet. If water pools near the foundation after rain, add compacted soil to restore the slope. For persistent drainage problems, a French drain or catch basin installed by a drainage contractor is the right solution.
Pro Tip: Check outdoor hose bibs and irrigation lines each spring before turning the system back on. A cracked bib from winter freeze can drip inside the wall cavity for weeks before you notice it. Shut off irrigation lines at the interior valve each fall and drain the lines before the first freeze.
Pools with automatic fill valves should be checked monthly. A stuck fill valve can run continuously and add hundreds of dollars to your water bill before you notice the meter moving.
Sump pump testing and basement drainage
A sump pump that fails during a heavy rain event is one of the fastest ways to turn a wet basement into a major insurance claim. Testing takes less than ten minutes.
Step-by-step sump pump test
- Confirm the pump is plugged in and the outlet has power.
- Pour a five-gallon bucket of water slowly into the pit.
- Watch the float rise and trigger the pump automatically.
- Confirm water discharges through the outlet pipe and away from the foundation.
- Test the backup power source (battery backup or water-powered backup) by unplugging the primary pump and repeating the bucket test.
Maintenance schedule
- Clean the pit of debris every six months.
- Inspect the float switch for free movement (no obstructions).
- Check the check valve on the discharge pipe annually; replace it if it leaks back.
- Replace the battery in a battery-backup unit every two to three years, or per manufacturer guidance.
When to call a pro
If the pump runs continuously without the pit filling, the float switch may be stuck or the check valve may be failing. If the pump fails the bucket test entirely, replace the unit before the next rain season. A plumber or sump pump specialist can assess whether the pit size and pump capacity match your home’s groundwater load.
For homes with persistent basement moisture, a French drain installed along the interior perimeter of the foundation wall channels groundwater to the sump pit before it reaches the floor. Exterior foundation weep holes should be inspected and cleared annually if your home has them.
How to monitor water use and find hidden leaks
Silent leaks, the ones you cannot see or hear, are often the most expensive. An unexplained, sustained spike in your water bill is the primary indicator that something is leaking inside the home. The EPA recommends a simple meter test and annual checks of any leak-detection devices you have installed.
Meter test procedure
- Turn off every water-using fixture and appliance in the home, including the ice maker and irrigation system.
- Locate your water meter (usually at the curb or in a covered box near the street).
- Record the reading, including the low-flow indicator dial if present.
- Wait 30 minutes without using any water.
- Re-read the meter. Any movement confirms a leak somewhere in the system.
Toilet dye test
Drop a dye tablet or a few drops of food coloring into the toilet tank. Wait 10 minutes without flushing. If color appears in the bowl, the flapper is leaking. Replacing a worn flapper every five years prevents this silent waste. A leaking toilet flapper can waste dozens of gallons per day without making any audible sound.
Bill monitoring
Compare your water bill to the same month in the prior year. Your utility company can often flag unusual usage patterns if you call and ask.
Pro Tip: Place point-of-use moisture sensors under the kitchen sink, behind the washing machine, and under the water heater for the best early-warning coverage. Pair those sensors with a whole-house flow-monitoring device to catch leaks that occur inside walls or under slabs before they reach the floor.
What to do the moment you find a leak
Speed matters. Water-damaged areas should be dried within 24–48 hours to reduce mold risk. Every minute a leak runs unchecked adds to the repair cost and the insurance complexity.
Immediate steps
- Shut off the nearest valve (appliance-level first, main shutoff if needed).
- Turn off electricity to the affected area at the breaker panel if water is near outlets, fixtures, or the electrical panel. Do not enter standing water if you are unsure about electrical safety.
- Move valuables, electronics, and furniture out of the wet area.
- Place buckets and towels to contain water and slow spread.
Documentation checklist
- Take photos and video of all visible damage before moving anything.
- Note the date and time the leak was discovered.
- Photograph the water meter reading at the time of discovery.
- Keep all damaged materials (flooring samples, drywall pieces) until the adjuster has inspected.
Insurance procedure
- Call your insurance agent or carrier’s claims line as soon as the leak is contained.
- Non-weather-related water damage is covered by most homeowners policies when it is sudden and accidental, but insurers expect homeowners to mitigate damage promptly. Failing to act quickly can affect your claim outcome.
- Your policy’s “duty to mitigate” clause means you are expected to take reasonable steps to prevent further damage. Document every step you take.
- Temporary repairs such as epoxy patches or pipe clamps are acceptable short-term fixes, but they should be disclosed to your adjuster. Permanent repairs made before the adjuster inspects can complicate the claim.
For a complete plumbing emergency checklist covering documentation and insurance steps, Mdtechservices has a step-by-step guide ready to use.
When to call a licensed plumber and what to ask
Some leaks are DIY repairs. Many are not. Knowing the line protects your home and your insurance coverage.
Red-flag scenarios that require a licensed plumber
- Active pipe burst or water flowing from inside a wall.
- Water pooling under a concrete slab (slab leak).
- Sewer backup or drain gurgling in multiple fixtures simultaneously.
- A leak that returns within days of a DIY repair.
- Visible mold or mildew growth near a plumbing fixture.
- Water near the electrical panel, outlets, or any wiring.
Questions to ask before hiring
- Are you licensed and insured in California? (Request the license number and verify it with the CSLB.)
- What diagnostic methods do you use — camera inspection, pressure test, moisture meter?
- Will you provide a written estimate before starting work?
- What warranty do you offer on parts and labor?
- Will this repair require a permit, and will you pull it?
- What is your timeline, and will you provide written documentation of the repair?
What to have ready for the plumber
- Photos of the leak location and any visible damage.
- Your home’s age and pipe material if known (copper, galvanized, PEX).
- A history of prior leaks or repairs in the same area.
- Your water meter reading from the day you noticed the problem.
Pro Tip: Ask the plumber to include specific diagnostic steps on the written estimate, not just a repair line item. “Replace toilet flapper” is less useful than “pressure-test supply line, inspect flapper and fill valve, replace worn components.” The detail tells you whether the diagnosis was thorough.
What a professional inspection and repair actually looks like
Understanding the professional workflow helps you evaluate quotes and know whether a technician is being thorough or cutting corners.
Typical professional workflow
- Intake and history: The technician asks about the leak’s location, duration, and any prior repairs. This context narrows the diagnostic field before any tools come out.
- Visual inspection: Check all accessible pipes, joints, fittings, and fixtures for moisture, corrosion, staining, or mineral deposits.
- Non-destructive diagnostics: A moisture meter identifies wet areas inside walls without cutting drywall. A camera inspection checks drain lines for cracks or blockages. A pressure test confirms whether the supply line holds pressure or bleeds down.
- Targeted repair: Fix only what the diagnostics confirm. Good technicians do not guess.
- Post-repair testing: Run water through the repaired system and re-check with the moisture meter to confirm the leak is resolved.
- Documentation: Provide a written summary of findings, parts used (with brand and model), warranty terms, and recommended follow-up.
Common repairs and what they involve
- Toilet flapper and fill valve: 20–30 minute repair, parts under $30, fully DIY-capable but a plumber can confirm no supply-line issues exist.
- Washing machine hose replacement: 15–30 minutes, straightforward, but a plumber should inspect the wall valve at the same time.
- Water heater element or piping repair: Requires draining the tank and working with high-temperature components; licensed technician recommended.
- Pinhole leak in copper pipe: A compression clamp is a short-term fix. A soldered or push-fit repair is the permanent solution. If the pipe shows multiple pinholes, full section replacement is the right call.
A written scope of work protects you as much as the plumber. It sets expectations, gives you a record for insurance, and holds the technician accountable for the warranty. Never authorize work without one.
Pro Tip: Request that the estimate list the specific parts brand and part number for any component being replaced. This lets you verify quality and gives you a reference point if the same part fails again under warranty.
For plumbing upgrade ideas that reduce leak risk during a remodel, including accessible shutoff placement and drain routing, that resource covers the planning side in detail.
Practical habits that actually reduce leak risk over time
The homeowners who avoid major water damage are not the ones who react fastest. They are the ones who never face a crisis because they caught the problem in March, not in the middle of a rainstorm.
A quarterly visual check takes 20 minutes: look under every sink, behind the washing machine, at the water heater base, and at the toilet supply line. That routine catches the slow drip that becomes a rotted cabinet floor if left alone for six months. Annual appliance hose replacement on a fixed schedule removes the guesswork entirely. Labeling every shutoff valve and logging your average monthly water bill creates a baseline that makes anomalies obvious.
The financial case for one annual professional plumbing inspection is straightforward. Regular plumbing maintenance catches corrosion, worn fittings, and pressure irregularities before they fail. A professional visit costs a fraction of a single water damage claim, and it gives you documentation that shows your insurer you are maintaining the home responsibly.
Vacation prep deserves its own habit. Before leaving for more than a few days, shut off the main water supply or activate the automatic shutoff on your flow monitor. Ask a neighbor to check the home every two to three days. Enable push notifications on any connected leak sensors. A leak that runs for a week while you are away is a very different problem than one caught in an hour.
Mdtechservices is ready to help with leaks and plumbing repairs
When the checklist reveals something beyond a hose swap or a flapper replacement, Mdtechservices provides licensed plumbing inspections, leak diagnostics, appliance hose and water heater servicing, sump pump and drainage repairs, and installation of flow monitors and automatic shutoff devices across Orange County and Los Angeles County.
Every service visit includes licensed technicians, a written estimate before work begins, warranty coverage on parts and labor, and documentation you can use for insurance purposes. Whether your home shows a red-flag sign like water under a slab or you simply want a professional eye on aging plumbing before it becomes a problem, Mdtechservices is a reliable next step. To schedule a plumbing inspection or appliance repair, contact Mdtechservices directly through the website or call to book an appointment. You can also review the full plumbing checklist to see exactly what a professional inspection covers.
Sources
- WaterSense products: leak detection and flow monitoring guide (EPA)
- Understanding the Fundamentals: The real cost of flooding | NFIP for agents
- Water Damage Insurance Claims Statistics 2026 | ConsumerAffairs®
- Water Damage Statistics — Insurify