
TL;DR:
- Drain cleaning involves removing blockages with mechanical tools and natural treatments. Most minor clogs can be cleared in under 30 minutes by homeowners following proper steps. If DIY methods fail twice or multiple drains back up simultaneously, calling a professional plumber is necessary to prevent damage.
Drain cleaning is a systematic process of removing blockages from household plumbing using mechanical tools and natural treatments. Most homeowners can complete step by step drain cleaning in 10–30 minutes with basic tools costing under $20, and roughly 90% of household clogs are minor enough to clear without calling a professional. The key is following the right sequence: start shallow, work deeper, and know when to stop. Industry standards recommend a mechanical-first approach to protect your pipes and avoid costly mistakes.
What tools and safety gear do you need for drain cleaning?
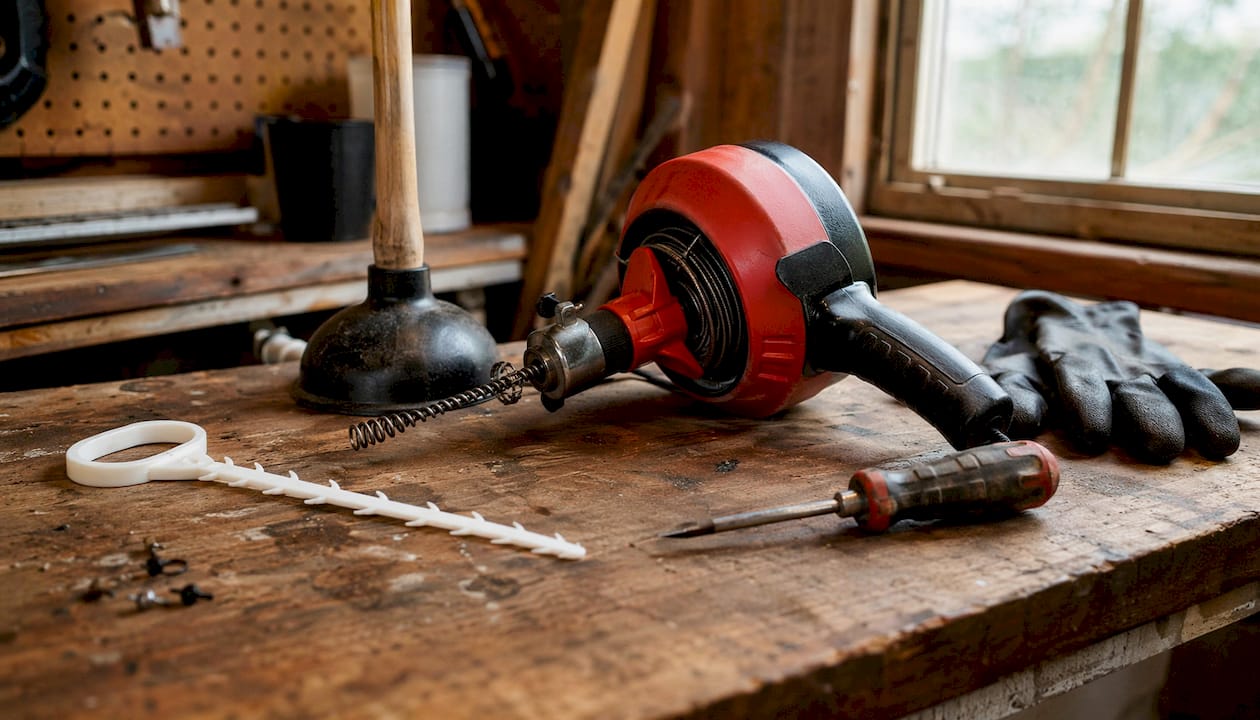
Gathering the right tools before you start saves time and prevents mid-job trips to the hardware store. The two most important mechanical tools are a cup plunger (for flat drains like sinks) and a flange plunger (for toilets, which have an extended rubber lip that seals the bowl opening). A hand auger, also called a drain snake, is a 15–25 foot flexible cable that reaches clogs beyond the P-trap.
For natural treatments, keep baking soda, white vinegar, and dish soap on hand. You will also want a bucket, channel-lock pliers for removing the P-trap, and a barbed plastic hair removal tool for bathroom drains. These tools together cover the full range of common household clogs.
Safety gear is non-negotiable. Wear rubber gloves to protect against bacteria and chemical residue. Add safety glasses when using a drain snake or working under a sink. Chemical drain cleaners are a last resort because they corrode chrome and PVC pipes and leave harmful residue in your plumbing system.
| Tool | Purpose |
|---|---|
| Cup plunger | Clears sink and tub drain clogs with suction |
| Flange plunger | Seals toilet bowl for effective plunging |
| Hand auger (drain snake) | Breaks or extracts deep clogs past the P-trap |
| Barbed hair tool | Pulls hair clogs from bathroom drains manually |
| Channel-lock pliers | Loosens P-trap slip nuts for removal and cleaning |
| Baking soda and vinegar | Natural treatment for mild buildup and odors |
| Rubber gloves and safety glasses | Protects hands and eyes during cleaning |
Pro Tip: Buy a barbed plastic hair removal tool for about $3 at any hardware store. It pulls more hair from a bathroom drain in 30 seconds than a plunger does in 10 minutes.
Step by step mechanical drain cleaning methods for common household clogs
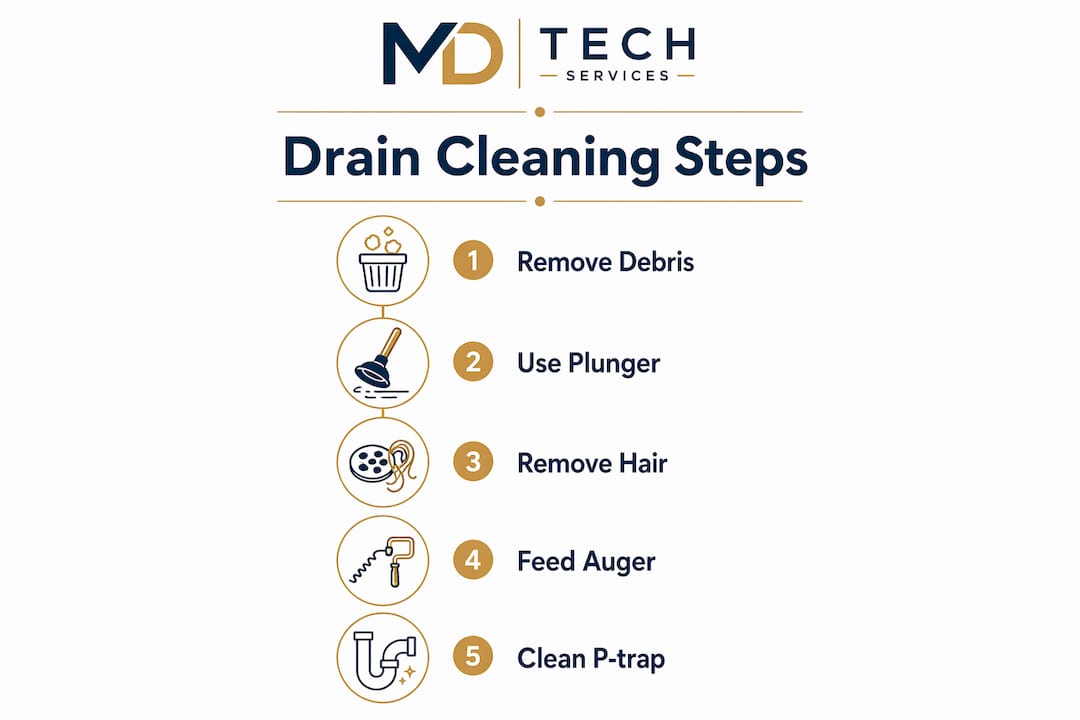
The recommended mechanical sequence is: plunger first, then manual hair removal, then hand auger, then P-trap cleaning. Always start with the shallowest accessible point and work deeper only if the clog persists. Skipping steps wastes time and risks pushing the clog further into the pipe.
Step 1: Remove visible debris and clean the stopper
Pull out the drain stopper or strainer by hand or with a screwdriver. Most bathroom sink stoppers lift out after you unscrew the pivot rod nut under the sink. Rinse the stopper under running water and scrub off any hair or soap buildup with an old toothbrush. Reinstall it only after you have cleared the drain.
Step 2: Use a plunger correctly
Place the cup plunger directly over the drain opening. Before you push, seal the overflow hole (the small opening near the top of the sink basin) with a wet rag or tape. Failing to seal the overflow hole releases the pressure you build with the plunger, making every stroke useless. With the overflow sealed, press the plunger down firmly to create a tight seal, then use a steady push-and-pull motion for 20–30 seconds.
The pull stroke creates a hydraulic vacuum that dislodges clogs as effectively as the push stroke. Most homeowners only push, which cuts their results in half. After plunging, run hot tap water for 30 seconds to flush the loosened material.
Pro Tip: Fill the sink with 2–3 inches of water before plunging. Water transmits pressure better than air, making each stroke more powerful.
Step 3: Remove hair manually
If the plunger does not clear the drain, insert a barbed hair removal tool or a straightened wire hanger with a small hook bent at the end. Push it 4–6 inches into the drain and rotate it slowly while pulling upward. Hair clogs almost always sit within the first 6 inches of a bathroom drain. Remove the hair, dispose of it in the trash (not back into the drain), and test the drain with running water.
Step 4: Feed a hand auger into the drain
If the clog is deeper, feed a hand auger into the drain opening. Push the cable in slowly while turning the handle clockwise. When you feel resistance, you have reached the clog. Continue rotating to either break through the blockage or hook it so you can pull it out. Withdraw the cable slowly and wipe it clean with a rag as it comes out. Run water to confirm the drain is clear.
Pro Tip: Never force the auger cable. If it bunches up inside the pipe, you risk scratching the pipe walls or creating a secondary blockage. Slow, steady rotation is the right technique.
Step 5: Remove and clean the P-trap
The P-trap is the curved pipe section directly under the sink. Place a bucket under it before you start. Loosen the two slip nuts on either side of the curve by hand or with channel-lock pliers. Slide the P-trap off and dump its contents into the bucket. Clean the inside of the trap with a bottle brush, rinse it, and reinstall it hand-tight. Run water and check for leaks at both slip nut connections.
How do natural treatments like baking soda and vinegar help?
Natural treatments work best as a maintenance step after mechanical cleaning or for mild odor and buildup issues. They are not strong enough to break apart a solid hair or grease clog on their own. Think of them as a follow-up rinse, not a first response.
The correct sequence is straightforward. Pour one cup of baking soda directly into the drain, followed immediately by one cup of white vinegar. The fizzing reaction loosens light soap scum and organic buildup on pipe walls. Cover the drain opening with a stopper or rag to direct the reaction downward rather than up and out of the drain. Wait 15–20 minutes, then flush with hot tap water for 60 seconds.
Boiling water warps PVC pipe joints, and most homes built after 1980 use PVC throughout. Use the hottest water from your tap instead. If your home has older metal pipes, you can use water just below boiling, but hot tap water is always the safer choice.
For odor removal without the fizzing reaction, squeeze the juice of half a lemon into the drain and let it sit for 10 minutes before flushing. Lemon juice neutralizes sulfur-based odors from organic buildup without any risk to pipe materials.
| Natural method | Best use case | Pipe material safe? |
|---|---|---|
| Baking soda and vinegar | Mild buildup, odor control, maintenance | Yes (all types) |
| Hot tap water flush | Grease softening, post-treatment rinse | Yes (all types) |
| Lemon juice | Odor elimination | Yes (all types) |
| Boiling water | Grease clogs in metal pipes only | Metal pipes only |
Pro Tip: Run the baking soda and vinegar treatment once a month as routine maintenance. It keeps slow drains from becoming full blockages and costs less than $1 per treatment.
When should you call a professional plumber?
Stop DIY efforts and call a licensed plumber after two failed attempts using both a plunger and a hand auger. This is the “Rule of Two,” and experts recommend it because continued forcing risks pushing the clog deeper into the main line or cracking an aging pipe.
Watch for these specific warning signs that indicate a main-line blockage rather than a simple fixture clog:
- Multiple drains in your home slow down or back up at the same time
- Sewage odors come from floor drains or sink drains
- Flushing the toilet causes water to bubble up in the bathtub
- Running the washing machine causes the kitchen sink to back up
- A hand auger fails to clear the clog after 15 minutes of effort
When two or more fixtures react to each other, such as a toilet flush causing gurgling in a nearby sink, the blockage is almost certainly in the main sewer line. No hand auger reaches that far. Professional plumbers use power augers and hydro-jetting equipment that clears main-line obstructions without damaging the pipe. Attempting to force a DIY solution past this point risks sewage backup into your home.
Recurring clogs often signal structural problems like pipe corrosion, improper venting, or tree root intrusion. A single clearing does not fix those issues. A professional camera inspection identifies the root cause and prevents the same problem from returning in two months.
For a full breakdown of which plumbing problems you can fix yourself and which require a licensed plumber, the fix-or-call guide from Mdtechservices covers the most common scenarios homeowners face.
Key Takeaways
The most effective drain cleaning approach follows a mechanical-first sequence, starting with a plunger and progressing to a hand auger, before using any natural or chemical treatments.
| Point | Details |
|---|---|
| Mechanical methods come first | Use a plunger, then a hand auger, before trying any natural or chemical treatment. |
| Seal the overflow hole | Covering the overflow opening is required for a plunger to build enough suction to work. |
| Avoid boiling water on PVC | Hot tap water is safe for all pipe types; boiling water warps PVC joints. |
| Natural treatments are maintenance tools | Baking soda and vinegar clear mild buildup but cannot break solid hair or grease clogs. |
| Two failed attempts means call a pro | The Rule of Two protects your pipes and prevents costly sewage backup. |
What I’ve learned from watching homeowners tackle drain clogs
The single most common mistake I see is skipping the overflow seal. A homeowner will plunge for five minutes, feel no progress, and assume the clog is too deep for a plunger. In most cases, the plunger would have worked fine if the overflow hole had been covered. That one step changes the outcome more often than any tool upgrade.
The second mistake is reaching for a chemical cleaner too quickly. Chemicals feel like a fast fix, but they do not dissolve solid hair clogs. They sit on top of the blockage, corrode the pipe walls, and leave you with the same clog plus a pipe that is now weaker. Mechanical methods take more effort, but they actually remove the material rather than just softening it.
Regular maintenance is the habit that prevents most emergency calls. A monthly baking soda and vinegar treatment, combined with a routine plumbing maintenance schedule, keeps drains flowing freely year-round. The homeowners who never have drain emergencies are not lucky. They are consistent.
— MDTECH
Plumbing help from Mdtechservices when DIY is not enough
When a clog resists every method in this guide, Mdtechservices is ready to help. Our licensed technicians serve Orange County and Los Angeles County with fast, reliable plumbing and appliance repair services. We bring professional-grade equipment to jobs that hand tools simply cannot finish.

Whether you need a one-time drain clearing or a full plumbing inspection, Mdtechservices provides honest assessments and lasting solutions. Our team also handles appliance repair and installation, so one call covers multiple home service needs. For homeowners who want a complete picture of what professional repair looks like, the homeowner repair guide from Mdtechservices is a practical starting point. Contact us today to book an appointment online or speak directly with a technician.
FAQ
What is the correct order for step by step drain cleaning?
Start with a plunger, then use a barbed hair tool, then a hand auger, and finally remove and clean the P-trap if the clog persists. Always work from the shallowest point inward.
Can baking soda and vinegar actually unclog a drain?
Baking soda and vinegar clear mild soap scum and organic buildup, but they cannot break apart solid hair or grease clogs. Use them for maintenance or after mechanical cleaning.
Why is my plunger not working?
The most likely cause is an unsealed overflow hole. Cover the overflow opening with a wet rag before plunging, and use a push-pull motion rather than just pushing down.
Is it safe to use boiling water to clear a drain?
Boiling water is safe only for metal pipes. PVC pipes, which are standard in most homes built after 1980, can warp or crack at temperatures above 160°F. Use hot tap water instead.
When should I stop DIY drain cleaning and call a plumber?
Call a licensed plumber after two failed attempts with a plunger and hand auger, or immediately if multiple drains back up at the same time, which signals a main-line blockage.