
TL;DR:
- Water pressure testing measures how forcefully water moves through your home’s plumbing, helping identify system issues. Regular testing prevents costly damage from high or low pressure and ensures appliances operate efficiently. Use a simple gauge on an outdoor hose bib to monitor pressure and seek professional help if readings fall outside the safe range.
Water pressure testing is the process of measuring the force at which water moves through your home’s plumbing, expressed in pounds per square inch (PSI). Knowing your PSI tells you whether your system operates within a safe range, and it is the fastest way to understand why test water pressure matters for protecting your pipes, fixtures, and appliances. A standard residential pressure gauge costs $8–$15 and delivers a reading in under five minutes. That small investment can prevent hundreds of dollars in damage from leaks, burst fittings, or failed appliances.
Why test water pressure at home?
Water pressure testing is the industry term for what most homeowners call a “pressure check.” It gives you a concrete number instead of a vague feeling that something is off. A pressure test converts symptoms into a real diagnosis, which makes it the most reliable first step in any plumbing troubleshooting process. Without that number, you are guessing.
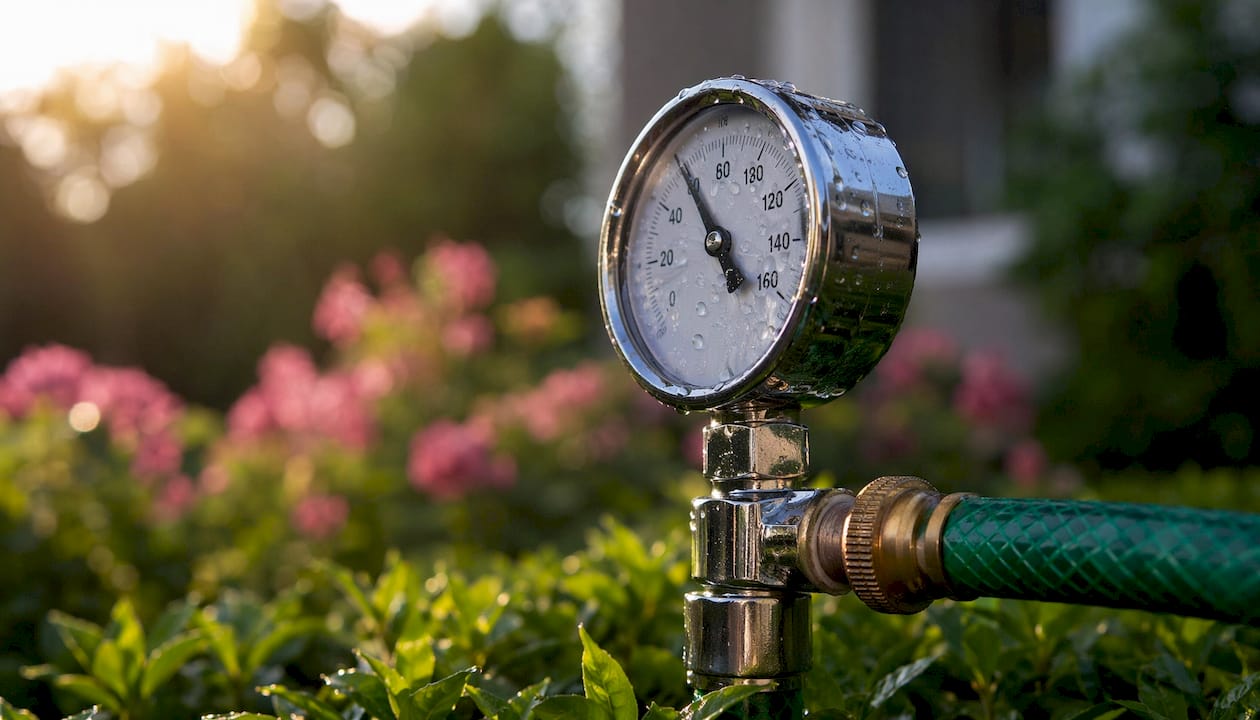
The signs of low water pressure are easy to spot: a weak shower, slow-filling toilets, or a kitchen faucet that barely trickles. High pressure is harder to notice. It works silently, stressing seals, cartridges, and hose connections until something fails. By the time you see a leak or a flooded cabinet, the damage is already done. Regular testing catches both problems before they become expensive repairs.
Testing also gives you a baseline. If your pressure reads 58 PSI today and 72 PSI six months from now, that change tells you something in your system has shifted. A failing pressure reducing valve (PRV), a change in municipal supply pressure, or a partial blockage can all cause pressure drift. You cannot track a change you never measured.
How do you test water pressure at home?
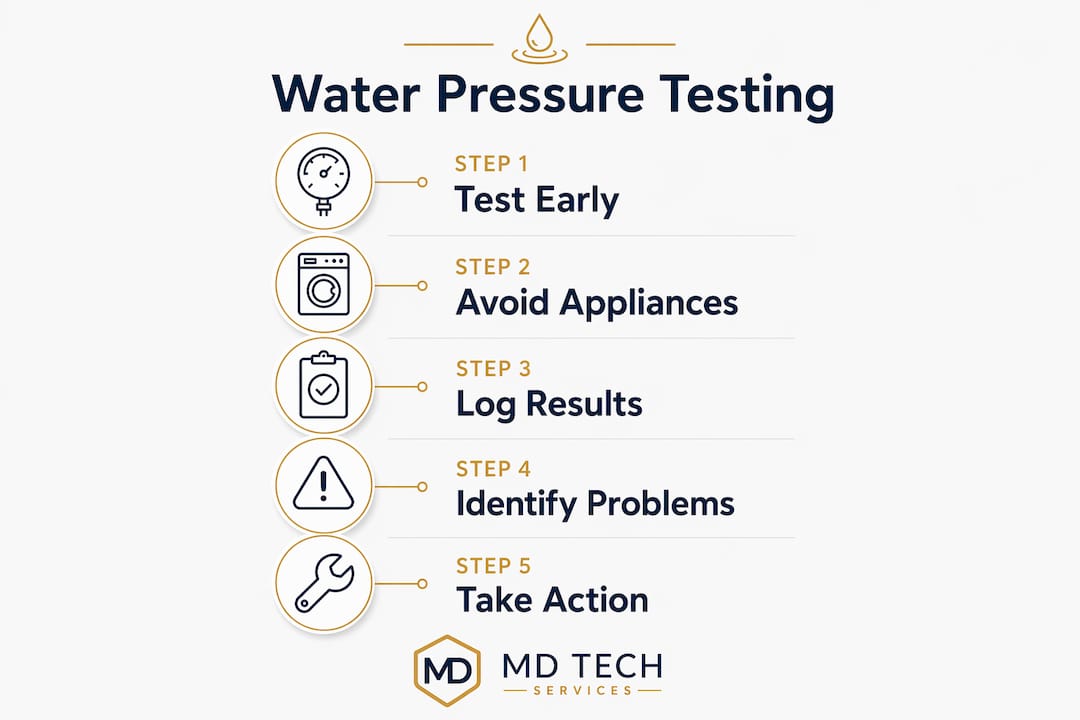
Testing home water pressure takes under five minutes and requires only a standard threaded pressure gauge. Follow these steps for an accurate reading.
- Buy a pressure gauge. A basic dial gauge with a standard 3/4-inch hose thread fits most outdoor hose bibs and costs between $8 and $15 at any hardware store.
- Choose the right location. Test at the outdoor hose bib closest to where the main water supply enters your home. This gives you the most accurate incoming pressure reading for the whole system.
- Turn off all water inside. Shut off every faucet, appliance, and irrigation zone. Running water anywhere in the house lowers the reading and underestimates your actual static pressure.
- Attach the gauge. Thread the gauge onto the hose bib by hand. Hand-tightening with the rubber washer is enough for a good seal. Do not use a wrench. Overtightening damages the hose bib threads and creates a new problem.
- Open the bib fully. Turn the handle all the way on and let the gauge needle settle. Wait about 10 seconds for the reading to stabilize.
- Record the PSI. Write down the number and note the time of day. Pressure from the municipal supply often varies between morning peak hours and late evening.
- Close the bib and remove the gauge. Store the gauge for your next test.
Pro Tip: Test your pressure twice: once in the early morning around 6:00 AM to 8:00 AM when neighborhood demand is highest, and once in the evening. A large difference between the two readings points to supply-side fluctuations that a PRV alone cannot fix.
One common error is testing while a dishwasher or washing machine is running. Even a single appliance pulling water drops the reading by several PSI. Another mistake is testing at an interior fixture. Pressure readings at interior fixtures can be lower than the actual supply pressure because of elevation differences and pipe restrictions. Always use the exterior hose bib for the most reliable result.
What do different water pressure readings mean for your home?
The normal residential water pressure range is 40–80 PSI, with 50–60 PSI considered the ideal operating zone per 2026 residential guidelines. The table below shows what each range means for your plumbing.
| Pressure Range | Status | What It Means |
|---|---|---|
| Below 40 PSI | Low | Weak flow, slow fill times, poor appliance performance |
| 40–49 PSI | Acceptable low | Functional but worth monitoring for further drops |
| 50–60 PSI | Ideal | Safe for fixtures, appliances, and pipe integrity |
| 61–80 PSI | Acceptable high | Within code but approaching stress threshold |
| Above 80 PSI | High / Code violation | IRC 2021 P2903.3.1 requires a PRV at this level |
Pressure below 40 PSI signals a real problem. Your dishwasher may not clean properly, your water heater may short-cycle, and multi-story homes will see almost no flow on upper floors. The cause could be a partially closed shutoff valve, a clogged aerator, or a failing PRV that is now restricting flow instead of reducing it.
Pressure above 80 PSI is a code violation under IRC 2021 P2903.3.1. Sustained high pressure accelerates wear on seals, cartridges, and appliance hoses, causing leaks and failures that homeowners often blame on product defects. A refrigerator ice maker line, a washing machine hose, or a toilet fill valve can all fail years ahead of schedule when pressure runs too high. The damage is real, but the root cause stays hidden until you test.
What are the benefits of regular water pressure testing?
Routine pressure testing is one of the most cost-effective maintenance habits a homeowner can build. Here is what it protects you from.
- Silent high-pressure damage. High water pressure stresses plumbing components without obvious symptoms. Pinhole leaks inside walls, dripping faucets, and appliance failures often trace back to pressure that was never checked.
- PRV failure detection. Pressure reducing valves typically last 5–12 years and can fail open, allowing dangerous pressure to pass through unchecked. A simple gauge test reveals a failed PRV before it causes a burst pipe.
- Appliance protection. Washing machines, dishwashers, refrigerators with ice makers, and water heaters all carry maximum pressure ratings. Keeping your system within the 50–60 PSI sweet spot extends the life of every water-connected appliance in your home.
- Baseline tracking. Recording your pressure every few months lets you spot gradual drift. A slow rise in PSI over time is a reliable early warning sign of a PRV starting to fail.
- Lower repair costs. Catching a pressure problem early costs you a $10 gauge and a phone call. Missing it can mean a flooded kitchen, a mold remediation bill, or a full appliance replacement. Your annual plumbing maintenance checklist should include a pressure test every six months.
Pro Tip: Keep a simple log in a notes app or on paper near your water heater. Write the date, the PSI reading, and any plumbing work done recently. Three or four data points over a year tell a clearer story than any single reading.
What can you do if your water pressure is too high or too low?
Abnormal pressure readings call for specific responses depending on whether you are dealing with a high or low reading. Here is a practical breakdown.
If your pressure is too low (below 40 PSI):
- Check the main shutoff valve at the meter. A partially closed valve is the most common and easiest fix.
- Clean or replace aerators on faucets and showerheads. Mineral buildup restricts flow and mimics low-pressure symptoms.
- Check the PRV. A valve set too low or starting to fail in the closed position will reduce pressure throughout the house.
- Look for a partially closed secondary shutoff valve near the water heater or under a sink.
- If none of these steps restore pressure, contact a licensed plumber. The issue may be a supply-side problem or a pipe restriction that requires professional diagnosis. Reviewing common household plumbing issues can help you decide whether to DIY or call a pro.
If your pressure is too high (above 80 PSI):
- Do not adjust the PRV without a gauge attached. Turning the adjustment screw without reading the result is guesswork and can make the problem worse.
- Attach your pressure gauge, then turn the PRV adjustment screw counterclockwise in small increments. Recheck the gauge after each adjustment until you reach 55–60 PSI.
- If the PRV does not respond to adjustment, or if your home does not have one, call a licensed plumber. Installing or replacing a PRV is not a DIY task.
- Ask your plumber about a thermal expansion tank if your home has a PRV and a water heater. PRVs create a closed system, and without an expansion tank, heating cycles can cause pressure spikes that trigger the temperature and pressure (T&P) relief valve to drip.
- After any adjustment, retest your pressure the following morning to confirm the reading held overnight.
Knowing when to hire a professional plumber saves you from turning a manageable fix into a costly repair. PRV replacement, pipe repairs, and supply-side issues all require licensed work in most jurisdictions.
Key Takeaways
Testing your home water pressure is the single most effective way to protect your plumbing, appliances, and budget from both silent high-pressure damage and the performance problems caused by low pressure.
| Point | Details |
|---|---|
| Normal range is 40–80 PSI | The ideal operating zone is 50–60 PSI; anything above 80 PSI requires a PRV under IRC 2021. |
| Testing takes under 5 minutes | A $8–$15 gauge attached to an outdoor hose bib delivers an accurate static pressure reading. |
| High pressure causes hidden damage | Sustained pressure above 80 PSI accelerates wear on seals, hoses, and appliances without obvious symptoms. |
| PRVs fail silently | Pressure reducing valves last 5–12 years and can fail open, allowing dangerous pressure to persist undetected. |
| Record your readings over time | A pressure log lets you spot gradual drift and catch a failing PRV before it causes serious damage. |
What we see in the field at Mdtechservices
The most common mistake I see homeowners make is waiting for something to break before they check their water pressure. By the time a washing machine hose bursts or a refrigerator ice maker line fails, the pressure has been running high for months or years. The appliance gets blamed. The real cause never gets addressed. Then the replacement appliance fails too, for the same reason.
The second thing I notice is that homeowners are surprised by how simple the test actually is. They expect it to require a plumber, special tools, or shutting off the water to the whole house. A $10 gauge and five minutes at the hose bib is genuinely all it takes for a baseline reading. That number tells you more about your plumbing system’s health than any visual inspection.
My honest advice: test your pressure twice a year, write it down, and compare it to your last reading. If you see a steady climb, do not wait for a failure. A PRV adjustment or replacement is a straightforward repair when caught early. It becomes a much bigger job after a pipe fails inside a wall or an appliance floods your kitchen. Proactive maintenance is always cheaper than reactive repair.
— MDTECH
Mdtechservices can help with your plumbing pressure concerns
If your pressure test reveals a reading outside the safe range, or if you are not comfortable testing on your own, Mdtechservices is ready to help. Our licensed technicians serve homeowners across Orange County and Los Angeles County with thorough plumbing inspections that include water pressure checks, PRV assessment, and full system evaluation.

We identify pressure problems before they cause costly damage to your pipes and appliances. Whether you need a PRV replaced, a pressure baseline established, or a full plumbing safety inspection, our team responds quickly and works with your schedule. You can also review our plumbing checklist for homeowners to see exactly what a professional inspection covers. Call Mdtechservices today to book your appointment and protect your home.
FAQ
What is the normal water pressure for a home?
Normal residential water pressure ranges from 40 to 80 PSI, with 50–60 PSI considered the ideal range. Pressure above 80 PSI requires a pressure reducing valve under IRC 2021 P2903.3.1.
How often should you test your home water pressure?
Test your water pressure at least twice a year, once in spring and once in fall. More frequent testing is worthwhile if your home has an aging PRV or if you notice changes in flow at your fixtures.
Can high water pressure damage appliances?
Yes. Sustained pressure above 80 PSI accelerates wear on appliance hoses, seals, and internal valves, causing premature failures in washing machines, dishwashers, and refrigerators with ice makers.
What causes low water pressure in a house?
Low water pressure is most often caused by a partially closed shutoff valve, clogged aerators, a failing PRV set too low, or a supply-side issue from the municipal line. Start by checking the main shutoff valve before calling a plumber.
Do I need a plumber to test my water pressure?
No. A standard pressure gauge costing $8–$15 attaches to any outdoor hose bib and gives you an accurate reading in under five minutes. You only need a licensed plumber if the reading is abnormal and requires a PRV adjustment, replacement, or other repair.