
A condensate drain is the pipe, pan, and outlet system that removes the water your air conditioner or condensing appliance produces during normal operation. Keeping it clear is one of the simplest things you can do to prevent water damage, mold growth, and unexpected system shutdowns.
Three things to know right now:
- Primary function: The drain collects moisture that drips off your evaporator coil and routes it safely out of your home.
- Main risk if neglected: A blocked drain causes water to overflow into ceilings, walls, or flooring, and creates conditions where mold can grow quickly.
- Most obvious sign to check: Look for standing water in the drip pan under your air handler, or a musty smell near the unit.
Table of Contents
- What is condensate drainage, and what parts make up the system?
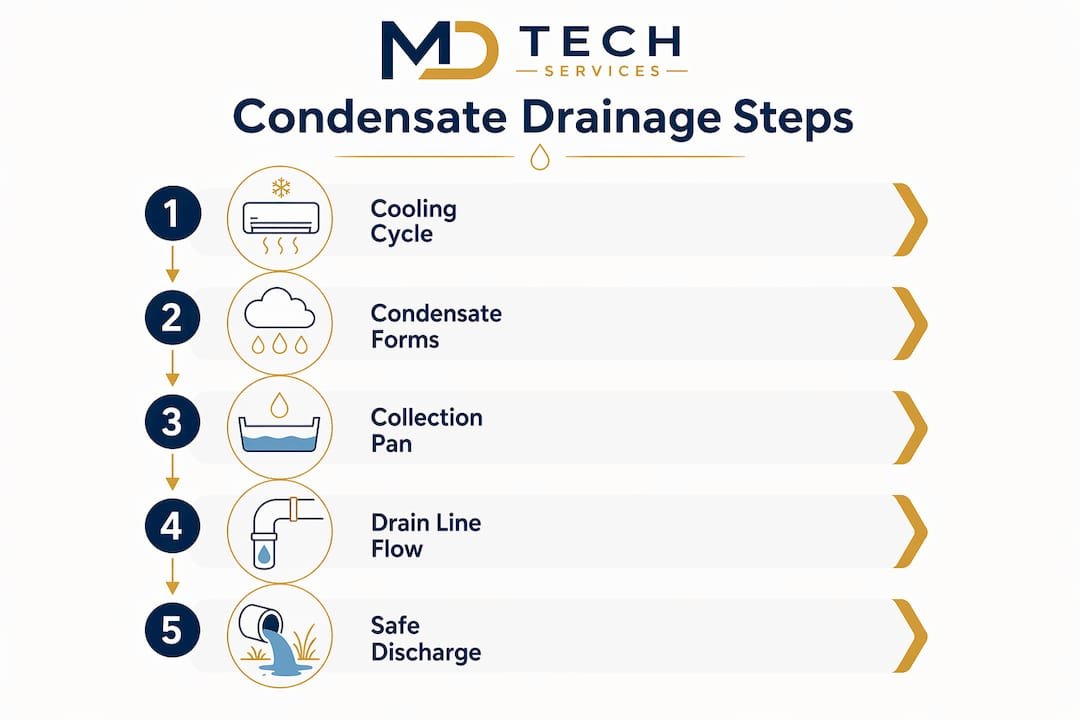
- How does condensate drainage work, step by step?
- Why neglected condensate drainage causes real problems
- What are the warning signs of a condensate drain problem?
- How to inspect and clean your condensate drain yourself
- What does a good condensate drain maintenance schedule look like?
- When should you call a professional for condensate drain issues?
- What do secondary drains and overflow switches actually do?
- Key Takeaways
- The part most homeowners overlook
- Condensate drain service from Mdtechservices
- Useful sources for homeowners
What is condensate drainage, and what parts make up the system?
Your condensate drainage system has several distinct components, and knowing where each one sits helps you spot problems before they become expensive.
Primary drain pan: This shallow pan sits directly beneath the evaporator coil inside your air handler. It catches condensate as it drips off the coil and feeds it into the drain line.
Secondary (auxiliary) pan: When your air handler is installed above finished living space, a second, larger pan sits underneath the entire unit. Its job is to catch water if the primary pan overflows. It typically has its own visible discharge point, often draining outside near a window or eave, so you can see when the primary drain has failed.
Primary drain line: This pipe carries condensate from the primary pan to an approved discharge location. Per the International Mechanical Code Section 307, the inside diameter must be at least 3/4 inch and the pipe must slope a minimum of 1/8 inch for every 12 inches of horizontal run. In practice, 1/4 inch per foot is a safer target.
Secondary drain line: A separate pipe from the secondary pan that discharges to a visible location, alerting you that the primary line is blocked.
Cleanout/T-fitting: A capped access point on the drain line, usually near the air handler, where you pour cleaning solution or attach a vacuum. The IMC requires the line be maintainable without cutting the pipe.
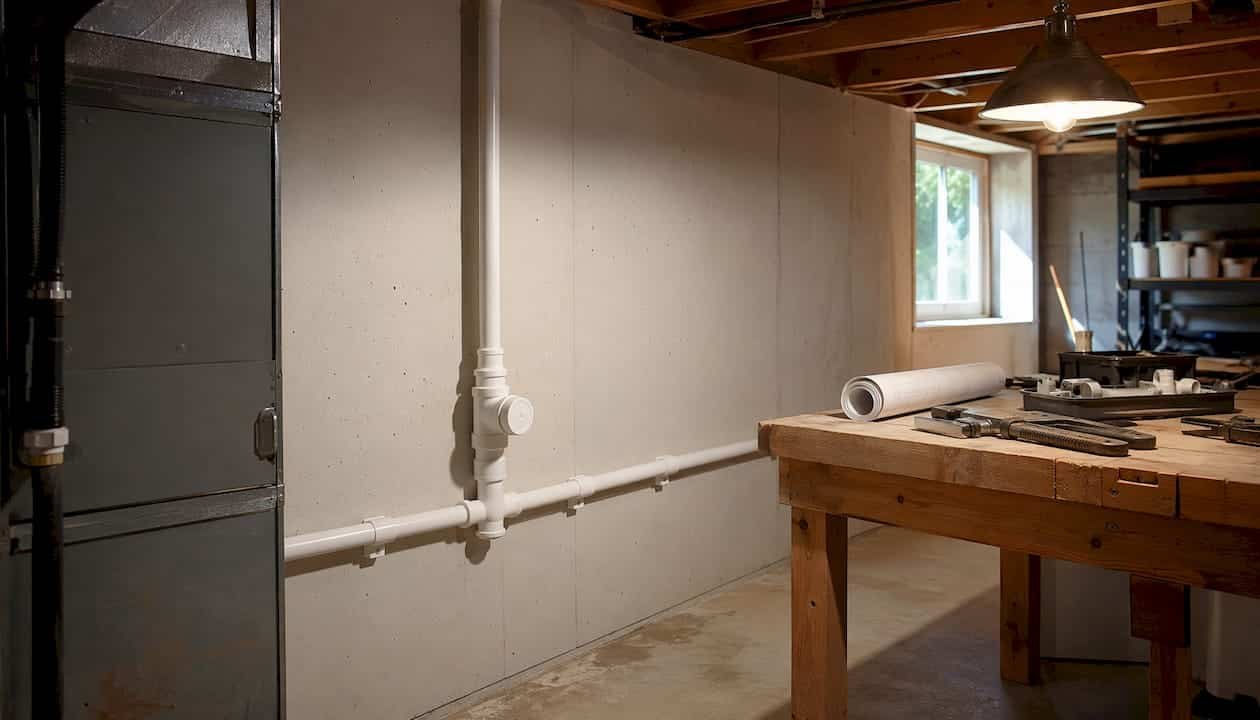
P-trap: A curved section of pipe that holds a small amount of water to block air from being drawn back into the system. Sizing and depth matter, especially in high-static applications where a shallow trap can airlock and stall drainage.
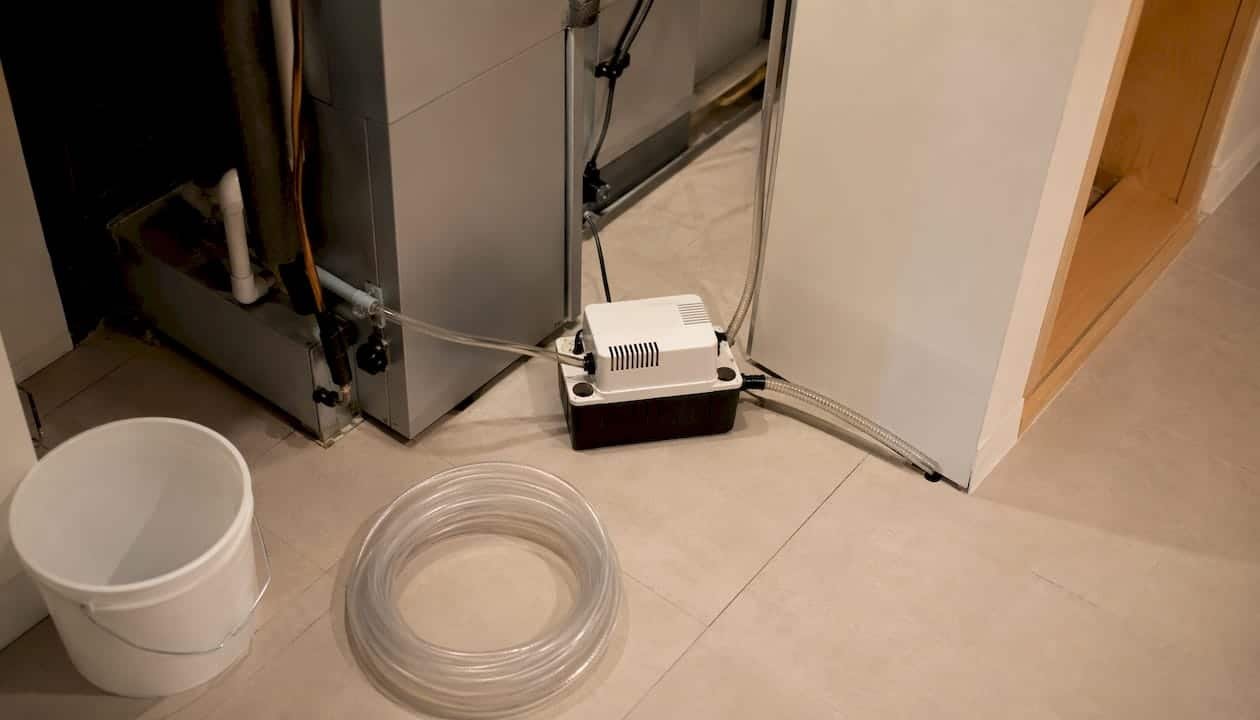
Condensate pump: Used when the air handler sits in a basement or other location where gravity drainage to an exterior point is not possible. The pump collects water in a small reservoir and pumps it up and out.
Most residential drain lines are 3/4-inch PVC or CPVC, both of which resist corrosion. Copper is used in some older installations. Understanding how your condenser coil works gives useful context for why so much moisture accumulates in the first place.
How does condensate drainage work, step by step?
The path water follows is straightforward under normal conditions.
- Condensation forms on the evaporator coil. Warm, humid indoor air passes over the cold coil; moisture in the air condenses and drips downward.
- Water collects in the primary drain pan. The pan holds the water briefly before it flows into the drain line.
- Water travels down the primary drain line. Gravity moves it along the sloped pipe, through the P-trap, and toward the discharge point.
- Water exits at an approved location. Common discharge points include an exterior wall stub, a floor drain, a utility sink, or a condensate pump reservoir. Codes prohibit discharge onto walkways, roofs, or areas where it could cause ponding near a foundation.
- Safety devices monitor the flow. A float or overflow switch sits in the primary drain pan or secondary pan. When water rises above a set level, it cuts power to the system before flooding occurs. A condensate pump, when present, must be interlocked to shut off the equipment if the pump fails.
During the cooling season, this cycle runs continuously. In heating mode, most forced-air systems produce little or no condensate unless you have a high-efficiency condensing furnace, which does generate significant moisture. Heat pumps in defrost mode can also produce brief bursts of drainage from the outdoor unit.
Why neglected condensate drainage causes real problems
A clogged or failing condensate drain is not a minor inconvenience. The consequences scale quickly.
- Water damage: An overflowing pan can saturate ceiling drywall, insulation, and flooring within hours. Repairs to water-damaged ceilings and subfloors typically cost far more than a routine drain cleaning.
- Mold and indoor air quality: Stagnant water in a drain pan or slow-moving drain line creates ideal conditions for algae and mold. Mold spores circulating through your duct system are a genuine public-health concern, not just a cosmetic issue.
- System shutdowns and efficiency loss: When the overflow switch trips, your system shuts off entirely. In peak summer heat, that means no cooling until the drain is cleared.
A typical residential air conditioner produces significant amounts of condensate daily during peak summer operation. That volume creates ideal conditions for algae and biofilm inside slow-flowing horizontal drain runs.
That much water moving through a narrow pipe every day explains why even a partial clog can overflow a pan in a matter of hours. Staying ahead of it with regular HVAC drainage maintenance is the most cost-effective approach.
What are the warning signs of a condensate drain problem?
Most condensate drain issues give you visible or sensory clues before they cause serious damage. Use this checklist during a quick visual inspection.
- Musty or moldy odor near the air handler or from supply vents, indicating algae or mold in the pan or drain line
- Standing water in the drain pan under the air handler, which should normally be dry or nearly dry
- Water stains or dripping on the ceiling below an attic air handler, or on the floor around the unit
- System shutting off unexpectedly on a hot day, often caused by an overflow switch tripping due to a blocked drain
- Gurgling sounds from the drain stub or cleanout fitting, suggesting a partial clog
- Dripping from a secondary discharge point outside the home, which means the primary drain is already blocked and the backup system is active
One important distinction: a small drip from the outdoor condensate stub during active cooling is normal. Water dripping inside the home, from the air handler cabinet, or from a ceiling is not normal and warrants immediate attention. Problems peak during the cooling season when condensate volume is at its highest.
How to inspect and clean your condensate drain yourself
Basic cleaning is well within reach for most homeowners. Here is a safe, step-by-step procedure.
Tools you will need:
- Flathead screwdriver
- Bucket and towels
- Wet/dry shop vacuum
- Distilled white vinegar or a manufacturer-approved HVAC drain cleaner
- Flashlight
Procedure:
- Turn off the system. Set the thermostat to “off” and switch off the breaker for the air handler. Never work near the unit with power on.
- Locate and inspect the drain pan. Open the air handler access panel and shine a flashlight into the pan. If you see standing water, mold, or debris, the drain is restricted.
- Remove visible debris from the pan. Use a towel or small wet/dry vacuum to remove standing water and any sludge.
- Vacuum the outdoor drain stub. Take your shop vacuum to the exterior exit point of the drain line and seal it around the stub. A 60-second vacuum pull at the outdoor stub often suctions out the algae clog directly.
- Flush the cleanout fitting. Remove the cap from the T-fitting or cleanout near the air handler. Pour 1 cup of distilled white vinegar slowly into the opening. Wait 30 minutes.
- Confirm flow. Pour a small amount of water into the cleanout and verify it exits at the outdoor stub or discharge point.
- Reassemble and restore power. Replace the cleanout cap, close the access panel, and turn the breaker back on.
Pro Tip: Flush the drain monthly during the cooling season if you live in a humid climate. Vinegar works well for routine algae prevention, but if clogs keep coming back within a few weeks, the problem is likely a slope issue, a missing or incorrectly sized P-trap, or a shared drain line. Those are structural problems that vinegar cannot fix, and they require a technician to diagnose properly. HVAC-specific non-acid cleaners are also worth considering if you have a septic system.
What does a good condensate drain maintenance schedule look like?
Consistent, simple habits prevent most condensate drain failures. Here is what to do and when.
Preventive actions to keep in mind:
- Change air filters every 1–3 months. Dirty filters shed debris that eventually reaches the drain pan.
- Keep the area around the indoor unit clear of dust and stored items.
- Insulate horizontal sections of the drain line inside the home if you live in a humid climate, to prevent exterior condensation on the pipe itself.
- Verify that a secondary pan and float switch are installed if your air handler sits above finished living space.
| Task | Who Does It | Frequency |
|---|---|---|
| Visual check of drain pan | Homeowner | Monthly (cooling season) |
| Vinegar or cleaner flush | Homeowner | Monthly (cooling season) |
| Air filter replacement | Homeowner | Every 1–3 months |
| Full drain line inspection and clear | Licensed technician | Annually (spring tune-up) |
| Float switch and secondary pan check | Licensed technician | Annually |
| Trap and slope verification | Licensed technician | Every 2–3 years or after any re-piping |
A spring tune-up is the right time to have a pro inspect the full condensate system before peak cooling demand arrives. Scheduling that visit in advance is one of the most reliable ways to avoid an emergency call in July. A step-by-step seasonal maintenance plan can help you stay on track through the year.
When should you call a professional for condensate drain issues?
Some condensate problems are beyond what a shop vacuum and vinegar can resolve. Call a licensed HVAC technician when you see any of the following.
- Clogs that return within a few weeks of cleaning, which typically indicate improper pipe slope or trap depth
- Water in the ceiling, insulation, or walls near the air handler
- A visibly cracked, corroded, or rusted primary drain pan
- A condensate pump that runs continuously, makes unusual noise, or fails to clear the reservoir
- The system shuts off repeatedly and resetting the breaker does not resolve it
- Any situation where you are unsure whether the secondary pan or float switch is functioning
A licensed technician will typically perform a full drain-line flush, use a camera if the blockage is deep, correct trap depth or pipe slope, replace a failed condensate pump, install or replace a secondary pan and float switch, and repair connections to the approved discharge point. Most diagnostic visits and minor repairs take 1–3 hours. Re-piping a drain line or replacing a secondary pan can take longer depending on access. For recurring or damaging problems, the cost of a professional visit is almost always less than the cost of water-damage remediation.
Verifying that your technician holds a current state license is straightforward through the ACCA contractor locator. California requires HVAC contractors to hold a C-20 license through the Contractors State License Board.
What do secondary drains and overflow switches actually do?
These two components are your last line of defense when the primary drain fails, and understanding them helps you know what to look for.
The secondary (auxiliary) pan sits beneath the entire air handler and collects any water that overflows the primary pan. It has its own drain line that terminates at a visible location, often outside a window or near an eave. If you ever see water dripping from that secondary discharge point, the primary drain is already blocked. That drip is a warning, not a normal event.
The float or overflow switch is a small sensor placed in the primary drain pan or secondary pan. When water rises to a set level, it cuts power to the system. Per code requirements, all HVAC equipment that produces condensate must have either a secondary drain line, a secondary pan with its own drain, an overflow switch, or a combination of these. The switch prevents flooding but also means your system will not run until the drain is cleared.
To check these features yourself, locate the secondary discharge point outside your home and confirm it is unobstructed. If you are not sure whether your system has a float switch installed, a licensed technician can verify it during a routine inspection.
Key Takeaways
A properly maintained condensate drainage system prevents water damage, mold, and system shutdowns. Monthly flushing during the cooling season and an annual professional inspection are the two most effective actions a homeowner can take.
| Point | Details |
|---|---|
| Identify your drain components | Locate the drain pan, outdoor stub, and cleanout fitting before a problem occurs. |
| Monthly flushing prevents most clogs | Flush with 1 cup of distilled white vinegar monthly during the cooling season. |
| 5–20 gallons per day in summer | That daily volume explains why even a partial clog can overflow a pan within hours. |
| Call a pro for recurring clogs | Clogs that return quickly usually mean a slope, trap, or shared-drain issue a technician must fix. |
| Mdtechservices handles it locally | Licensed technicians in Orange County and Los Angeles County diagnose and repair condensate drain issues, including pump replacement, re-piping, and float switch installation. |
The part most homeowners overlook
Most condensate drain advice focuses on the clog itself. Clear it, flush it, done. What that advice misses is that a clog is usually a symptom, not the root cause.
The real issue, in a large share of recurring cases, is that the drain was never installed correctly in the first place. The slope is off by a fraction of an inch. The P-trap is too shallow for the system’s static pressure. The drain ties into a shared line that backs up when another appliance runs. None of those problems respond to vinegar. They require someone to actually look at the pipe, measure the slope, and correct the installation.
The other thing worth saying plainly: a dirty condensate pan is a health issue, not just a maintenance item. Algae and mold growing in stagnant water inside your air handler can circulate through every room in your home. Treating it as a low-priority task until something leaks is the wrong frame. Monthly flushing during the cooling season costs almost nothing and takes five minutes. Mold remediation after a ceiling collapse costs considerably more.
Condensate drain service from Mdtechservices
When a condensate drain issue goes beyond a quick flush, Mdtechservices provides licensed, responsive service across Orange County and Los Angeles County. Our technicians handle the full range of condensate-related repairs: drain line clearing and re-piping, condensate pump replacement, secondary pan and float switch installation, slope correction, and trap replacement.

Booking is straightforward through our online scheduler, and we offer same-day or next-business-day appointments where available. Minor maintenance is genuinely DIY-safe, but recurring clogs, water in your ceiling, or a failed pump are situations where a licensed technician pays for the visit quickly. For a full picture of what professional HVAC repair covers, or to schedule an inspection, visit our service page and book directly.
Useful sources for homeowners
These are the most reliable references for verifying condensate drain codes, best practices, and professional standards.
- ICC IMC Section 307: The model code governing condensate disposal, pipe sizing, slope, traps, and overflow protection. Use this to verify what your local code is likely based on.
- HVAC School condensate drain guide: Detailed best-practices article written for technicians but accessible to homeowners; covers traps, venting, and common installation errors.
- InspectApedia condensate drains: Practical reference for code requirements, inspection tips, and overflow protection; useful for homeowners and inspectors alike.
- American Society of Home Inspectors: Plain-language overview of condensate systems from a home-inspection perspective.
- ACCA HVAC contractor locator: Find and verify licensed HVAC contractors in your area.
- Manufacturer installation manuals: Always the first reference for trap sizing, pump interlock requirements, and discharge specifications specific to your equipment model.