Lint buildup inside dryer vents is a leading cause of home fires across American neighborhoods, with thousands reported every year. For homeowners in Orange and Los Angeles County, regular vent cleaning does more than comply with safety recommendations. It helps safeguard families and keeps appliances running efficiently. Discover practical steps for gathering the right supplies and maintaining your dryer, boosting safety and lowering utility costs in your Southern California home.
Table of Contents
- Step 1: Gather Essential Cleaning Supplies
- Step 2: Disconnect and Access The Dryer Vent
- Step 3: Remove Lint And Debris Thoroughly
- Step 4: Clean Vent Cover And Ducts
- Step 5: Reassemble And Test Dryer Performance
Quick Summary
| Key Takeaway | Explanation |
|---|---|
| 1. Gather essential cleaning tools | Collect gloves, vacuum, brushes, and screwdrivers for efficient and safe cleaning. Ensure you have all necessary items before starting to avoid interruptions. |
| 2. Disconnect the dryer safely | Unplug the dryer and turn off the gas or power supply before accessing the vent. This prevents electrical or gas accidents during cleaning. |
| 3. Thoroughly remove lint and debris | Use specific brushes and vacuum attachments to dislodge and remove lint from the entire vent system, reducing fire hazards and improving performance. |
| 4. Clean the vent cover and ducts | Regularly clear debris from the exterior vent cover and inspect duct for damage or blockages. Proper airflow prevents lint buildup and enhances dryer safety. |
| 5. Test the dryer after reassembly | After cleaning, reattach all components securely and conduct a test run. Monitor performance for efficiency and safety, ensuring no unusual behaviors occur. |
Step 1: Gather essential cleaning supplies
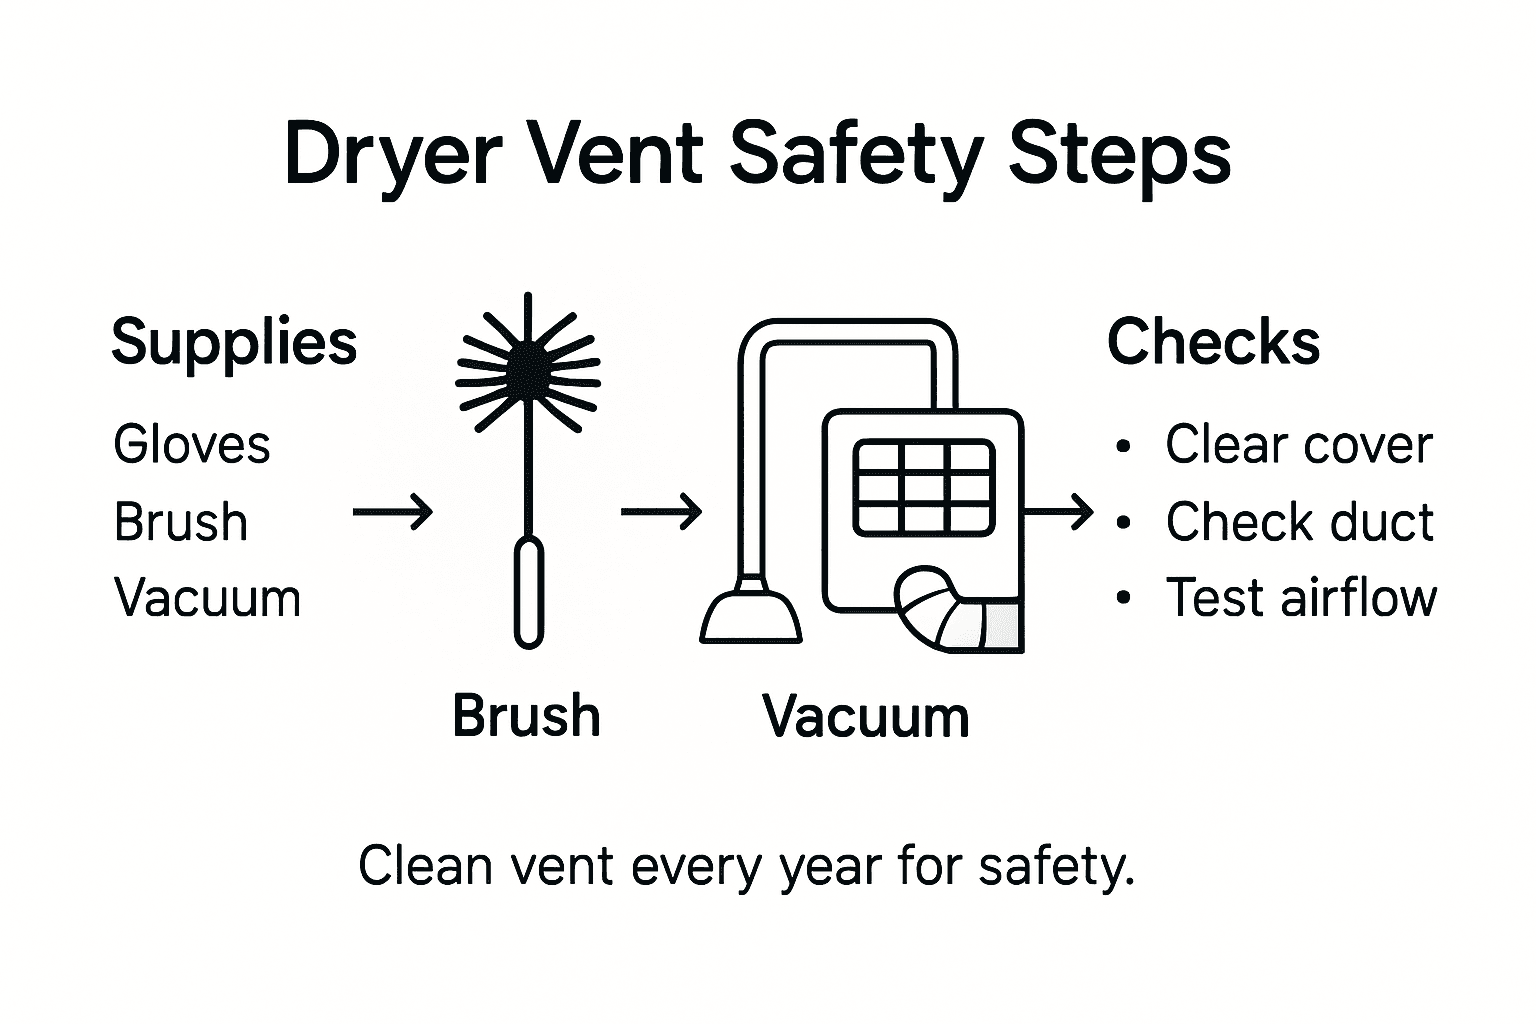
Before diving into your dryer vent cleaning project, you will need to collect specific tools and safety equipment to ensure a thorough and safe cleaning process. The National Fire Protection Association recommends having certain key supplies that will help you effectively remove lint and reduce potential fire hazards in your home.
Your essential cleaning kit should include a set of protective work gloves to shield your hands from sharp metal edges, a vacuum cleaner with narrow attachment tools for lint removal, a specialized dryer vent cleaning brush kit with long flexible rods that can reach deep inside duct systems, and a few basic screwdrivers for disconnecting vent components. According to InterNACHI’s safety guidelines, consider adding a rigid metal duct cleaning brush for more stubborn lint buildup and potentially a power rotary brush for particularly challenging vent configurations.
Gather these supplies before starting to ensure you can complete the cleaning process efficiently and safely. Having everything prepared will make the task smoother and help you maintain your dryer’s performance and reduce potential fire risks.
Pro tip: Store your dryer vent cleaning tools together in a dedicated storage container or toolbox to keep them clean and easily accessible for future maintenance sessions.
Here’s a quick reference for the main cleaning supplies and their purposes:
| Cleaning Supply | Primary Use | Safety Benefit |
|---|---|---|
| Protective work gloves | Handling sharp vents and dirty components | Prevents cuts and scrapes |
| Vacuum with narrow attachment | Removing loose lint from vent and duct | Reduces airborne dust |
| Dryer vent cleaning brush kit | Reaching deep into duct systems | Dislodges stubborn lint |
| Rigid metal duct cleaning brush | Cleaning tough buildup in metal ducts | Increases cleaning efficiency |
| Power rotary brush | Cleaning long or complex vent routes | Speeds up deep cleaning |
| Screwdriver set | Detaching vent connections and covers | Ensures safe access |
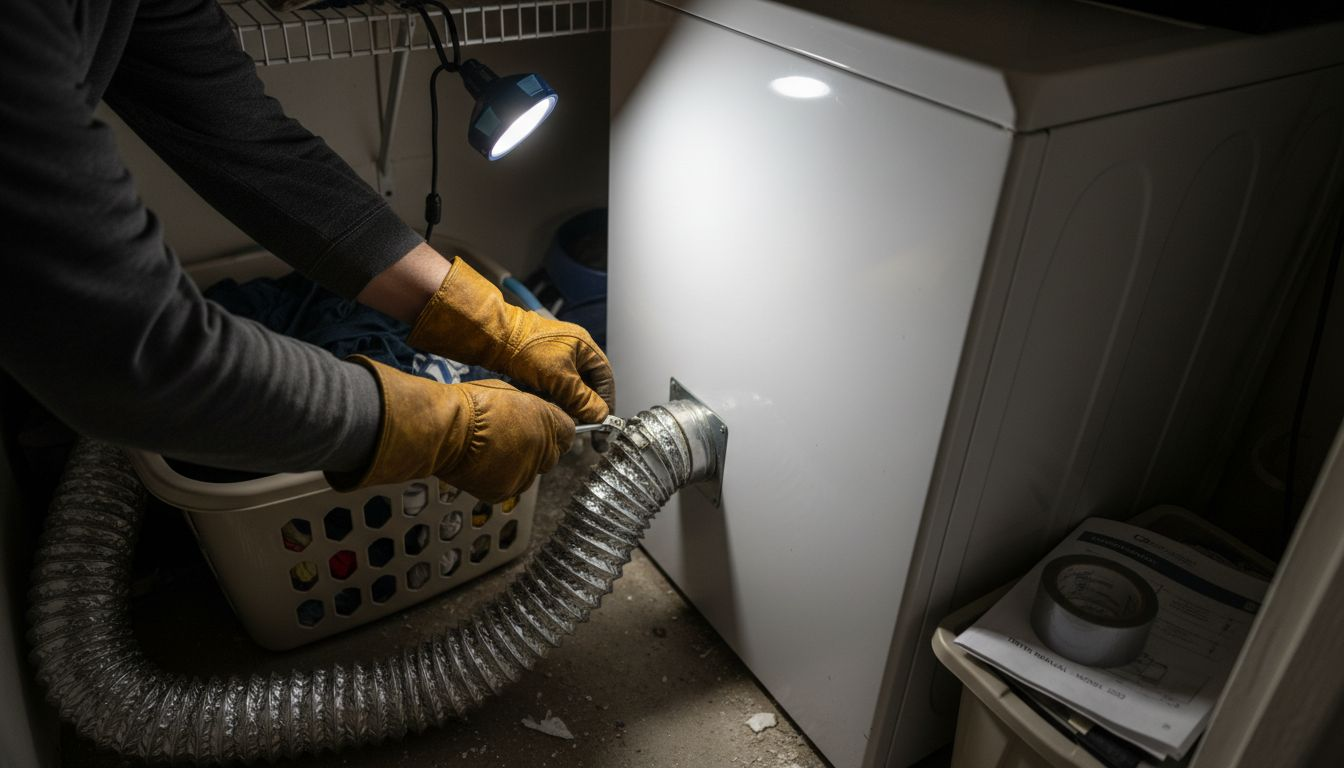
Step 2: Disconnect and access the dryer vent
Before you begin cleaning your dryer vent, you must safely disconnect and access the vent system. According to InterNACHI’s safety guidelines, the first critical step is to unplug the dryer and shut off the gas or power supply to prevent any potential electrical or gas-related accidents. This precaution ensures your personal safety while working with the appliance and its connected components.
Once the power is off, locate the vent connection at the back of the dryer. Carefully loosen the clamp securing the vent to the dryer exhaust and gently pull the vent away from the appliance. The National Fire Protection Association emphasizes the importance of using rigid metal ducts instead of flexible plastic ones, which can pose significant safety risks. Inspect the connection points to ensure they are clean and intact, which helps prevent air leaks and potential lint accumulation that could lead to fire hazards.
By methodically disconnecting and accessing the vent, you are setting the stage for a thorough and safe cleaning process that will improve your dryer’s efficiency and reduce potential risks to your home.
Pro tip: Take a photo of the vent connection before disconnecting to help you reassemble everything correctly when you finish cleaning.
Step 3: Remove lint and debris thoroughly
Consumer Reports highlights the critical importance of thoroughly removing lint and debris from your dryer vent system to prevent potential fire hazards. This step requires careful attention and the right tools to ensure complete cleaning and optimal dryer performance. You will be systematically clearing out accumulated lint that can restrict airflow and create dangerous conditions.
According to InterNACHI’s safety recommendations, start by using a rigid metal vent brush to meticulously clean inside the ductwork. Insert the brush deep into the vent, rotating and pushing it through the entire length to dislodge trapped lint and debris. Follow this by using a powerful vacuum with narrow attachments to suction out the loosened particles. Be thorough and methodical, working from both the interior dryer connection and the exterior vent opening to ensure you remove lint from every section of the ductwork.
Pay special attention to hard-to-reach areas and corners where lint tends to accumulate. Check the entire vent path for any signs of blockage or excessive lint buildup that could potentially restrict airflow and create fire risks. Your goal is to restore complete ventilation efficiency and eliminate any potential hazards.
Pro tip: Wear a dust mask and safety glasses during the cleaning process to protect yourself from airborne lint particles and debris.
Step 4: Clean vent cover and ducts
The National Fire Protection Association recommends thorough cleaning of the exterior vent cover to maintain optimal dryer performance and prevent potential safety hazards. Your goal in this step is to carefully remove debris from the vent cover and ensure unobstructed airflow through the entire duct system. Proper maintenance of this critical component helps prevent lint buildup and reduces the risk of dryer fires.
InterNACHI guidelines emphasize the importance of maintaining a clean and functional vent system, starting with the exterior cover. Begin by removing the vent cover carefully, checking that its flap or damper moves freely. Clean away any accumulated dirt, leaves, or debris that might block the opening. Use a soft brush or cloth to wipe down the cover, ensuring no obstructions prevent the damper from opening and closing properly. Pay special attention to the edges and corners where debris tends to collect.
Carefully inspect the duct for any signs of damage, moisture accumulation, or irregular bends that could trap lint. Your thorough cleaning should include checking the entire path of the ductwork, ensuring it maintains a smooth, unobstructed route from the dryer to the exterior of your home. Remove any accumulated lint or debris using your cleaning tools from previous steps, working methodically to clear out every section of the vent.
Pro tip: Test the vent cover after cleaning by running the dryer and checking that exhaust air flows freely and the cover opens and closes smoothly.
Step 5: Reassemble and test dryer performance
Consumer Reports provides critical guidance for safely reassembling and testing your dryer after cleaning, ensuring that all components are securely reconnected and functioning optimally. This final step is crucial for verifying that your maintenance work has improved the dryer’s overall performance and safety.
The National Fire Protection Association recommends a methodical approach to reassembly, beginning with carefully reattaching the vent hose to both the dryer and exterior vent cover. Ensure all clamps are tightened securely, with no gaps or loose connections that could allow lint escape or create potential fire hazards. Double check that the vent cover’s flap moves freely and the connection is smooth and unobstructed.
Proceed with a test run by turning on the dryer and monitoring its performance closely. Pay attention to drying time, heat distribution, and airflow. A properly cleaned and reassembled dryer should dry clothes more quickly and efficiently, with no unusual heat buildup or unexpected shutdowns. Listen for any unusual sounds and watch for consistent, steady operation that indicates a successful cleaning and reassembly process.
Here’s a summary of how proper dryer vent cleaning impacts safety and efficiency:
| Aspect | Result of Proper Cleaning | Risk if Neglected |
|---|---|---|
| Fire Safety | Reduces chance of lint-related fires | Higher fire risk |
| Drying Speed | Faster and more even drying | Extended drying times |
| Air Quality | Less lint and dust released indoors | More indoor dust buildup |
| Energy Use | Lower energy consumption | Higher utility bills |
Pro tip: Keep a log of your dryer maintenance dates and observations to track performance improvements and plan future cleaning schedules.
Protect Your Home with Expert Dryer Vent Services from MDTech Services
A clogged or poorly maintained dryer vent poses serious risks including fire hazards, inefficient drying, and higher energy bills. The comprehensive Dryer Vent Cleaning Guide for Safe and Efficient Homes highlights the importance of thorough lint removal, safe disconnection, and duct maintenance to keep your dryer running safely and smoothly. If tackling these steps feels overwhelming or you want to ensure your home’s safety with professional precision, MDTech Services is here to help.
Our licensed technicians bring trusted expertise in appliance repair and maintenance right to your doorstep in Orange County and Los Angeles County. We prioritize your family’s safety by offering thorough dryer vent cleaning, HVAC repair, and appliance installation services that restore efficiency and peace of mind.

Don’t wait for hazards to build up. Schedule your professional dryer vent cleaning or appliance service today by visiting MDTech Services. With our reliable, safety-focused approach and easy online booking, you can protect your home while enjoying faster drying times and lower energy use. Act now and make your home safer and more efficient with MDTech’s expert care.
Frequently Asked Questions
What supplies do I need for dryer vent cleaning?
You will need protective work gloves, a vacuum cleaner with narrow attachments, a dryer vent cleaning brush kit, a rigid metal duct cleaning brush, a power rotary brush, and a screwdriver set. Gather these tools before starting to ensure a thorough and safe cleaning process.
How do I safely disconnect my dryer vent?
To disconnect your dryer vent, first unplug the dryer and shut off the gas or power supply. Then, carefully loosen the clamp securing the vent to the dryer exhaust and gently pull the vent away from the appliance.
What steps should I follow to clean the lint from my dryer vent?
Start by using a rigid metal vent brush to clean inside the ductwork thoroughly. After loosening the lint, use a vacuum with narrow attachments to suction out the debris, ensuring you check both the interior connection and the exterior vent opening for a complete clean.
How do I clean the exterior vent cover and ducts?
Remove the vent cover and clean away any dirt or debris blocking the opening. Afterward, inspect the duct for signs of damage or moisture and clear any lint from the entire duct path to ensure smooth airflow.
How can I test my dryer’s performance after cleaning?
After reassembling the dryer, turn it on and monitor its performance. Look for any unusual sounds, drying times, or heating issues to confirm that your cleaning has improved its efficiency and safety.
When should I clean my dryer vent?
Aim to clean your dryer vent at least once a year or more frequently if you notice longer drying times or if your dryer feels hotter than usual during operation. Regular maintenance helps reduce fire risks and improves drying efficiency.
Recommended
- Dryer Installation Steps for Safe and Easy Setup – MDTech Services
- Hood repair installation service Vent Blower Duct repair installation service.Transforming Kitchens: Hood Repair and Installation for a Better Cooking Experience – MDTech Services
- Refrigerator repair Condenser Coil cleaning. The Ultimate Guide to Refrigerator Repair: How to Properly Clean the Condenser Coil – MDTech Services
- Hood repair Cooktop repair Vent repair Blower repair or Installation – MDTech Services
- Maintenance Guide – Timber Windows & Wooden Doors – ATW